
iPhone 13 Parts


- Your Definitive Guide to iPhone 13 Spare Parts and Components at iLevante.com 📱✨
- Getting to Know the iPhone 13: Key Features
- Screens for iPhone 13: Types and When to Replace Them 🖼️
- When Do You Need a New Screen for Your iPhone 13?
- Types of Replacement Screens for iPhone 13:
- Basic Guide to Changing the iPhone 13 Screen (General Outline) 🛠️
- iPhone 13 Battery: Keep the Power Going All Day 🔋
- iPhone 13 Battery Specifications
- When to Change the Battery? Warning Signs 📉
- OEM Batteries without Logo: Original Quality? 🤔
- Basic Steps to Change the iPhone 13 Battery (General Outline) 🛠️
- Back Covers for iPhone 13: Renew Your Mobile's Look 🎨
- Available Colours and Material
- Replacement Process: A Technical Challenge 🔩
- Top 5 Most Sought-After Spares for iPhone 13 and How They Solve Common Problems 🛠️
- Table of Key iPhone 13 Spares and Problems They Solve
- 1. Charging Port (Lightning) for iPhone 13 ⚡
- 2. Front Camera with IR (TrueDepth) for iPhone 13 🤳
- 3. Rear Camera (Main) for iPhone 13 📸
- 4. Glass Back Cover for iPhone 13 (Review detailed section above) 🌈
- 5. Speakers (Earpiece and Main/Bottom) for iPhone 13 🔊
- Other Essential Spares for Your iPhone 13 🧩
- Common Hardware Failures in iPhone 13: Identify the Problem 🔍
- Technical Perspective: When Software Mimics Hardware Failures ⚠️
- Basic Software Diagnostic Tips (Before Blaming Hardware):
- Basic Repair Guide: Get Hands-On with Caution! 👨🔧👩🔧
- Essential Tools for Repairing Your iPhone 13
- General Precautions Before and During Repair
Your Definitive Guide to iPhone 13 Spare Parts and Components at iLevante.com 📱✨
Welcome to iLevante.com, your trusted destination for all
Getting to Know the iPhone 13: Key Features
Before we dive into the world of spare parts, let's briefly recall what makes the iPhone 13 special. Launched in September 2021, this model continued the flat-edged design line introduced by the iPhone 12, but with significant improvements [1]:
- Screen: 6.1-inch Super Retina XDR OLED display, with a resolution of 2532 x 1170 pixels, offering vibrant colours and deep blacks. It incorporates Ceramic Shield on the front, more resistant than the glass of any previous smartphone.[1]
- Chip: Powerful A15 Bionic, with a 6-core CPU (2 performance and 4 efficiency cores) and a 4-core GPU, plus a 16-core Neural Engine for exceptional performance in apps and games.[1]
- Cameras: Advanced dual 12MP camera system (wide and ultra-wide) with improvements in low-light photography, sensor-shift optical image stabilisation on the main camera, and the popular Cinematic Mode for video recording with depth of field.[1]
- Battery: Offers longer life compared to its predecessor, allowing more hours of video and audio playback.[1]
- Construction: Aerospace-grade aluminium design and glass back, compatible with MagSafe wireless charging.[1]
- Resistance: IP68 rating for water and dust resistance.[1]
These features, though impressive, do not make the iPhone 13 immune to accidents or natural wear and tear. That's why, at iLevante.com, we offer you
Screens for iPhone 13: Types and When to Replace Them 🖼️
The screen is one of the most vital components and, unfortunately, one of the most prone to damage. A fall, a knock, or even pressure can cause anything from small cracks to a completely unusable screen.[2, 3] If you're facing a
When Do You Need a New Screen for Your iPhone 13?
- Cracked or broken glass.[2, 3]
- Dead pixels or strange coloured spots.[3, 4]
- Vertical or horizontal lines on the screen.[3, 4]
- Completely black screen but the phone still rings or vibrates.[3, 4]
- The touch screen doesn't respond or does so erratically (ghost touches).[3, 4]
- Brightness problems, such as flickering or very low brightness even at maximum.[5]
Types of Replacement Screens for iPhone 13:
At iLevante.com, we understand that every customer has different needs and budgets. That's why we offer various qualities of
- Original Screens (or Service Pack): These are screens manufactured directly by Apple or its authorised suppliers. They offer the same image quality, brightness, colours, and touch response as the screen that came with your iPhone 13 from the factory.[6] They are the ideal option for those seeking maximum quality and fidelity. However, it's important to know that Apple does not sell original parts directly to unauthorised third parties for repairs. The "original" ones found are usually recovered from other iPhones (refurbished/pulled) or through very specific channels.
- Refurbished OLED Screens (or Pulled): These screens are original Apple OLED panels that have been removed from other iPhones (e.g., from returned devices or those with other non-screen related faults) and may have had the outer glass replaced if it was damaged, while retaining the original OLED panel.[6, 7] They offer image and touch quality identical to the original, making them an excellent alternative in terms of quality-price ratio.
-
Aftermarket OLED Screens (Soft and Hard):
- Soft OLED: These screens use a flexible OLED substrate, similar to that of original Apple screens. This allows them to be thinner, offer better viewing angles, more accurate colours, and generally a visual experience closer to the original.[6, 8] They also tend to be more durable against minor impacts compared to Hard OLEDs.
- Hard OLED: These use a rigid OLED substrate. They are a more economical alternative to Soft OLEDs and originals, but can be slightly thicker and more fragile.[6, 8] Colour quality and viewing angles may be slightly inferior to Soft OLEDs, but they are still a significant improvement over LCDs.
Both Soft and Hard Aftermarket OLEDs are good options if you're looking for image quality superior to LCDs without the cost of an original or high-end refurbished one.[8, 9]
-
Incell LCD Screens: Incell technology integrates the touch layer directly into the LCD panel, making them thinner than traditional LCDs.[4, 10] For the iPhone 13, which originally uses OLED, an Incell LCD screen will represent a drop in image quality: blacks will not be as deep, contrast will be lower, and colours may be less vibrant.[9, 11] However, they are an
economical option for repairing an iPhone 13 screen and offer adequate touch functionality.[4, 12] They are a viable alternative if budget is the main concern. - TFT LCD Screens: These are the most basic and economical type of LCD screen. They use thin-film transistor technology.[10, 13] Compared to the original OLED screen of the iPhone 13, TFTs will have noticeably lower image quality, with less brightness, contrast, more limited viewing angles, and higher power consumption.[14, 13, 15] Although compatible, they are considered a last-resort option for very tight budgets.
Important note on Face ID and True Tone: When replacing the iPhone 13 screen, it is crucial to correctly transfer the front sensor assembly (which includes Face ID components like the dot projector and infrared camera) from the original screen to the new one.[16, 17, 18, 19, 20, 21, 22] If this assembly is damaged or not transferred, Face ID will stop working. Furthermore, the True Tone function (which automatically adjusts the screen's white balance according to ambient light) may be lost if the new screen is not programmed with the data from the original screen.[16, 20, 23, 24, 25, 6, 26] Some high-quality screens or the use of specific programmers may allow True Tone to be restored.
"Unknown Part" Message: Apple has implemented a system whereby if the screen is replaced (even with another original Apple screen, if not done by an authorised service that "calibrates" the part), a message may appear in Settings indicating "Unknown Part" or "Important Display Message".[27, 28, 29, 30, 31, 6, 32, 33] This generally does not affect the touch or visual functionality of the screen, but it is a system notification.
Basic Guide to Changing the iPhone 13 Screen (General Outline) 🛠️
Changing the screen of an iPhone 13 is a delicate task that requires patience and the right tools. Warning: If you have no prior experience, consider seeking professional help. Mishandling can damage other components.
- Tools Needed: Precision screwdriver kit (Pentalobe P2, Phillips #000, Y-Type Y000), suction cup, opening picks (spudgers), heat gun or hairdryer, tweezers, and new screen adhesive.[16]
- Power Off and Discharge: Completely turn off your iPhone. It's advisable for the battery to be below 25% to minimise risks in case of accidental puncture.[16, 34]
- Remove Bottom Screws: Using the Pentalobe screwdriver, remove the two screws located on either side of the Lightning port.[16]
- Heat Edges: Use the heat gun (at low temperature) or a hairdryer to gently heat the edges of the screen. This will soften the adhesive that seals it.[16]
- Lift the Screen: Place a suction cup near the bottom edge of the screen and gently pull upwards to create a small opening. Insert a thin plastic pick into the opening and carefully slide it along the edges to cut the adhesive. The iPhone 13 opens to the left, like a book. Do not open it completely yet, as there are flex cables connected.[16]
- Internal Disconnections: Once open, you'll see metal shields covering the connectors. Remove the screws (organise them well!) and the shields. Disconnect the battery connector first. Then, disconnect the screen flex cables and the front sensor assembly cable (which includes the earpiece, TrueDepth camera, etc.).[16]
- Transfer Sensors (CRUCIAL!): Very carefully, remove the front sensor assembly (earpiece, TrueDepth camera, proximity/ambient light sensor) from your original screen and transfer it to the new screen. This assembly is usually fixed with small screws and sometimes adhesive. This step is vital for Face ID to continue working.[16, 17, 20, 21]
- (Optional) Programming for True Tone: If you wish to retain True Tone and your new screen requires it, this is the time to use a programmer to read the data from the original screen and write it to the new one.[16, 20, 23, 24, 25]
- Connect New Screen: Connect the flex cables of the new screen and the sensor assembly to the logic board. Then, reconnect the battery.
- Preliminary Test: Before sealing the phone, turn it on and test the new screen: touch, image, brightness, Face ID, and True Tone (if programmed).[16]
- Sealing: If everything works, turn off the iPhone. Clean off any old adhesive residue from the frame and apply the new screen adhesive.[16]
- Closing: Carefully close the screen, ensuring it fits snugly along all edges. Replace the bottom Pentalobe screws.[16]
Remember: This is a basic guide. We recommend searching for detailed video tutorials specific to the iPhone 13 before you begin. Patience and organisation are key.
iPhone 13 Battery: Keep the Power Going All Day 🔋
The battery is the energy heart of your iPhone 13, and over time, like all rechargeable batteries, its performance can decline. Knowing when it's time for a change and what your options are is crucial for keeping your device running optimally.
iPhone 13 Battery Specifications
The original iPhone 13 battery is an engineering feat designed to offer a good balance between size and autonomy:
- Apple Battery Model: A2655 (according to sources like iFixit).[35]
- Nominal Capacity: 3227 mAh (milliampere-hours).[35, 36]
- Voltage: Approximately 3.84V - 3.87V.[35, 36]
- Chemistry Type: Integrated rechargeable lithium-ion.[1, 37]
- Estimated Duration by Apple (with new battery): [1]
- Video playback: Up to 19 hours.
- Video playback (streaming): Up to 15 hours.
- Audio playback: Up to 75 hours.
When to Change the Battery? Warning Signs 📉
Your iPhone 13 will give you signs when its battery is nearing the end of its useful life. Pay attention to these indicators:
- Reduced Duration: The most common sign. If you notice you have to charge your iPhone much more often than before with similar usage.[38, 2, 39, 3, 40]
- Unexpected Shutdowns: The phone suddenly turns off, even when the battery indicator shows a remaining percentage (e.g., 20-30%).[38, 2, 39, 3, 40]
- Slow Performance: iOS may reduce the processor's maximum performance to prevent shutdowns on iPhones with very degraded batteries. You may notice apps take longer to open or the system generally feels slower.[38, 2, 39, 40]
- Low Battery Health: In Settings > Battery > Battery Health, if the "Maximum Capacity" is below 80%, Apple considers the battery significantly degraded and recommends replacement.[38, 2, 40]
- Swollen Battery: If you notice the screen lifting slightly or the back casing seems bulged, it could be a swollen battery. This is dangerous! A swollen battery can damage other components and even catch fire. You should stop using the phone and replace the battery immediately.[2, 3, 40]
- Excessive Overheating: If the phone gets much hotter than normal during charging or everyday use, it could be a symptom of a faulty battery.[2, 39, 40]
OEM Batteries without Logo: Original Quality? 🤔
When looking for a replacement battery, you might come across terms like "OEM no logo". It's important to understand what this means:
- What are OEM Batteries?: "OEM" stands for Original Equipment Manufacturer. In theory, an OEM battery is manufactured by the same company (or one with equivalent standards) that produces batteries for Apple, but it is marketed without the Apple logo.[4, 41, 42, 37]
- Quality: An OEM battery from a reputable supplier can offer performance very similar to an original Apple battery in terms of capacity, durability, and safety.[43, 37] However, the term "OEM" is sometimes used loosely in the market, so actual quality can vary. It's crucial to buy from reliable sources like iLevante.com, where we carefully select our suppliers.[41, 14]
- Advantages: They are usually cheaper than a battery repair directly with Apple. They can be an excellent alternative to low-quality generic "aftermarket" batteries that flood the market.[41, 43]
- Disadvantages and Implications of the "Unknown Part" Message:
- When installing a battery that is not the factory-installed original or one that has not been "calibrated" or recognised by Apple's systems (even if it's a genuine Apple battery taken from another iPhone), your iPhone 13 will display a message in Settings > General > About and/or in Settings > Battery. This message might say "Unknown Part" or "Important Battery Message: Unable to verify this iPhone has a genuine Apple battery.".[37, 44, 27, 28, 45, 30]
- As a consequence of this message, the "Battery Health" function (which shows the remaining maximum capacity percentage) will not be available or will not display accurate information.[37, 44, 27, 28, 45]
- Apple states that this notification does not affect your ability to use your iPhone or the battery's performance itself.[37, 27, 28, 45, 32] Simply, the system cannot verify its "authenticity" for the health report.
- This happens because iPhone batteries contain a microcontroller that communicates with the phone's logic board. Apple "pairs" the original battery with the board. Replacement batteries, even some high-quality OEM or genuine ones from other devices, may not have this pairing, which triggers the message.[37]
- Why "no logo"?: Manufacturers who also produce for Apple (OEMs) may have agreements that prevent them from selling parts with the Apple logo directly to the spare parts market. Selling them "no logo" is a way to offer similar quality without breaching these agreements.
It's fundamental to understand that the "Unknown Part" message is a consequence of Apple's system and not necessarily an indicator of a poor-quality battery, especially if you purchase a good-quality OEM battery. The loss of the "Battery Health" function is the main drawback, but the battery can work perfectly in terms of charge and duration.[27, 28, 45, 32]
Basic Steps to Change the iPhone 13 Battery (General Outline) 🛠️
Replacing the iPhone 13 battery is a delicate task that carries risks if not done correctly. Warning: Lithium-ion batteries can be dangerous if punctured, damaged, or mishandled, with a risk of fire or explosion. Proceed with extreme caution and at your own risk. It is highly recommended to discharge the battery below 25% before starting.[38, 40, 46, 47, 34]
- Tools Needed: Similar to screen replacement: Pentalobe P2, Phillips #000, Y-Type Y000 screwdrivers, suction cup, opening picks, spudger, heat gun or hairdryer. Additionally, you will need new adhesive strips specific to the iPhone 13 battery.[46]
- Turn Off and Open the iPhone: Follow the same initial steps as for screen replacement: turn off the device, remove the bottom Pentalobe screws, heat the screen edges, and use the suction cup and picks to carefully lift it (opening to the left).[46]
- Disconnect the Battery (FIRST!): Once the connector shield plate is removed, locate the battery connector and disconnect it from the logic board using a plastic spudger. This is always the first component to disconnect.[46]
- Disconnect Screen (and others if necessary): Disconnect the screen flex cables to remove it completely and work more comfortably. If other components like the speaker obstruct access to the battery adhesive strips, they may also need to be removed.[46]
- Remove Battery Adhesive Strips: The iPhone 13 battery is held by several elastic adhesive strips. Locate the tabs of these strips (usually black) on the battery edges. Pull each tab slowly and steadily, at as low an angle as possible (almost parallel to the battery). Try not to break them. If a strip breaks, you'll have to very carefully pry the battery up using a plastic spudger (never a metal one that could puncture it) or dental floss, applying a little isopropyl alcohol around the edges to soften the adhesive. Do not pry directly against the logic board or puncture the battery.[40, 46]
- Install the New Battery: Clean any old adhesive residue from the chassis. Place the new iPhone 13 battery-specific adhesive strips on the chassis or the back of the new battery (depending on the replacement part's design). Place the new battery in its slot, aligning it correctly with its connector. Connect the new battery's flex cable to the logic board.[46, 47]
- Reconnect and Test: Reconnect the screen and any other components you disconnected. Before sealing the phone, turn it on (you might need to connect it to the charger the first time with a new battery [46]) and check that the battery charges and the phone works correctly.
- Seal the iPhone: If everything is fine, turn off the phone. If desired, apply new screen adhesive to try to restore some water resistance. Close the screen and replace the Pentalobe screws.
- Calibrate the New Battery: For optimal performance and a more accurate percentage reading, calibrate the new battery [38, 47]:
- Charge the battery to 100% and leave it charging for at least 2 more hours.
- Use your iPhone normally until it turns off completely due to low battery (0%).
- Charge it again to 100% without interruption.
Battery replacement, although technically less complex than screen replacement for some, is still a procedure that requires patience, the right tools, and careful handling of components. Subsequent calibration is an often-overlooked but important step for the long-term good performance of the new battery.
Back Covers for iPhone 13: Renew Your Mobile's Look 🎨
The glass back cover of the iPhone 13 not only gives it an elegant look and allows for wireless charging but is also one of the most vulnerable parts to breakage in case of a fall. If yours has been damaged, replacing it can restore your iPhone to its original beauty and protect its internal components.[14, 48, 49]
Available Colours and Material
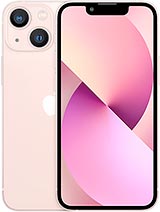
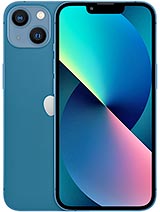
- The iPhone 13 (and 13 Mini) was launched in an attractive range of colours for its glass back cover. These are: (PRODUCT)RED, Starlight, Midnight, Blue, Pink, and later, the colour Green was added.[1, 50]
- The material is glass, which facilitates wireless charging but also makes it susceptible to cracks or complete breakage after an impact.[1, 14, 50]
Replacement Process: A Technical Challenge 🔩
We must be direct: replacing the glass back cover of the iPhone 13 is one of the most complex and time-consuming repairs. The glass is strongly adhered to the phone's chassis, and removing it without damaging other components is a real challenge.[48, 51, 49]
- Extreme Complexity: Unlike older models, the back glass is not an easily removable part. It is glued with a very strong adhesive.[48, 51]
- Extraction Methods:
- Heat and Pry (Most common DIY method but risky): This method involves evenly heating the back cover with a heat gun or hairdryer to soften the adhesive. Then, with much patience and using thin, resistant prying tools (like thin metal spudgers or special blades), the glass fragments are removed one by one. It's a slow and meticulous process, with a high risk of damaging internal flex cables, the wireless charging coil, the battery, or even scratching the metal chassis. Eye protection and gloves are required.[48, 49]
- Laser Machine (Professional Method): Specialised repair shops often use laser machines. These machines burn and vaporise the adhesive underneath the glass, allowing the glass pieces to be removed more easily and with less risk to internal components.[48, 51, 52] However, the equipment is very expensive and requires specific knowledge for safe and effective operation.
- Full Housing Replacement (Chassis Housing): An alternative, which may be simpler for some advanced DIY users, is to purchase a complete back housing that already includes the new glass, the metal frame, and sometimes some minor pre-installed components (like side buttons or the wireless charging coil). However, this involves a complete disassembly of all internal components of your iPhone (logic board, battery, cameras, etc.) to transfer them to the new housing. It's a very long and complex repair.[48]
- Common Tools (for the heat and pry method): Heat gun or powerful hairdryer, thin plastic and metal prying tools (spudgers, iSesamo), suction cup (can help lift large pieces), safety goggles, cut-resistant gloves, precision screwdrivers (if you need to remove any components for better access).[16, 48, 49]
- New Adhesive: Once the broken glass is removed and the chassis is cleaned of any adhesive and glass residue, you'll need new adhesive specific to the iPhone 13 back cover. Pre-cut adhesives that perfectly fit the phone's design are ideal. A strong liquid adhesive (like B7000 or T7000) can also be used, but it's harder to achieve a uniform and clean seal.[4, 48, 53]
- Considerations for MagSafe and Wireless Charging:
- The wireless charging coil and the MagSafe magnet assembly are located just beneath the back glass, often adhered to the inside of the chassis or, in some cases, to the original glass cover itself.[48, 53]
- When removing the broken glass, it is extremely important not to damage the wireless charging coil. If damaged, wireless charging will stop working.[48]
- If the coil and MagSafe magnets were adhered to the original glass, they must be carefully transferred to the new back cover, ensuring perfect alignment for MagSafe to work correctly (holding strength and charging efficiency). Some high-quality replacement back covers may come with the MagSafe coil and magnets already pre-installed and aligned.[48, 53]
- Incorrect replacement or damage to these components will affect or nullify the functionality of wireless charging and MagSafe accessories.[48]
Given the high complexity and associated risks, if you don't have prior experience with repairs of this level, we strongly recommend considering a professional repair service for changing the back cover of your iPhone 13. If you decide to venture, research thoroughly, equip yourself with the right tools, and above all, have a lot of patience. The integrity of wireless charging and MagSafe functionality critically depends on the correct handling of their components during this process.
Top 5 Most Sought-After Spares for iPhone 13 and How They Solve Common Problems 🛠️
Besides screens and batteries, other iPhone 13 components frequently need attention. Knowing them will help you better diagnose any problem and find the solution at iLevante.com. Below, we detail the most in-demand spares, focusing on the Charging Port, Front Camera with IR, and Rear Camera, along with other key components.
Table of Key iPhone 13 Spares and Problems They Solve
| Spare Part | Common Problems Solved | Important Notes / Implications |
|---|---|---|
| Complete Screen | Cracked/broken glass, dead pixels, lines/stains on screen, black screen, unresponsive or erratic touch, brightness/colour issues. | Requires transfer of front camera/sensor assembly for Face ID. True Tone may require programming. Possible "Unknown Part" message. |
| Battery | Very short duration, unexpected shutdowns, slow performance, battery health <80%, swollen battery (danger!), overheating. | "Unknown Part" message and loss of "Battery Health" function in iOS if not calibrated by Apple. Requires post-replacement calibration. |
| Charging Port (Lightning Flex) | Doesn't charge, intermittent or slow charging, cable doesn't fit well, physical damage to the port, problems with main microphone (if on the same flex). | Complex repair, may require logic board disassembly. Ensure correct microphone alignment. |
| Front Camera with IR (TrueDepth) | Face ID not working/unavailable, blurry/stained selfies, front camera app doesn't open, problems with front Portrait mode. | CRITICAL: Face ID linked to the original assembly. Must be transferred from the old screen. If the original is damaged, Face ID is lost (usually irreparable without Apple). |
| Rear Camera (Main Module) | Blurry/out-of-focus photos, stains on images, camera app doesn't open/black screen, broken lens glass, flash not working, faults in specific modes (Cinematic, Night). | Possible "Unknown Part" message. Some advanced functions might be affected if not genuine or improperly installed. |
| Glass Back Cover | Breakages, cracks from falls. | Very complex replacement. Crucial to transfer/secure wireless charging coil and MagSafe magnets. |
| Speakers (Earpiece and Main) | Earpiece: Cannot hear during calls, low/distorted sound. Main: No multimedia/ringtone sound, low/distorted sound. | Earpiece: Integrated with Face ID sensors; damage or poor transfer affects Face ID. Main: Moderately complex replacement. |
This table gives you a quick idea of which part might be failing based on your iPhone 13's symptoms. Accurate diagnosis is key before purchasing any spare part.
1. Charging Port (Lightning) for iPhone 13 ⚡
- Relevant Information: The iPhone 13 uses the Lightning connector for charging and data transfer. The charging port assembly (known as the charging flex) often also integrates the phone's main microphone (the one you use for normal calls) and sometimes other small components or antennas.[3, 54, 55, 56, 57, 58]
- Common Problems It Solves:
- The iPhone doesn't charge when you connect the Lightning cable, or charging is intermittent (connects and disconnects).[3, 54, 56]
- Charging is excessively slow, even with a suitable charger and cable.[3, 54]
- The Lightning cable doesn't fit firmly into the port, feels loose, or easily comes out.
- There is visible physical damage inside the port, such as bent or broken pins, or signs of corrosion (often due to moisture).[3, 54, 56]
- People can't hear you well during phone calls (if the main microphone is damaged and is part of this flex).[55, 57]
- Before replacing: Sometimes, the problem is simply an accumulation of dust, lint, or dirt inside the port, preventing a good connection. Try cleaning it carefully using a non-metallic toothpick or compressed air before assuming the port is damaged.[54, 56]
- Available Colours: The charging port flex component is an internal part and has no colour variations visible from the outside. The small metallic trim surrounding the port on the iPhone's chassis does match the phone's colour (Midnight, Starlight, etc.), but this trim is part of the chassis, not the charging flex replacement part.
- Basic Replacement Guide (General Outline):
- Complexity: High. This is one of the most laborious replacements, as it often requires disassembling much of the phone, including in many cases the logic board, to access and replace the charging port flex.[54, 55, 57]
- Key steps: Turn off the iPhone, open the screen (following heating and prying steps), disconnect the battery (essential!).[55, 57]
- It will be necessary to remove components such as the bottom speaker, Taptic Engine, and frequently, the main logic board to access and release the charging port flex.[54, 55, 57]
- The charging port flex is usually screwed to the chassis with multiple small screws and may also have adhesive. Its connectors must be disconnected from the logic board and removed with extreme care.[55, 57]
- When installing the new flex, it's crucial to ensure the correct alignment of all its components (port, microphone, antenna contacts if any) and that all screws return to their original place (they are of different sizes).
- Reassemble all components in reverse order, testing functionality before completely sealing the device.
2. Front Camera with IR (TrueDepth) for iPhone 13 🤳
- Relevant Information: This is not just a sensor for selfies; it's the heart of the Face ID facial recognition system. The iPhone 13's TrueDepth camera assembly includes the 12MP front camera, a dot projector, a flood illuminator, and is often integrated on the same flex cable with the proximity sensor, ambient light sensor, and earpiece speaker.[59, 16, 17, 18, 19, 1, 60, 61, 62, 63]
- Common Problems It Solves (or that manifest if damaged):
- Face ID unavailable or not working: "Could not activate Face ID on this iPhone," or it simply doesn't recognise your face.[59, 18, 19, 2, 60, 61, 62, 29, 22, 64, 65]
- Blurry selfies, with spots, black dots, or the front camera app doesn't open or shows a black image.[59, 2, 66]
- Problems with Portrait mode on the front camera (doesn't detect depth well or doesn't blur the background).
- Error message on screen like "A problem was detected with the TrueDepth camera. Face ID has been disabled.".[59, 60, 61, 62, 65]
- Visible physical damage to the front camera lens after a fall.
- The earpiece speaker doesn't work or sounds bad (if the speaker is part of the same flex cable that gets damaged).
- The proximity sensor doesn't work (the screen doesn't turn off when you bring the phone to your ear during a call).
- Critical Importance of Sensor Transfer / Pairing with Logic Board:
- THIS IS VITAL!: Face ID functionality is intrinsically linked (serialised or "paired") to the original and unique TrueDepth camera and sensor assembly that came factory-installed in your iPhone.[16, 17, 18, 19, 20, 21, 29, 22, 64, 65, 31]
- When replacing the screen: It is absolutely IMPERATIVE to very carefully transfer the entire original TrueDepth camera/sensor/earpiece assembly from your old screen to the new screen. If this original assembly is damaged during transfer, or if an assembly from another phone is installed (even an original Apple one), Face ID will permanently stop working.[16, 17, 18, 19, 20, 21, 29, 22]
- If the original TrueDepth camera assembly is damaged: Replacing it with a new one, even if it's a genuine Apple part, generally WILL NOT restore Face ID. This is because key components (like the dot projector and IR camera) are cryptographically paired with the Secure Enclave of your A15 Bionic chip on your logic board. Only Apple or an Apple Authorised Service Provider (AASP) have the tools and software to, in very specific cases and with specific new parts, recalibrate and restore Face ID function. For most third-party repairs, this is not possible.[18, 19, 21, 29, 22, 64, 65, 31]
- The "Unknown Part" message may appear if the system detects a change in these components, but the loss of Face ID is fundamentally due to the mismatch of serialised components, not just the message.[27, 28, 30, 31, 32]
- Available Colours: Not applicable, as it's an internal component.
- Basic Replacement/Transfer Guide (General Outline, mainly during screen change):
- Complexity: Very High if attempting to repair a damaged flex or individual sensors (almost impossible without micro-soldering and special tools). Moderate-High to transfer the complete assembly from one screen to another, but requires extreme delicacy.
- The front camera and sensor assembly is usually adhered and/or screwed to the internal back of the screen.[16, 20, 21]
- The small screws and brackets holding it must be carefully removed. Sometimes, very gentle heat is needed to soften the adhesive fixing a sensor.
- The flex cables are extremely fragile. Any excessive pulling or bending can damage them irreversibly.[16, 20, 21]
- Reinstallation on the new screen must be in the exact same orientation and position.
The interdependence of the front camera with Face ID makes any manipulation of this area high risk. If your Face ID works, but you only have issues with the image quality of the front camera, and the problem isn't the entire assembly, the repair is even more complex. In many cases, if Face ID fails due to a problem in this module, repair outside of Apple may not be viable to restore Face ID.
3. Rear Camera (Main) for iPhone 13 📸
- Relevant Information: The iPhone 13 features a sophisticated dual 12MP rear camera system. The main (wide-angle) lens has an $f/1.6$ aperture and sensor-shift optical image stabilisation (OIS), while the ultra-wide-angle lens offers an $f/2.4$ aperture and a 120º field of view. This system allows for high-quality photos and videos, including Cinematic Mode.[1]
- Common Problems It Solves:
- Blurry photos or videos, or the camera is unable to focus correctly (autofocus fails).[59, 2, 39, 67, 66]
- Appearance of spots, black dots, or strange artefacts in images or videos that are not external dirt on the lens.
- The camera app crashes, shows a black screen when trying to use the rear camera, or simply doesn't open.[39, 67, 66, 68]
- The external protective glass of one or both lenses is broken or severely scratched (in some cases, it's possible to replace only the lens glass if the internal camera module is intact, but it's a delicate repair).[2, 67, 66, 68]
- The True Tone flash doesn't work or works erratically.
- Specific functions like Cinematic Mode, Night Mode, or image stabilisation do not operate correctly.
- "Unknown Part" Message / Pairing:
- As with the screen and battery, if you replace the rear camera module of your iPhone 13 (models 12 and later), even if you use a genuine Apple part taken from another iPhone, it's very likely that a message will appear in Settings > General > About indicating "Unknown Part" or "Important Camera Message" (on iOS 15.2 and later versions).[27, 28, 64, 65, 66, 30, 31, 69, 32]
- Apple states that this message does not affect your ability to use the iPhone or access your camera.[66, 30, 69] However, it is a system notification.
- In some cases, although the camera works, certain advanced functions that depend on specific calibration with the logic board might not perform at 100% if the part is not recognised as the original paired one or if the installation is not perfect.[66, 30, 69] With iOS 18, Apple has started to allow the registration of some genuine used parts, but conditions may vary.[70]
- Available Colours: Not directly applicable to the camera module, as it's an internal component. The external lens trim is part of the iPhone's back cover design.
- Basic Replacement Guide (General Outline):
- Complexity: Moderate. Requires opening the phone and handling delicate connectors.
- Key steps: Turn off the iPhone, open the screen, and disconnect the battery.[69]
- Disconnect the screen and set it aside carefully to access the logic board.[69]
- Locate the rear camera module. It's usually covered by a small screwed-on metal shield. Remove these screws and the shield.[69, 71]
- Very carefully, disconnect the camera module's flex connectors from their sockets on the logic board using a plastic spudger. There are usually two connectors.[69, 71]
- Once disconnected, the camera module can be removed from its housing.[69]
- Place the new camera module, ensuring the flex connectors are well-aligned, and gently connect them to the logic board until they click.
- Replace the metal shield and its screws.
- Reassemble the phone (connect battery, screen, etc.) and thoroughly test the camera (photos, videos, all modes, flash) before sealing it completely.[72]
4. Glass Back Cover for iPhone 13 (Review detailed section above) 🌈
- Brief Reminder: As detailed earlier, the iPhone 13 comes in (PRODUCT)RED, Starlight, Midnight, Blue, Pink, and Green colours.[1, 50] Its cover is glass to facilitate wireless charging.
- Common Problems: Mainly breakages and cracks due to falls or impacts.[2, 3]
- Replacement: It's one of the most complex repairs due to the strong adhesive and fragility of the glass.[48, 51, 49] It's crucial to carefully handle the transfer of the wireless charging coil and MagSafe magnets to avoid losing these functionalities.[48, 52, 73, 53] Given the difficulty, professional assistance is often recommended.
5. Speakers (Earpiece and Main/Bottom) for iPhone 13 🔊
- Relevant Information: Your iPhone 13 has two main speakers:
- Earpiece Speaker: Located at the top, integrated into the TrueDepth camera and front sensor assembly. You use it to listen during normal phone calls.[59, 60, 74, 75, 76, 77, 78]
- Main Speaker (Loudspeaker): Located at the bottom of the phone, next to the Lightning port. It's used for ringtones, music, videos on speaker, and hands-free audio.[59, 60, 76, 79, 80]
- Common Earpiece Speaker Problems:
- No sound or very low sound during calls, making conversation difficult.[59, 2, 77]
- The earpiece sound is distorted, metallic, or crackly.[59, 2, 77]
- If the complete earpiece assembly (which includes the proximity sensor) is damaged or poorly reinstalled, the proximity sensor might fail (the screen doesn't turn off when you bring the phone to your ear).
- Important: As the earpiece speaker is part of the Face ID assembly, damage or incorrect replacement of this flex can lead to Face ID loss.[16, 18, 19, 29, 22]
- Common Main Speaker (Bottom) Problems:
- No sound for ringtones, notifications, music, videos, or in hands-free mode.[59, 2]
- The sound is very low, poor quality, distorted, or sounds "broken".[59, 2]
- Sometimes, the cause can simply be dirt or lint obstructing the speaker grilles. Careful cleaning with a soft brush or compressed air can solve the problem without needing replacement.[59, 2]
- Available Colours: Not applicable, they are internal components.
- Basic Replacement Guide (Earpiece Speaker - as part of the front assembly):
- Complexity: Very High. Generally, the earpiece speaker is not replaced aislatedly, but the entire assembly (including earpiece, secondary microphone, proximity sensor, IR illuminator for Face ID) is transferred from the original screen to the new one during a screen change. Attempting to desolder and replace only the speaker from this flex is extremely delicate and risky.[16, 18, 19, 29, 22, 75]
- Face ID Warning!: If this flex or its components (especially the IR illuminator) are damaged during handling, Face ID will stop working.
- Basic Replacement Guide (Main/Bottom Speaker):
- Complexity: Moderate.[76, 79, 80]
- Key steps: Turn off the iPhone, open the screen, disconnect the battery.[76, 79, 80]
- The main speaker is located at the bottom of the phone. It's normally held by several screws and has a flex connector to the logic board.[76, 79, 80]
- Remove the screws securing it, carefully disconnect its flex cable, and remove the speaker module.[76, 79, 80]
- Place the new speaker, connect it, and secure it with its screws.
- Reassemble and test the sound before closing the phone.
Other Essential Spares for Your iPhone 13 🧩
Beyond the larger and more commonly replaced parts, there are other small but crucial components that may need changing for your iPhone 13 to work like new. At iLevante.com, we also think of them:
- Taptic Engine: This is the vibrating motor that provides the precise and subtle haptic feedback characteristic of iPhones. If you notice your iPhone 13 isn't vibrating, the vibration is weak, sounds strange, or the haptic feedback feels incorrect, the Taptic Engine could be the culprit. Its replacement is moderately complex.[59, 1, 60, 81, 82, 83, 34]
- Flex Cables (Volume, Power, Mute Buttons): Your iPhone's physical buttons are connected to the logic board via flex cables. Over time or due to falls, these cables can get damaged, causing the volume buttons, power/lock button, or mute switch to stop working or work intermittently. Replacing these flex cables can be quite complex, as they are often adhered and run through intricate areas of the chassis.[59, 60, 84, 85]
- SIM Tray: Although it seems simple, the tray where you insert your SIM card can get lost, bent, or broken. It's an easy and inexpensive replacement. At iLevante.com, you can find SIM trays in the exact colour of your iPhone 13 so it doesn't look out of place.[60, 86, 87]
- Adhesives (Screen, Battery, Back Cover): These are fundamental. When you open the iPhone, the original adhesives that provide the seal are broken. To correctly secure new components (like the screen or back cover) and to try to restore some resistance to liquids and dust (although the IP68 certification is lost once the device is opened), it's crucial to use quality pre-cut adhesives. There are also specific adhesives for fixing the battery.[16, 40, 4, 46, 48, 53, 69, 75]
- Screw Sets: During a repair, it's surprisingly easy to lose one of the tiny screws that hold the iPhone's internal components. Apple uses various types and sizes (Pentalobe, Phillips, Y-Type, Standoff). Having a replacement set can save you from a tight spot.[59, 60]
- Internal Metal Shields: Inside the iPhone, there are several metal plates or shields that cover and protect connectors and sensitive areas of the logic board. Sometimes, these can get bent during incorrect disassembly or lost. Having replacements ensures everything remains well protected.
Don't underestimate the importance of these "small" parts. A faulty Taptic Engine can ruin the user experience, or a broken button flex can make the phone very difficult to operate. At iLevante.com, we strive to offer you a complete range of spares so you can perform a comprehensive and quality repair.
Common Hardware Failures in iPhone 13: Identify the Problem 🔍
With daily use, even a device as well-built as the iPhone 13 can experience hardware failures. Correctly identifying the problem is the first step to a successful repair. Here's a summary of the most frequent breakdowns and the associated spare parts you might need from iLevante.com:
- Screen Damage: This is perhaps the most common problem. It includes everything from a broken or cracked front glass to issues with the OLED panel (no image, lines, coloured spots), or failures in touch response (the digitiser doesn't respond or does so erratically).[2, 39, 3] Main spare: Complete Screen.
- Battery Degradation or Failure: Manifests as noticeably reduced charge duration, unexpected phone shutdowns (even with remaining battery percentage), general system slowness (iOS may reduce performance to protect an ageing battery), or, in severe cases, a swollen battery that can deform the phone.[2, 39, 3] Main spare: Battery.
- Charging/Lightning Port Problems: The iPhone doesn't charge, charging is intermittent, the cable doesn't hold well, or there's physical damage to the port. Sometimes, the main microphone can also fail if it's integrated into the same flex cable.[88, 2, 39, 3, 58] Main spare: Charging Port Flex.
- Camera Failures (Front or Rear):
- Rear Camera: Blurry photos, focus problems, spots on images, camera app shows black or closes, flash doesn't work, lens glass broken.[59, 88, 2, 39, 67, 66] Main spare: Rear Camera Module or Lens Glass.
- Front Camera / TrueDepth: Face ID doesn't work or gives errors, poor quality selfies, front camera app doesn't respond.[59, 88, 2, 60, 61, 62, 65] Main spare: Front Camera and Sensor Assembly (usually transferred, not replaced, to maintain Face ID).
- Sound Problems: No sound during calls (earpiece), or no sound for music, videos, or ringtones (main speaker). Distorted or low-quality sound from either.[59, 88, 2, 60, 74, 77, 78] Main spares: Earpiece Speaker, Main Speaker (Bottom).
- Overheating: The phone gets excessively hot without intensive use. It can be a symptom of a faulty battery, but also of more serious problems on the logic board.[59, 2, 39, 68]
- Broken Back Cover: Cracks or complete breakage of the rear glass.[2, 3] Main spare: Glass Back Cover or Complete Housing.
- Unresponsive Buttons: Volume buttons, power button, or mute switch don't work or work erratically.[59, 60, 84, 85] Main spare: Button Flex Cables.
- Taptic Engine / Haptic Feedback Problems: Vibration is non-existent, weak, noisy, or the system's haptic feedback doesn't work.[59, 60, 81, 82, 83, 34] Main spare: Taptic Engine.
- SIM Card Problems: The iPhone doesn't detect the SIM card, or the SIM tray is damaged or lost.[59, 60, 86, 87] Main spare: SIM Reader (internal, complex) or SIM Tray (external, easy).
Hardware problems usually manifest with clear symptoms that, once correctly identified, can guide you to the right spare part at iLevante.com. This list acts as a preliminary diagnostic guide, helping you understand what might be failing in your iPhone 13 and directing you to the most likely solution.
Technical Perspective: When Software Mimics Hardware Failures ⚠️
From a repair technician's perspective, it's crucial to understand that not all problems appearing to be hardware-related actually are. Sometimes, certain software faults or anomalous behaviours (iOS or applications) can lead you to believe that a physical component of your iPhone 13 is damaged. Before rushing to buy a spare part, consider these situations:
- Frozen or Unresponsive Screen: An iPhone with a completely locked screen or one that doesn't respond to touch doesn't always mean the screen is broken. A temporary operating system glitch or a crashed application can cause this. A forced restart often resolves these software lock-ups.[68, 89, 90, 5]
- Rapid Battery Drain: If your battery drains faster than usual, don't immediately assume the battery is faulty. Resource-intensive background apps, a bug in a recent iOS version, or poorly optimised system settings could be the culprits.[68, 89, 90]
- Overheating: Intensive use of demanding applications (games, video editing), prolonged charging in a warm environment, or even uncontrolled background processes can cause your iPhone to heat up. It's not always a battery or logic board fault.[68, 89, 90]
- Unexpected App Closures: If one or more apps close неожиданно on their own recurrently, it could be due to app incompatibility with the current iOS version, an internal app error, or an outdated iOS.[68, 89, 90, 5]
- Wi-Fi or Bluetooth Problems: Difficulty connecting, frequent disconnections, or poor performance don't always indicate an antenna or chip failure. Sometimes these are software issues that can be resolved by resetting network settings, the router, or the iPhone itself.[68, 90]
- Face ID or Camera Not Working Correctly: Before thinking the Face ID sensors or camera module are damaged, check some software aspects [61, 62, 65, 68, 90, 5]:
- Ensure iOS is updated to the latest version.
- Check Face ID settings (Settings > Face ID & Passcode) and ensure it's enabled for the functions you're trying to use.
- Check that nothing is obstructing the TrueDepth camera (dirt, a poorly placed screen protector, or a case).
- Try resetting Face ID and setting it up again.
- White Screen of Death (WSOD): Although it can be a serious hardware failure (like a loose or damaged screen connector), a completely white and unresponsive screen can also result from a failed iOS update, an interrupted restore, or firmware corruption.[90, 5]
Basic Software Diagnostic Tips (Before Blaming Hardware):
If your iPhone 13 exhibits any of the above symptoms, try these software steps before considering a hardware repair:
- Restart the iPhone: The classic "turn it off and on again" solves many minor temporary problems.[61, 62, 65, 68, 89, 90, 5]
- Force Restart the iPhone: If the screen is frozen, a forced restart can help. For iPhone 13: quickly press and release the volume up button, then quickly press and release the volume down button, and finally press and hold the side button until the Apple logo appears.[68, 89, 90, 5]
- Update iOS: Ensure you have the latest version of iOS. Apple releases updates that fix bugs and improve performance. Go to Settings > General > Software Update.[61, 62, 65, 68, 89, 90, 5]
- Close Background Apps: Swipe up from the bottom of the screen and hold to see open apps, then swipe them up to close them.[68, 89]
- Check Storage: Nearly full storage can slow down the iPhone and cause erratic behaviour. Go to Settings > General > iPhone Storage.[89]
- Reset Settings: If problems persist, you can try resetting all settings (this doesn't delete personal data like photos or contacts, but it does reset network settings, keyboard, home screen, etc.). Go to Settings > General > Transfer or Reset iPhone > Reset > Reset All Settings.[89, 5]
- Factory Restore (As a Last Software Resort): If none of the above works, you might consider restoring your iPhone to factory settings. Warning! This will erase all data on your iPhone, so make sure to make a full backup to iCloud or your computer before proceeding.[61, 62, 65, 89, 90, 5]
Including this perspective is important because, as your trusted source for spares at iLevante.com, we want to ensure you only replace what's genuinely damaged. Sometimes, a simple software solution can save you time, money, and the effort of an unnecessary repair. If the problem persists after trying these steps, then it's more likely a hardware failure requiring a spare part.
Basic Repair Guide: Get Hands-On with Caution! 👨🔧👩🔧
Deciding to repair your own iPhone 13 can be a rewarding experience and a way to save money. However, it's a task that requires patience, the right tools, and a lot of caution. At iLevante.com, we want you to be well-prepared if you venture into the world of "do-it-yourself" (DIY).
Essential Tools for Repairing Your iPhone 13
Having the right toolkit is half the battle. Here's a list of tools usually needed for most iPhone 13 repairs:
- Precision Screwdriver Kit: Indispensable. You'll need at least:
- Pentalobe P2 screwdriver (for the external screws next to the Lightning port).[91, 88, 16, 46, 55, 57, 69, 75, 76, 79, 80, 81, 83, 34]
- Phillips #000 screwdriver (for many internal screws).[91, 88, 16, 46, 55, 57, 69, 75, 76, 79, 80, 81, 83, 34]
- Tri-Point Y000 screwdriver (or Y-type, for shield screws and other components).[91, 88, 16, 46, 55, 57, 69, 75, 76, 79, 80, 81, 83, 34]
- Possibly a Standoff screwdriver for certain logic board screws.[91, 88, 16, 46, 55, 57, 69, 75, 76, 79, 80, 81, 83, 34]
- Suction Cup: To help lift the screen and create an initial opening.[91, 88, 16, 46, 48, 49, 55, 57, 69, 75, 76, 79, 80, 81, 83, 34]
- Plastic Opening Picks (Spudgers, Opening Picks): Thin, anti-static tools for separating components, disconnecting flex cables, and cutting adhesive without damaging parts.[91, 88, 16, 46, 48, 49, 55, 57, 69, 75, 76, 79, 80, 81, 83, 34]
- Tweezers (ESD preferably): For handling small screws, cables, and other tiny components. Anti-static (ESD) ones are better for protecting electronic components.[91, 88, 16, 46, 48, 49, 55, 57, 69, 75, 76, 79, 80, 81, 83, 34, 71]
- Heat Gun or Hairdryer: To apply moderate heat and soften adhesives sealing the screen and other components.[91, 88, 16, 46, 48, 49, 55, 57, 69, 75, 76, 79, 80, 81, 83, 34]
- Anti-static Wrist Strap (ESD Strap): Highly recommended to ground yourself and prevent damaging the iPhone's sensitive electronic components with electrostatic discharge.[88, 16, 83, 92]
- Pre-cut Adhesive for Screen/Back Cover: Essential for resealing the phone after repair, helping to keep out dust and moisture (although IP68 certification is lost).[91, 88, 16, 4, 46, 48, 49, 53, 69, 75]
- Gloves and Safety Goggles: Especially important if working with broken glass, to protect your hands and eyes.[88, 16, 48, 49, 76, 92]
- Isopropyl Alcohol (90% or higher): Useful for cleaning old adhesive residue.[88, 40, 48, 49]
- (Optional) Screen Programmers (e.g., JCID, QianLi): Needed if you want to try to restore the True Tone function after a screen change with certain types of replacement parts.[16, 20, 23, 24, 25, 6, 26]
- (Optional, Professional Level) Laser Machine for Back Covers: Used by professionals to facilitate the removal of the back glass. Not a common DIY tool.[48, 51, 52]
At iLevante.com, you'll find many of these tool kits and specific adhesives for your iPhone 13.
General Precautions Before and During Repair
Safety and care are paramount. Keep these tips in mind:
- Research Thoroughly: Before touching a single screw, watch multiple guides and video tutorials specific to the repair you're going to perform on your iPhone 13. Compare different sources.[38, 40]
- Impeccable Organisation: Keep all small screws and parts perfectly organised. A magnetic screw tray or simply labelling each group of screws is vital. iPhone screws are of different sizes and lengths; placing an incorrect one in the wrong place can severely damage the logic board or other components.[91, 88, 16, 46, 55, 60, 69, 75, 76, 79, 83, 92]
- Disconnect the Battery First!: Once the phone is open, the first connector you MUST disconnect is the battery's. This prevents accidental short circuits while handling other components. Reconnect it only at the end, just before testing.[16, 93, 46, 54, 55, 57, 69, 75, 76, 79, 80, 81, 83, 34, 94] Also, discharge the battery below 25% before starting any internal manipulation to reduce the risk of fire if accidentally punctured.[38, 40, 46, 47, 81, 83, 34]
- ESD Protection: Use an anti-static wrist strap connected to a ground or a large metal part. Static electricity from your body can fry the iPhone's delicate circuits.[88, 16, 83, 92]
- No Forcing: Never force connectors, cables, or components to fit. If something doesn't go in smoothly, it's likely misaligned or there's an obstruction. Check carefully.[55, 57, 69, 92]
- Flex Cables = Extreme Fragility: The flat (flex)


