
Oppo Pad Parts - Tablets Repair Parts


- Essential Spares for Your Oppo Tablet: Bring It Back to Life! 🛠️
- Know Your Oppo Pad: Popular Series and Models 🚀
- Zooming in on the Giants: Key Features of Popular Oppo Pad Models
- Oppo Pad 3 and Pad 3 Pro: Impressive Power and Screens
- Oppo Pad Air and Pad Air 2: Productivity and Portability in Your Hands
- Spares for Oppo Tablets: Solving the Most Common Problems 🛠️
- Replacement Screens for Oppo Pad: Clear Vision Again!
- Batteries for Oppo Pad: Recover Lost Autonomy! 🔋
- Other Essential Spares for Your Oppo Tablet
- Diagnosing Problems on Your Oppo Pad: Hardware or Software? 🧐
- Common Hardware Faults in Oppo Tablets (Beyond Screens and Batteries)
- When Software Deceives: ColorOS Problems That Look Like Physical Faults
- Let's Get to Work! Basic Guide to Common Repairs for Your Oppo Pad 💪
- Precautions and Essential Tools for the Budding Technician
- Simplified Step-by-Step Guide (Basic Outlines):
- Your Oppo Pad Like New with iLevante.com: Quality and Trust in Every Spare ✨
Essential Spares for Your Oppo Tablet: Bring It Back to Life! 🛠️
Your Oppo tablet is more than just a simple device; it's your window to the digital world, your work tool, or your daily entertainment hub. When something goes wrong, like a cracked screen, an unresponsive touchscreen, or a battery that no longer performs as it used to, it can be a source of considerable frustration. But don't worry! In most cases, a repair is much simpler and more economical than you imagine, allowing you to extend the lifespan of your digital companion.
At iLevante.com, we understand the vital importance your tablet has in your day-to-day life. That's why we've assembled a wide and carefully selected range of high-quality spares so you can restore the original functionality and splendour to your Oppo Pad. This guide has been prepared with you in mind, to help you understand what might be failing in your tablet, what specific parts you might need to fix the problem, and most importantly, how we can assist you in this process.
Here you'll find detailed information about the different Oppo tablet series, the most common problems these devices usually face over time and with use, and the spares that will allow you to undertake those repairs with confidence. Get ready to become knowledgeable in the care and maintenance of your Oppo Pad, and discover how a simple part can make all the difference. The decision to repair, rather than replace, is not only friendly to your wallet but also to the environment. By opting for repair, you contribute to reducing electronic waste, an increasingly important gesture in our technological world.
Know Your Oppo Pad: Popular Series and Models 🚀
Oppo, a brand recognised for its innovation and quality in the world of mobile devices, offers several lines of tablets, each designed with a slightly different focus and target audience. Knowing the exact series and model of your device is the first, and most crucial, step to finding compatible spares and ensuring a successful repair. Incorrect identification could lead to purchasing a part that doesn't fit or work correctly, causing more frustration and unnecessary expense. You can find your tablet's model in the device settings (usually in "Settings" > "About tablet" or "Device information"), on the original box, or sometimes on a label on the back of the device.
The main Oppo tablet series you should know are:
- Oppo Pad Series (General): This line usually groups the brand's flagship or higher-end models. These tablets are designed to offer an optimal balance between processing power, screen quality, and an immersive multimedia experience. Models like the Oppo Pad 2, and the more recent Oppo Pad 3 and Oppo Pad 3 Pro, are examples of this category, seeking to satisfy the most demanding users.
- Oppo Pad Air Series: The 'Pad Air' series is characterised by offering a solid and fluid user experience, but in a noticeably more lightweight and portable format. These tablets are ideal for on-the-go productivity, note-taking, reading, and consuming multimedia content away from home. Here we find models like the original Oppo Pad Air and its successor, the Oppo Pad Air 2.
- Oppo Pad Neo: The 'Pad Neo' is often positioned as a more accessible option within Oppo's catalogue, without sacrificing essential features. It's focused on daily entertainment and general use, offering good value for money for students or users looking for a functional tablet for home.
The differentiation between these series implies significant variations in technical specifications, such as processor type, screen technology, battery capacity, and, therefore, in the types of spares they might need and their cost. For example, a "Pro" model will likely incorporate a screen with more advanced technology, and thus, its replacement could be more expensive than that of an "Air" or "Neo" model. Understanding these differences will help you better contextualise your device's needs.
Zooming in on the Giants: Key Features of Popular Oppo Pad Models
To help you better identify your device and understand its peculiarities, below we detail the most relevant features of some of the most popular Oppo Pad models, always from the perspective of repair and the components you might need.
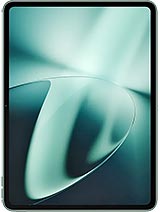
Oppo Pad 3 and Pad 3 Pro: Impressive Power and Screens
These models represent Oppo's latest and most powerful offering in the tablet segment, designed for users seeking maximum performance.
- Oppo Pad 3:
- Screen: Equipped with an 11.61-inch IPS LCD panel, it offers a resolution of 2000 x 2800 pixels (approximately 296 ppi density) and a 144Hz refresh rate for exceptional visual fluidity. Some versions, like the "Matte Display Edition," use LTPS LCD (Low-Temperature Polycrystalline Silicon) technology, which can improve resolution and efficiency.
- Battery: A robust 9520 mAh battery ensures good autonomy, complemented by 67W fast charging.
- Other relevant data: Incorporates the Mediatek Dimensity 8350 chipset and was launched in November 2024.
- Oppo Pad 3 Pro:
- Screen: An impressive 12.1-inch IPS LCD panel with a resolution of 2120 x 3000 pixels (~304 ppi), 144Hz refresh rate, Dolby Vision compatibility, and a brightness that can reach 900 nits (HBM), ideal for outdoor viewing.
- Battery: Features a 9510 mAh battery and also supports 67W fast charging.
- Other relevant data: Powered by the Qualcomm Snapdragon 8 Gen 3 chipset, it was launched in October 2024. Its model identifier is, for example, OPD2401.
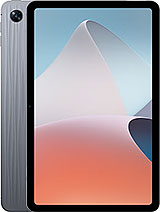
Oppo Pad Air and Pad Air 2: Productivity and Portability in Your Hands
The Air series focuses on offering a balance between functionality and a lightweight design, perfect for everyday use.
- Oppo Pad Air (Original):
- Screen: Features a 10.36-inch IPS LCD screen with a resolution of 1200 x 2000 pixels (~225 ppi) and a typical brightness of 360 nits.
- Battery: A Li-Po battery of 7100 mAh with support for 18W fast charging. The commonly associated battery model is BLT004.
- Other relevant data: Uses the Snapdragon 680 4G chipset and was launched in June 2022.
- Oppo Pad Air 2:
- Screen: Grows slightly to 11.4 inches with an IPS LCD panel, resolution of 1720 x 2408 pixels (~260 ppi), 90Hz refresh rate, and 400 nits of brightness.
- Battery: Increases its capacity to 8000 mAh (Li-Po) and improves charging speed to 33W.
- Other relevant data: Comes with the Mediatek Helio G99 chipset and was launched in November 2023.
It's interesting to note that, although all these models use IPS LCD technology for their screens, the differences in size, resolution, and refresh rate are significant, meaning each replacement screen will be unique to its model. Battery capacity also varies, which is a crucial factor when looking for a replacement. Although chipsets (MediaTek or Snapdragon) and launch dates indicate technological evolution, for the most common spares like screens and batteries, physical specifications and connectors are the determining factors for compatibility, rather than the internal processor. However, the age of the device can influence the availability and price of original spares; newer models might have more expensive original spares or, initially, fewer third-party alternatives on the market.
| Model | Screen Size | Screen Type | Resolution | Battery Capacity (mAh) | Fast Charging (W) | Chipset | Launch Date |
|---|---|---|---|---|---|---|---|
| Oppo Pad 3 | 11.61 inches | IPS LCD (or LTPS LCD) | 2000 x 2800 | 9520 | 67W | Mediatek Dimensity 8350 | Nov 2024 |
| Oppo Pad 3 Pro | 12.1 inches | IPS LCD | 2120 x 3000 | 9510 | 67W | Snapdragon 8 Gen 3 | Oct 2024 |
| Oppo Pad Air | 10.36 inches | IPS LCD | 1200 x 2000 | 7100 | 18W | Snapdragon 680 4G | Jun 2022 |
| Oppo Pad Air 2 | 11.4 inches | IPS LCD | 1720 x 2408 | 8000 | 33W | Mediatek Helio G99 | Nov 2023 |
Spares for Oppo Tablets: Solving the Most Common Problems 🛠️
With the hustle and bustle of daily use, it's completely normal for some parts of your beloved Oppo tablet to suffer natural wear or fall victim to unexpected accidents. Fortunately, the vast majority of these problems have a practical and accessible solution by replacing the affected component. At iLevante.com, we pride ourselves on offering you an extensive variety of components and spares specifically designed for your Oppo Pad, allowing you to restore its functionality and prolong its lifespan. Next, we'll focus on the most in-demand spares: screens and batteries, and then explore other essential components.
Replacement Screens for Oppo Pad: Clear Vision Again!
The screen is, without a doubt, one of the most vital and, at the same time, most vulnerable components of any tablet. It's our main window for interaction and viewing.
Common Causes of Screen Damage:
An unfortunate fall from the table, an accidental knock while transporting it, excessive pressure inside a tight backpack... there are countless everyday situations that can result in a broken, cracked screen, with deep scratches or with worrying visual faults like dark spots, abnormal coloured lines, or constant flickering. On other occasions, the problem isn't visible: the touch panel may stop responding in certain areas or altogether, even without any apparent physical damage to the glass. These problems not only affect aesthetics but also severely compromise the device's usability.
Exploring Screen Technologies (Important for your choice at iLevante.com):
Understanding the different screen technologies available will help you make an informed decision when choosing a spare:
- TFT and IPS LCD Screens: Most Oppo Pad tablets, including the models we've highlighted like the Pad 3, Pad 3 Pro, Pad Air, and Pad Air 2, come factory-fitted with IPS LCD (In-Plane Switching Liquid Crystal Display) screens or, in some more basic cases, TFT LCD (Thin-Film Transistor). IPS screens are an evolution of TFTs, generally offering better viewing angles and more faithful colour reproduction. Both technologies provide good image quality at a relatively reasonable manufacturing cost. If you're looking for a direct replacement that's economical and does its job, a compatible TFT/IPS screen is a solid option. However, more basic TFTs may have more limited viewing angles and lower contrast compared to IPS or superior technologies.
- INCELL Screens: INCELL screens represent a technology where the touch sensor and LCD panel are integrated into a single layer. This can result in a thinner screen profile and, often, a more economical spare. They are an alternative to consider if your budget is tight. However, it's important to be aware that, in some cases, image quality, maximum brightness, and colour gamut width may be inferior to original screens or OLED/AMOLED alternatives. You might notice differences in colour vibrancy or that the bottom bezel is slightly wider.
- OLED and AMOLED Screens: Although not standard on all Oppo Pad models (which tend to use IPS LCD), OLED (Organic Light Emitting Diode) and AMOLED (Active Matrix OLED) screens represent the pinnacle of image quality for mobile devices. Their main advantage lies in the ability to offer true blacks (each pixel lights up or turns off individually), resulting in infinite contrast and extraordinarily vibrant colours. If your Oppo tablet originally had an LCD screen and you're looking for a significant improvement in visual quality, or if your model was already OLED/AMOLED, opting for a spare of this technology will provide you with the best experience. They are generally more expensive, but the difference in visual quality is noticeable, especially for multimedia consumption. A possible drawback, besides the price, is a greater susceptibility to "burn-in" or image retention if static elements are displayed for very long periods.
- Original vs. Compatible Screens (OEM Refurbished vs. Aftermarket):
- Originals (or OEM Refurbished): These are screens manufactured directly by Oppo or for Oppo under their strict quality standards. They can also be original screens that have been professionally refurbished (e.g., by replacing only the outer glass if the internal LCD/OLED panel was intact and functional). Naturally, they offer maximum compatibility and image quality identical to what your tablet had from the factory. They are usually the most expensive option but guarantee original performance and visual experience.
- Compatibles (Aftermarket): These are screens manufactured by third parties. Within this category, we find TFT, INCELL, and OLED/AMOLED alternatives that do not come directly from Oppo. The quality and price of these screens can vary considerably between manufacturers. At iLevante.com, we strive to select and offer compatible screens that present an excellent balance between quality, durability, and price, so you have reliable options that fit your needs. Transparency is key: an INCELL screen will be more economical but will not offer the same experience as an AMOLED.
The choice of replacement screen type is ultimately a decision that balances your budget with the image quality you desire. A user with an older Pad Air might opt for an economical INCELL screen for a functional and quick repair, while the owner of a Pad 3 Pro might be more inclined to invest in an original quality or AMOLED screen to maintain their device's premium experience. Being transparent about the differences between these qualities is fundamental for you to make the best decision.
| Screen Type | Visual Quality | Brightness | Durability (General) | Estimated Price | Ideal For... |
|---|---|---|---|---|---|
| Original / OEM | Excellent (identical to factory) | Optimal (per original specifications) | High | $$$ | Those seeking maximum quality and fidelity. |
| IPS LCD Compatible | Good-Very Good | Good | Medium-High | $$ | A good balance between quality and price, similar to the original in many cases. |
| TFT LCD Compatible | Acceptable - Good | Acceptable | Medium | $ - $$ | Economical repairs where visual quality is not the top priority. |
| INCELL | Acceptable | Acceptable-Low | Medium (can be thinner) | $ | The most economical option for a functional repair. |
| AMOLED/OLED Compatible | Excellent (pure blacks, vibrant colours) | Very Good - Excellent | Medium (risk of burn-in) | $$ - $$$ | Those seeking the best possible image quality, even as an upgrade over LCD. |
Batteries for Oppo Pad: Recover Lost Autonomy! 🔋
The battery is the energy heart of your tablet. Over time and with charge cycles, all lithium-ion batteries degrade, affecting your device's autonomy.
Symptoms of a Faulty or Degraded Battery:
Do you notice your Oppo tablet discharging alarmingly fast, even with little use? Does it turn off unexpectedly even though the battery indicator shows remaining percentage? Does it take an eternity to charge fully, or worse, do you notice the battery has swollen (this is an important warning sign and requires immediate attention as it can be dangerous)? These are unequivocal symptoms that your tablet's battery may have reached the end of its useful life and needs replacement.
OEM Batteries for Oppo: Original Quality without the Logo
At iLevante.com, it's common to find batteries listed as 'OEM' (Original Equipment Manufacturer). This term means they are batteries manufactured by companies that also produce components for major device brands, following the same or very similar quality standards and technical specifications. The main difference is usually that these batteries may be marketed without the Oppo logo. In essence, they are functionally like the originals.
Opting for an OEM battery allows you to obtain a high-quality product, with performance and durability comparable to the original battery that came with your tablet, but often at a more competitive price. The key to their reliability lies in the quality of the materials used, the manufacturing process, and the quality controls they undergo, not simply the presence of a logo. This is especially relevant because it alleviates the concern some users may have about whether an "unbranded" battery is of lower quality; if the OEM concept is well understood, the customer feels more confident.
Identifying the Correct Battery for Your Model:
To ensure perfect compatibility and optimal performance, it's vital to select the correct battery. Pay attention to these details:
- Capacity (mAh): Milliamps-hour indicate the battery's charge capacity. This data is usually printed on the original battery itself. For example, the Oppo Pad 3 has a 9520 mAh battery, the Pad 3 Pro 9510 mAh, the original Pad Air 7100 mAh, and the Pad Air 2 8000 mAh.
- Voltage (V): Voltage is also a crucial parameter and must match that of the original battery.
- Battery Model Number: Some batteries have a specific model code. A clear example is the BLT004 battery, which corresponds to the original Oppo Pad Air (7100 mAh). For other models like the Pad 3, Pad 3 Pro, or Pad Air 2, if a specific BLP or BLT code for the tablet isn't found in spare parts lists (as many BLP codes found in research, like BLP755 or BLP713, seem to be for Oppo phones), the mAh capacity, voltage, and physical form will be the main identifiers.
- Physical Form and Connectors: Ensure the battery's shape and, very importantly, the type and location of its connectors are identical to those of the battery you are replacing. A clear product photo in the online shop is very helpful here.
Precise identification is crucial. Although BLP codes are common on Oppo phones, for Pad series tablets, capacity (mAh), voltage, and physical connector compatibility are the most reliable identifiers. Listing batteries with all this data, along with compatible tablet models and clear photographs of the connectors, is vital to avoid purchasing errors.
Other Essential Spares for Your Oppo Tablet
Beyond screens and batteries, other components can fail for which iLevante.com offers solutions:
- Charging Ports (USB-C Connectors): A very common problem. If your tablet doesn't charge, does so intermittently, or you have to "wiggle" the cable for it to make contact, it's very likely the charging port is damaged, dirty, or worn out. Most modern Oppo tablets use USB-C connectors.
- Charging Flex and Other Flex Cables: Flexible cables (flex) are vital for interconnecting different internal parts of the tablet (logic board with screen, charging port, buttons, etc.). The charging flex is one of the most susceptible to wear from constant connection and disconnection. Flex cables also exist for volume buttons, power button, and even for the screen itself.
- Buttons (Power, Volume): With continued use, physical buttons can lose their characteristic "click," get stuck, or simply not respond. Often, the problem lies in the button's own mechanism or in the flex cable to which it's connected.
- Cameras (Front and Rear): If your photos are blurry, the camera app doesn't open, shows an error, or the camera is unable to focus, it could indicate a problem with the corresponding camera module.
- Speakers and Microphones: Problems like hearing no sound, distorted audio, or not being heard during video calls, usually point to a fault in the speaker or microphone.
- Back Covers: A broken or cracked back cover is not only an aesthetic issue but can also leave internal components exposed to dust, moisture, and further damage.
- SIM Trays (if the model is LTE/5G): On Oppo tablet models with cellular connectivity, losing or damaging the SIM tray prevents the use of mobile data.
- Specific Adhesives: For many repairs, especially those involving screen or back cover replacement, you'll need pre-cut adhesives or specific glue (like B7000 or T7000) to ensure a correct and durable seal.
- Outer Camera Glass Lens: Sometimes, what's damaged isn't the entire camera module, but only the small protective glass covering the lens. This is generally a simple and inexpensive spare.
- Touch Panels (Digitisers): On some older tablet models, or certain types of more economical screen spares, the touch panel (also known as a digitiser) can be a separate piece from the LCD panel. If the image looks perfect but the tablet doesn't respond to touch, or does so erratically, this could be the part you need.
It's important to note that some seemingly serious problems, like a tablet that "won't charge" or "won't turn on," can be due to a relatively inexpensive and easy-to-change component, such as the charging port or its associated flex cable. Educating the user about these possibilities can encourage them to consider repair before giving up on the device. Having a diverse catalogue of these "small but mighty spares" and highlighting them is fundamental to covering a wide spectrum of repair needs.
| Common Problem | Spare Needed (Examples) | Estimated Difficulty Level (DIY) |
|---|---|---|
| Tablet not charging / Intermittent charging | USB-C Charging Port, Charging Flex | Medium - Difficult (may require soldering in some cases) |
| Power/volume button not working | Power/Volume Button Flex, Physical Button | Medium |
| Distorted sound / No sound | Speaker | Medium |
| Not heard on video calls | Microphone | Medium - Difficult |
| Broken back cover | Back Cover | Easy - Medium |
| Blurry photos / Camera app fails | Camera Module (front or rear), Camera glass lens | Medium |
| Broken screen / No image / Touch not responding | Complete Screen (LCD/OLED + Touch) | Medium - Difficult |
Diagnosing Problems on Your Oppo Pad: Hardware or Software? 🧐
Before rushing to buy spares and dismantle your tablet, it's crucial to try and discern whether the fault you're experiencing is genuinely hardware (a damaged physical component) or software (a problem with your Oppo Pad's ColorOS operating system). Sometimes, symptoms can be confusing, and a software issue can mimic a hardware failure, leading you to unnecessary expense.
Common Hardware Faults in Oppo Tablets (Beyond Screens and Batteries)
If you've already ruled out screen and battery problems, here are other common hardware faults:
- Charging Port Problems:
- Symptoms: The tablet doesn't recognise the charger at all, charging is intermittent (connects and disconnects), you need to move or angle the cable for it to start charging, or by visually inspecting the port, you observe it's physically damaged, with bent pins, or very dirty.
- Causes: Accumulation of dirt, dust, or lint inside the port, natural wear from continued use (connecting and disconnecting the cable thousands of times), physical damage from accidental yanks on the cable, or internal corrosion due to moisture exposure.
- Hardware Solution: If careful cleaning (with compressed air or a plastic toothpick, never metal, and with the tablet off) doesn't work, you most likely need to replace the charging port module or the charging flex cable it's connected to.
- Button Faults (Power, Volume):
- Symptoms: The button has lost its travel or characteristic "click," is sunken and doesn't return to its position, or simply doesn't perform any action when pressed.
- Causes: Wear of the button's internal mechanism, or more commonly, damage to the flex cable connecting the button to the logic board.
- Hardware Solution: Usually involves replacing the button assembly and its associated flex cable.
- Logic Board (Motherboard) Problems:
- These are generally the most serious faults and often the most complex for an average user to diagnose and repair, as the logic board is the tablet's brain.
- General Symptoms: The tablet doesn't turn on at all and you've already verified it's not a battery, screen, or charging port issue; it constantly restarts for no apparent reason (boot loops); multiple functions fail simultaneously (e.g., Wi-Fi, Bluetooth, and sound stop working at the same time); it experiences excessive overheating even when not performing demanding tasks.
- Causes: Can be very varied: internal short circuits, liquid damage that has reached the board, prolonged overheating that has damaged components, failure of integrated circuits (ICs) soldered to the board, or even faulty soldering.
- Hardware Solution: Logic board repair usually requires a specialised technician with advanced tools and knowledge (micro-soldering, component diagnostics, etc.). At iLevante.com, we can provide some specific board components if you know exactly what you need, but the repair itself is advanced. In many cases, if the logic board fails sévèrement, it might be more cost-effective to consider a new device, though it's always worth getting a professional diagnosis.
- Other hardware problems: Constant overheating when charging can indicate an incompatible charger or damaged cable, but if it persists with original accessories, it could be a battery issue or a problem with the charging circuit on the board. A loose internal screen connection can also cause visual or touch issues.
Correctly identifying a faulty charging port can save you from unnecessarily buying a new battery, as the symptoms (tablet "dead" or not charging) can easily be confused.
When Software Deceives: ColorOS Problems That Look Like Physical Faults
Your Oppo tablet's operating system, ColorOS (based on Android), is complex and, like any software, can sometimes have faults, errors, or "bugs" that manifest in ways you might confuse with a hardware problem. Before picking up your tools, try these software solutions!
- Touchscreen Unresponsive or Lagging:
- Possible Software Causes: An application that has "hung" or crashed, the operating system overloaded by too many processes, a recent software update that introduced a bug, or simply that the device needs a restart to refresh its memory.
- Basic Software Solutions:
- Restart the tablet: Press and hold the power button until the options appear and select "Restart." If the screen is completely frozen, press and hold the power button for about 10-15 seconds until the tablet forcibly shuts down, then turn it back on.
- Close all applications running in the background.
- Check for pending ColorOS updates in "Settings" > "Software update" (or similar path) and install them.
- Boot into Safe Mode: This mode loads the operating system with only essential factory applications, temporarily disabling apps you've installed. If the touch works correctly in Safe Mode, it's very likely one of your downloaded apps is the culprit. You'll need to uninstall them one by one (starting with the most recent or suspicious ones) until you find the problematic one. The method to enter Safe Mode may vary slightly but usually involves turning off the tablet and then turning it on while holding the volume down button when the Oppo logo appears.
- Rapid Battery Drain (Caused by Software):
- Possible Software Causes: Applications consuming an excessive amount of power in the background (social media, games, messaging apps with constant notifications), screen brightness set to maximum permanently, services like location (GPS), Bluetooth, or Wi-Fi unnecessarily activated, bugs in the operating system or a specific application after an update.
- Basic Software Solutions:
- Review the "Battery usage by app" breakdown in the tablet's Settings to identify the "greediest" apps.
- Reduce screen brightness or activate automatic brightness.
- Turn off Wi-Fi, Bluetooth, and Location when not in use.
- Ensure both ColorOS and your apps are updated to their latest versions, as updates often include bug fixes that can affect battery consumption.
- Consider using the battery saving modes offered by ColorOS.
- General System Slowness, Freezes, or "Lag":
- Possible Software Causes: Internal storage space almost full (this greatly slows down any device), too many applications running in the background consuming RAM and CPU, excessive accumulation of cache files, presence of malware (though uncommon on tablets if apps are downloaded from official sources, it's not impossible), or an outdated operating system.
- Basic Software Solutions:
- Free up storage space by deleting unnecessary files (photos, videos, large documents) and uninstalling apps you no longer use.
- Clear the cache of applications or the general system cache (ColorOS usually has a "Phone Manager" or "Cleaner" tool for this).
- Restart the tablet regularly.
- Problems with OTA (Over-The-Air) Updates: If your tablet fails when trying to install a ColorOS update, it could be due to a very low battery (it's recommended to have at least 50% or be connected to the charger), low available storage space, an unstable internet connection, or even the use of a VPN interfering with update servers.
- General ColorOS Glitches: Sometimes, after a major system update, some specific functions, like the media player or certain settings, may exhibit erratic behaviour or "bugs." In these cases, a restart or waiting for a software patch are usually the solutions.
Providing these basic software diagnostic steps is crucial so that, as a user, you don't end up buying a hardware spare you don't actually need. A customer who solves a software problem thanks to this guide will remember iLevante.com favourably and return when they genuinely need a physical part.
Let's Get to Work! Basic Guide to Common Repairs for Your Oppo Pad 💪
Warning! Performing hardware repairs yourself carries certain risks. You could damage other components of your tablet if you are not careful or lack the necessary experience, and it's very likely you'll void the manufacturer's official warranty. If you don't feel completely confident or comfortable with the process, it's always advisable to go to a professional technical service. This guide offers basic and indicative outlines, and its purpose is illustrative. iLevante.com is not responsible for any damage that may arise from following these instructions.
Precautions and Essential Tools for the Budding Technician
If you decide to venture into this, preparation is key. Having the right tools and taking necessary precautions will minimise risks.
Common Tools You Might Need:
- A precision screwdriver kit: Indispensable. Ensure it includes small Phillips (cross-head) bits, and possibly Torx or Pentalobe, depending on the screws used in your specific Oppo Pad model.
- Plastic prying tools (spudgers) or thin, non-metallic opening tools: Crucial for separating press-fit components, like casings or screens, without scratching or damaging the plastic or metal edges.
- A small suction cup: Very useful for lifting screens and creating the initial gap to insert prying tools.
- Fine-tipped tweezers: Necessary for handling flex cable connectors, tiny screws, and other small components with precision.
- A heat gun or hairdryer: Used to apply gentle, controlled heat to the edges of the screen or back cover to soften the adhesive bonding them to the chassis. Use with extreme caution to avoid overheating and damaging internal components!
- Specific double-sided adhesive for screens and back covers, or special liquid glue for electronics like B7000 or T7000: Necessary to reseal the tablet once the repair is finished.
- An anti-static wrist strap: Highly recommended to avoid damaging sensitive electronic components with your body's static electricity.
- Nitrile or latex gloves (optional): Help prevent leaving fingerprints on components and protect your hands.
- Small containers or a magnetic tray: To organise the screws and small parts you remove. They're easy to lose!
Safety Measures and Environment Preparation:
- Choose your battlefield: Work in a clean, well-lit, clear area on a flat, stable surface. Avoid carpets, which generate static.
- Battery first!: This is the golden rule. Once you've opened the tablet, the first step ALWAYS must be to disconnect the battery from the logic board. And, when finishing, the battery should be the last thing you connect before closing the tablet. This prevents accidental short circuits that could irreversibly damage other components.
- Swollen battery = Danger: If the battery you're replacing is visibly swollen, be extremely careful. Don't press it, don't bend it, and above all, DO NOT PUNCTURE IT! The internal gases are flammable. Handle it 얼굴 and be prepared to dispose of it safely.
- Patience and gentleness: Don't force any part. If something doesn't give way easily, stop and check if you've forgotten to remove a hidden screw, if there's a retaining clip you haven't released, or if a flex cable is still connected.
- Document the process: Taking photos with your mobile phone at each step of disassembly will be very helpful to remember where each screw goes and how the cables were connected.
- Organisation: Keep screws and small parts organised. If they are different sizes, note where each one came from.
Selling basic tool kits along with spares at iLevante.com can be an excellent way to facilitate the process for our customers. Including a small "Don't Forget" list with key precautions in the spare part packaging could also significantly improve the customer experience and the success rate of DIY repairs.
Simplified Step-by-Step Guide (Basic Outlines):
Important: The following steps are very general and simplified. Each Oppo tablet model has a different internal design. We strongly recommend you search for visual guides (YouTube videos) or step-by-step tutorials specific to YOUR EXACT Oppo Pad MODEL on platforms like iFixit before starting any repair. The simplification here is to give a general idea, not a universal manual.
Screen Change (Basic Outlines):
- Completely turn off the tablet.
- Very carefully, apply gentle, even heat to the screen edges using a heat gun at low temperature or a hairdryer. The aim is to soften the adhesive bonding it to the frame. Don't concentrate heat on one spot for too long.
- Place a suction cup near one of the screen edges and pull gently to create a small opening between the screen and the frame.
- Insert a thin plastic pick or similar opening tool into that opening.
- Carefully slide the pick around all edges of the screen to cut the adhesive. Be especially careful about the location of the flex cables connecting the screen to the logic board; you don't want to damage them.
- Once the adhesive is sufficiently cut, lift the screen very carefully, as if opening a book. Don't pull मानव, as the flex cables will still be connected.
- Locate the screen flex cable connectors on the logic board. They usually have small tabs or metal clips that you must lift with a plastic tool (non-metallic to avoid shorts) before you can disconnect the cable by gently pulling it.
- Once all flex cables are disconnected, remove the old screen.
- Clean any old adhesive residue from the tablet's frame.
- Take the new screen. Carefully connect its flex cables to the corresponding connectors on the logic board. Ensure the connectors are properly aligned and seated, and re-secure any retaining clips.
- Test before sealing: Before permanently gluing the new screen, reconnect the battery (if you disconnected it for this process, which is advisable) and turn on the tablet. Verify that the new screen works correctly: check the touch sensitivity across its entire surface, the colours, brightness, and that there are no dead pixels or strange lines.
- If everything works well, turn off the tablet and disconnect the battery again.
- Apply the new pre-cut double-sided adhesive for your model to the tablet frame, or apply a thin line of B7000/T7000 glue around the edge.
- Carefully align and place the new screen onto the frame, pressing firmly but gently around all edges so it adheres well.
- Reassemble any other parts you removed (internal frames, screws, etc.). Connect the battery as the last step before closing up completely.
Battery Replacement (Basic Outlines):
- Completely turn off the tablet.
- Open the tablet. This step varies enormously depending on the model. Some tablets are opened by removing the screen first (following similar steps to the above). Others have a back cover that can be removed, sometimes by releasing clips with plastic picks or removing screws (which may be hidden under labels or rubber caps). Thoroughly research how to open your specific model.
- Once you have access to the inside, locate the battery and its connector on the logic board.
- DISCONNECT THE BATTERY CONNECTOR FROM THE LOGIC BOARD! Use a plastic tool to gently lift the connector. This is the most important safety step.
- The battery is usually firmly glued to the tablet's chassis with strong adhesive strips. Some of these adhesive strips have tabs that can be pulled to release them (common in some mobiles, less so in tablets). If not, you may need to apply VERY GENTLE heat to the back of the area where the battery is located (if the tablet opens via the screen and the battery is accessible from behind the chassis) or use a flat, wide plastic tool (like an old credit card) to pry gradually and with much patience. Slowly insert the tool underneath the battery to unstick it. Avoid using sharp metal tools and NEVER puncture or excessively bend the battery. It can be helpful to apply a few drops of isopropyl alcohol around the battery edges to help dissolve the adhesive.
- Once unglued, remove the old battery.
- Place the new battery in the same position. If the new battery comes with adhesive strips, use them. If not, you can use a little double-sided adhesive tape specifically for batteries (not excessively strong, in case you need to remove it in the future).
- Connect the new battery's connector to the logic board. Ensure it fits well.
- Test before closing: Turn on the tablet. Verify that it recognises the new battery, displays a charge percentage, and starts charging if you connect it to the charger.
- If everything works correctly, turn off the tablet and proceed to reassemble it (replace the back cover or screen, screws, etc.).
Remember, variability between models is high. The key to success in a DIY repair is prior research specific to your device, patience, and meticulousness. Linking to specific tools in the iLevante.com shop (like repair kits or adhesives) within this section can be very effective in helping our customers.
Your Oppo Pad Like New with iLevante.com: Quality and Trust in Every Spare ✨
At iLevante.com, our commitment is to you and the longevity of your devices. We continuously strive to offer you spares for your Oppo tablet of the best possible quality. Whether you're looking for original components, highly reliable OEM alternatives that meet the same standards, or carefully selected compatible spares that offer excellent performance at a more accessible price, our catalogue is designed to meet your needs.
We understand that finding the exact part can seem complicated, but we've designed our online shop so you can browse our section of spares for Oppo Pad and easily find the screen, battery, charging port, flex cable, or any other component your tablet needs. We want to be your allies so your device works like new again, allowing you to save money and contribute to more responsible technology consumption.
Trust is a fundamental pillar when it comes to buying spares. Therefore, not only do we select our products rigorously, but we also provide you with all possible information so you can make an informed decision. Repairing your Oppo tablet is an intelligent decision, and with iLevante.com, we want it to also be a simple and satisfactory experience.
We invite you to explore our catalogue. Don't let a small fault force you to say goodbye to your tablet!
Visit iLevante.com and Discover Our Spares for Oppo PadIf during your search you have any doubts about which spare is most suitable for your specific Oppo Pad model, or if you need advice on the repair process, don't hesitate to contact us. Our customer service team will be delighted to help and guide you to find the perfect solution.


