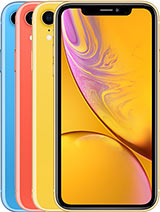
iPhone X Parts
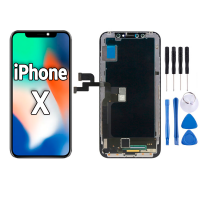






- 🚀 Discover All About Spare Parts for Your iPhone X: Give It a New Lease of Life!
- 📱 iPhone X: A Look at its Key Features
- Super Retina OLED Screen
- A11 Bionic Chip
- Advanced Camera System
- Design and Materials
- Battery and Charging
- 🖼️ Screens for iPhone X: Choose the Best Option for Your Repair
- Types of Replacement Screens for iPhone X
- Comparative Table of Screens for iPhone X
- Important Considerations When Changing the iPhone X Screen
- Basic Guide for iPhone X Screen Replacement
- 🔋 iPhone X Battery: Diagnosis and Solutions for Battery Life
- Original iPhone X Battery Specifications
- When to Change the Battery? Common Symptoms
- Original Apple Batteries vs. Unbranded OEM and Compatible Batteries
- The "Unknown Battery" Message or "Battery Health" Issues
- Basic Guide to Changing the iPhone X Battery
- iPhone X Battery Problem Diagnosis Table
- ✨ iPhone X Back Cover: Repairing the Rear Glass
- Material and Complexity of Replacement
- Basic Guide for Back Cover Replacement (Glass-Only Method)
- 🔩 Essential Spare Parts for Your iPhone X: Find What You Need!
- Top 5 Key Spare Parts for iPhone X
- Other Important Spare Parts for iPhone X
- 🛠️ Beyond the Common: Other Spares for Your iPhone X
- 🔍 Common iPhone X Problems and How to Identify Them
- 👨🔧 Basic Repair Guides: Get to Work (with Caution)
- General Tips Before You Start
- Summary of Steps for Common Repairs
- 🤔 Hardware or Software Problem? A Technical Perspective
- Software Symptoms That Can Be Confused with Hardware Failures
- Basic Software Troubleshooting Steps (Before Opening the Phone)
- When to Consider a Hardware Repair
- 💬 The "Unknown Part" Message on iPhone X
- Origin and Meaning of the Message
- Impact on Functionality
- Can the Message Be Removed?
🚀 Discover All About Spare Parts for Your iPhone X: Give It a New Lease of Life!
The iPhone X, launched in 2017, marked a milestone in the history of Apple and smartphones in general. It was the device that introduced the world to the notch, Face ID technology, and a stunning Super Retina OLED screen that covered almost the entire front. Despite the years that have passed, many users still appreciate its iconic design and solid performance. If you're one of them and your iPhone X needs a repair, you're in the right place! At iLevante.com, we understand that keeping your device in perfect condition is a priority.
This article is your definitive guide to the most common spare parts for the iPhone X, understanding what problems they solve, and how to choose the right part. The complexity introduced by its innovative design, such as the edge-to-edge screen and the removal of the physical home button, which was replaced by gestures and Face ID, means that certain components are more critical and their replacement requires greater attention. A poor-quality spare part or incorrect installation can compromise essential functions. For example, the functionality of the screen and the TrueDepth system is paramount, and an error here can affect the basic usability of the phone.
Furthermore, the ability to repair your iPhone X with quality parts not only saves you money but also contributes to more sustainable consumption. By extending the lifespan of your device, we challenge planned obsolescence and promote a more circular economy in the world of electronics. At iLevante.com, we offer you the components you need to keep your iPhone X working like new.
📱 iPhone X: A Look at its Key Features
To understand what spare parts you might need, it's helpful to remember the features that made the iPhone X such a special phone. These components, due to their advanced nature, are often the focus of repairs.
Super Retina OLED Screen
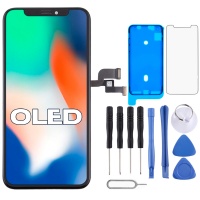
The iPhone X was Apple's first phone to incorporate an OLED screen, called Super Retina HD. This 5.8-inch borderless Multi-Touch screen offers a resolution of 2436 x 1125 pixels at 458 ppi, which translates to exceptional sharpness and clarity. It incorporates technologies such as HDR, True Tone (which adjusts the white balance according to ambient light), and a wide colour gamut (P3), in addition to pressure-sensitive 3D Touch. The quality of this screen is one of its strong points, so a replacement must be up to par to maintain the original visual experience.
A11 Bionic Chip
At its heart, the iPhone X beats with the A11 Bionic chip, a six-core processor with 64-bit architecture (two high-performance cores called Monsoon and four energy-efficient cores called Mistral). This chip also includes a dedicated neural engine for artificial intelligence tasks, such as Face ID processing, and an M11 motion coprocessor. Accompanied by 3GB of RAM, the A11 Bionic provides the necessary power for smooth performance, even in demanding applications and games. The integrity of the logic board, where this chip resides, is fundamental to the overall operation of the device.
Advanced Camera System
The iPhone X is no slouch in photography:
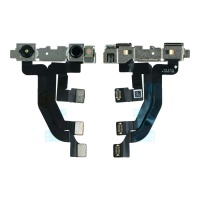
- TrueDepth Front Camera: A 7-megapixel camera with an ƒ/2.2 aperture, it's much more than just a selfie camera. It's the core of the Face ID system, integrating a dot projector, an infrared camera, and an IR illuminator to map the user's face. It also enables Portrait mode and the popular Animojis. Its repair or replacement is a delicate task due to its link with the device's security.
- Dual Rear Cameras: It consists of two 12-megapixel sensors: a wide-angle with an ƒ/1.8 aperture and a telephoto with an ƒ/2.4 aperture. Both lenses feature optical image stabilisation (OIS), and the lens cover is made of sapphire crystal for greater scratch resistance. This system allows for optical zoom and Portrait mode with lighting effects.
Design and Materials
The iPhone X boasts an elegant design with a glass front and back, joined by a surgical-grade stainless steel band. This construction, although premium, makes the back cover vulnerable to breakage, making it a frequently sought-after spare part. The device has an IP67 rating for water and dust resistance, a feature that can be compromised if a repair is not sealed correctly.
Battery and Charging
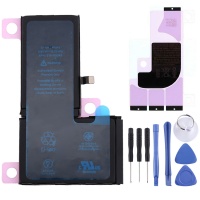
The iPhone X's battery life depends on an integrated rechargeable lithium-ion battery, with an approximate capacity of 2716 mAh. It is compatible with standard Qi wireless charging thanks to its glass back and also supports fast charging. Over time, battery degradation is inevitable, being one of the main reasons for seeking a replacement.
It's important to highlight how the advanced features of the iPhone X imply a high interdependence between its components. For example, the Face ID system not only depends on the front camera but also on a set of sensors (dot projector, infrared camera, IR illuminator) that are often integrated into different flex cables, such as the earpiece flex. Damage to one of these flex cables, perhaps during a screen repair, could render Face ID unusable. Similarly, wireless charging depends on an internal coil that can be damaged if care is not taken when replacing the back cover. Therefore, the user must be aware that even an apparently simple repair can have consequences if not performed with the proper knowledge and tools, underscoring the importance of quality spare parts and, in many cases, seeking qualified technical help to avoid problems such as loss of functionality or "unknown part" messages.
🖼️ Screens for iPhone X: Choose the Best Option for Your Repair
The Super Retina OLED screen of the iPhone X is one of its jewels, so if you need to replace it, it's crucial to choose wisely. At iLevante.com, we offer several options so you can find the one that best suits your needs and budget.
Types of Replacement Screens for iPhone X
There are various technologies and qualities in the replacement screen market:
- Original Apple (OLED Refurbished/Pulled): These are Apple-manufactured OLED screens, often recovered from other devices and reconditioned (e.g., with new glass if the original was damaged but the OLED panel was intact). They offer the image quality, colours, brightness, and True Tone compatibility most faithful to the original. They are the premium option.
- Soft OLED (Premium Aftermarket): These screens use a flexible plastic substrate, similar to Apple's original ones. This gives them greater durability against minor twists and an image quality very close to the original, with excellent colours and deep blacks. They are usually the best aftermarket alternative in terms of quality for money.
- Hard OLED (Standard Aftermarket): Unlike Soft OLEDs, Hard OLEDs are built on a rigid glass substrate. They are cheaper, but this rigidity makes them more fragile and susceptible to breaking from impacts or pressure during installation. Image quality is generally good, but the bezels may be slightly thicker, and the colours or brightness might not be identical to the original.
- INCELL / TFT LCD (Basic Aftermarket): These are the cheapest screens. Instead of OLED technology, they use LCD technology (as in iPhones prior to the X, for example, the iPhone 8). This means that the image quality is noticeably different: blacks are not pure (they tend to be dark grey due to constant backlighting), colours may be less vibrant, contrast is lower, and energy consumption tends to be higher. Additionally, these screens are usually a bit thicker.
Comparative Table of Screens for iPhone X
| Screen Type | Image Quality (Colour, Contrast, Blacks) | Brightness | Viewing Angles | Energy Consumption | Flexibility/Resistance | True Tone Preservation (with reprogramming) | Relative Price |
|---|---|---|---|---|---|---|---|
| Original Apple (OLED Refurbished/Pulled) | Excellent (faithful to original) | Excellent | Excellent | Optimised (OLED) | Very Good (flexible) | Yes (if IC is transferred or reprogrammed) | €€€€ |
| Premium Soft OLED | Very Good (almost original) | Very Good | Very Good | Good (OLED) | Very Good (flexible) | Yes (if IC is transferred or reprogrammed) | €€€ |
| Standard Hard OLED | Good | Good | Good | Good (OLED) | Fair (rigid, more fragile) | Yes (if IC is transferred or reprogrammed) | €€ |
| Basic INCELL/TFT LCD | Fair (less vibrant colours, greyish blacks) | Fair | Fair | Higher (LCD) | Fair (rigid) | Yes (if IC is transferred or reprogrammed) | € |
Note: Preserving True Tone generally requires transferring the microchip (IC) from the original screen or reprogramming the new screen with specialised tools.
Important Considerations When Changing the iPhone X Screen
- Loss of True Tone: As mentioned, if the information from the original screen's chip is not transferred to the new one (or reprogrammed with tools like the JC V1S, for example), the True Tone function will be lost, even if the replacement screen is of high quality.
- "Unknown Screen" Message: Although more common in later models, iOS may display a notification in `Settings` if it detects that the screen is not an original Apple-verified part, even if it's an original screen installed by a third party. This is mainly informational and does not usually affect the touch or visual functionality of a quality screen.
- Beware of Face ID!: The upper earpiece assembly, which contains vital sensors for Face ID (such as the infrared illuminator and dot projector, although the latter is more integrated with the front camera), must be carefully transferred from the old screen to the new one. If this assembly or its delicate flex cables are damaged during the process, Face ID could stop working permanently.
Choosing a lower quality screen, such as an LCD or a low-end Hard OLED, not only affects the visual experience. It can also impact battery life, as LCD screens tend to consume more energy due to the need for constant backlighting, unlike OLEDs where black pixels are turned off. Furthermore, Hard OLED screens, being more rigid, are more susceptible to damage from torsion or during installation if not handled carefully. At iLevante.com, we recommend opting for Soft OLED screens or, if the budget allows, original reconditioned ones to ensure the best experience and durability.
Basic Guide for iPhone X Screen Replacement
Changing the iPhone X screen is a delicate task. If you decide to do it yourself, here are some general steps. Remember that this is a basic guide, and working on your iPhone carries risks. If you don't feel confident, go to a professional.
- Preparation: You'll need specific tools: a Pentalobe P2 screwdriver (for the bottom screws), a Y-Type Y000 or Tri-Point screwdriver (for internal screws), a suction cup, plastic opening picks, a plastic spudger, anti-static tweezers, and optionally, a heat gun or hairdryer to soften the adhesive. Work in a clean, well-lit, and organised area.
- Power Off and Bottom Screws: Completely turn off your iPhone X. Remove the two Pentalobe screws located on either side of the Lightning port.
- Opening the Screen: Apply moderate heat (don't overdo it!) to the edges of the screen to soften the waterproof adhesive. Place a suction cup near the bottom edge and gently pull to create a small gap. Insert a thin plastic pick into that opening. Slide the pick along the edges to cut the adhesive. The iPhone X opens like a book, with the hinges on the left side (the screen's flex cables are on the right side when looking at the open phone from the front). Be very careful not to insert the pick too deep to avoid damaging internal cables!
- Battery Disconnection: Once the screen is open, locate the metal shield covering the battery and screen connectors. Remove the screws (Y-Type) and the shield. ALWAYS disconnect the battery connector first using a plastic spudger to avoid short circuits.
- Screen Disconnection: Disconnect the flex cables for the screen and the front earpiece/sensor assembly from the logic board. Now you can remove the screen completely.
- Earpiece Assembly Transfer: This is the most critical step. Very carefully, disassemble the earpiece speaker, proximity sensor, microphone, and Face ID components (like the IR illuminator) from your old screen and transfer them to the new screen. It's held in place with small screws and adhesive. Damage here can render Face ID useless.
- Connection and Testing: Connect the cables of the new screen and the earpiece assembly to the logic board. Reconnect the battery (temporarily). Turn on the iPhone and test the functionality of the new screen (touch, image, brightness) and Face ID before sealing the phone.
- Sealing and Closing: If everything works, disconnect the battery again. Place a new screen adhesive on the chassis frame if you want to maintain some degree of water resistance. Reattach the metal shields with their respective screws. Close the screen, fitting the top edge first and then gently pressing around the edges. Finally, replace the two bottom Pentalobe screws.
By offering a clear range of screen options and honestly explaining the differences, along with information on preserving True Tone and Face ID, at iLevante.com we aim to position ourselves as a reliable and expert supplier. We want you to make the best decision for your iPhone X.
🔋 iPhone X Battery: Diagnosis and Solutions for Battery Life
The battery is the energy heart of your iPhone X. Over time and with use, all rechargeable batteries degrade. If you notice that your iPhone X doesn't last as long as it used to, you may need a replacement.
Original iPhone X Battery Specifications
The iPhone X is equipped with an internal, non-user-removable lithium-ion (Li-Ion) battery. Its original capacity is approximately 2716 mAh. This capacity was designed to offer a good balance between device size and all-day battery life.
When to Change the Battery? Common Symptoms
Identifying the right time to change the battery is key:
- Battery Health Below 80%: Apple states that a battery is significantly degraded when its maximum capacity drops below 80% of its original design. You can check this in `Settings > Battery > Battery Health & Charging` (on more recent iOS versions) or `Battery Health` (on older versions).
- Unexpected Shutdowns: If your iPhone X suddenly turns off, even when the battery indicator shows there's still charge left (e.g., at 20% or 30%), it's a clear sign that the battery can no longer supply the peak power the system needs.
- Rapid Charge Drain: The battery drains much faster than it used to, forcing you to charge the phone multiple times a day with similar usage.
- Reduced Performance (Throttling): With severely degraded batteries, iOS may reduce the processor's maximum performance to prevent shutdowns. This can make the iPhone feel slower when opening apps or performing tasks. The "Peak Performance Capability" section in Battery Health will inform you if this management is active.
- Swollen Battery: In rarer and more serious cases, a faulty or very old battery can swell. This can cause the screen to lift, pressure spots to appear, or even the casing to deform. A swollen battery is a safety hazard and must be replaced immediately and with extreme caution.
- High Charge Cycles: Although not data the iPhone displays directly to the user, lithium-ion batteries have a finite number of full charge cycles (charging from 0% to 100%). For models like the iPhone X, they are expected to maintain over 80% of their health after about 500 cycles under ideal conditions.
Original Apple Batteries vs. Unbranded OEM and Compatible Batteries
When looking for a replacement, you'll find several options:
- Original Apple Batteries: These are designed and manufactured under Apple's strict quality and safety standards. They guarantee full compatibility with iOS, including correct battery health indication (if installed by Apple or an authorised service provider). They can be new or recovered from other devices ("pulled") in perfect condition.
- Unbranded OEM (Original Equipment Manufacturer) Batteries: These batteries are produced by manufacturers who meet specifications very similar to the original ones, and sometimes are the same ones who manufacture for Apple, but they do not carry the brand's logo. If they come from a trusted supplier, they can offer quality and performance very close to the original at a more affordable price. At iLevante.com, we strive to offer this type of high-quality battery.
- Compatible/Generic Batteries: The market is flooded with compatible batteries of highly variable quality. Some recognised brands offer good alternatives. However, there are many others of low quality that may have lower capacities than advertised, a short lifespan, or even lack adequate protection circuits, which could be a risk.
It's crucial to understand that using a low-quality battery or incorrect installation will not only result in poor battery life but can also pose safety risks such as overheating or swelling, potentially damaging other internal components of the iPhone X. Quality batteries incorporate a BMS (Battery Management System) that regulates charging and discharging safely.
The "Unknown Battery" Message or "Battery Health" Issues
If you replace the battery in your iPhone X, especially with more recent iOS versions, you may see a message in `Settings > Battery` stating "Unable to verify this iPhone has a genuine Apple battery. Health information not available for this battery." or similar. This can happen even if the battery is a high-quality OEM part or an original Apple battery installed by an unauthorised third party.
This message does not necessarily mean the battery is bad. It's an operating system notification. The battery will work, charge, and provide power. However, the "Battery Health" feature that displays the maximum capacity percentage might not be available or might show a dash. To avoid this message and maintain the health reading, some advanced technicians can transplant the BMS (the small circuit board) from the original battery to the new cell, a process that requires micro-soldering and is not recommended for the average user.
Basic Guide to Changing the iPhone X Battery
Warning: Lithium-ion batteries can be dangerous if punctured, damaged, or mishandled. Proceed with extreme caution. Discharge the battery to below 25% before starting to reduce risks. If the battery is swollen, be even more careful and consider seeking professional help.
- Opening the Device: Follow the same steps 1 to 3 from the screen replacement guide to open your iPhone X (remove Pentalobe screws, heat edges, use suction cup and picks to separate the screen).
- Battery and Screen Disconnection: Once the screen is open, remove the metal shield and disconnect the battery connector FIRST. Then, disconnect the screen flex cables and carefully remove it for better access.
- Removing the Adhesive Strips: The iPhone X battery is secured to the chassis by elastic adhesive strips. Locate the black tabs of these strips at the bottom edge of the battery. Pull each tab slowly and at as low an angle as possible, wrapping it around tweezers if necessary. If the strips break (which is common), you'll have to gently pry under the battery with a plastic spudger (never a metal or sharp one, to avoid puncturing it!). You can apply a few drops of isopropyl alcohol around the battery edges to help dissolve the adhesive, waiting a few minutes before attempting to lift it. Do not bend or puncture the battery.
- Removing the Old Battery: Once freed from the adhesive, remove the old battery.
- Preparing and Installing the New Battery: Clean any adhesive residue from the chassis. Place the new iPhone X-specific battery adhesive strips on the chassis or the back of the new battery. Place the new battery in its compartment and press firmly for the adhesive to set.
- Connection and Testing: Connect the new battery's flex cable to the logic board. Then, reconnect the screen. Turn on the iPhone to ensure it recognises the battery, that it charges, and that the phone powers on correctly.
- Closing and Calibration: If everything is in order, turn off the iPhone, disconnect the battery and screen to reattach the metal shields with their screws. Reconnect everything, seal the phone with new screen adhesive if you have it, and close it up. Once replaced, it's advisable to calibrate the new battery: charge it to 100% and leave it charging for at least two more hours. Then, use the iPhone until it powers off due to low battery. Finally, charge it back to 100% without interruption.
At iLevante.com, we offer high-quality replacement batteries for your iPhone X, along with the necessary information for you to make the best decision. We understand that the "unknown battery" message can cause concern, but a quality OEM battery will work perfectly to restore your device's battery life.
iPhone X Battery Problem Diagnosis Table
| Common Symptom | Possible Battery-Related Cause | Recommended Action |
|---|---|---|
| Battery health < 80% | Natural battery degradation. | Consider replacement to restore optimal performance and battery life. |
| Unexpected shutdowns (with remaining charge) | Battery unable to supply peak power demands. | Battery replacement highly recommended. |
| Very rapid charge drain | Reduced capacity, deteriorated internal cells. | First check for software causes (apps, iOS). If it persists, replace battery. |
| iPhone runs slow (throttling) | iOS manages performance to prevent shutdowns with a degraded battery. | Replacing the battery can restore peak performance. |
| Swollen battery | Serious internal battery failure. | DANGER. Urgent replacement and with extreme caution. Do not use or charge the phone. |
This table will help you determine if the problems you're experiencing with your iPhone X are likely linked to the battery, thus justifying the purchase of a spare part.
✨ iPhone X Back Cover: Repairing the Rear Glass
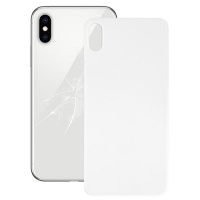
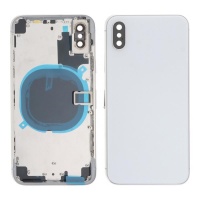
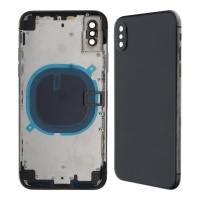
The iPhone X features an elegant glass back cover, essential for the wireless charging function. However, this beauty is fragile, and a drop can result in unsightly cracks or a complete shatter. Replacing it is possible, but it's one of the most challenging repairs.
Material and Complexity of Replacement
The glass back cover of the iPhone X is strongly bonded to the metal chassis with industrial adhesive. Additionally, components like the wireless charging coil (located in the centre), the LED flash, and several flex cables are very close to or even attached to it. This makes its removal a laborious and risky process.
There are mainly two approaches to repair:
- Glass-Only Replacement: This method involves removing the broken glass fragments from the original chassis. It requires applying intense and constant heat with a heat gun to soften the adhesive, and then, using thin and strong metal tools (like spudgers or special blades), carefully lifting and removing the glass pieces. The risk of damaging the wireless charging coil, cutting a flex cable (like the one for the power button/flash), or even puncturing the battery is very high without experience and extreme caution. Professionals often use laser machines that pulverise the adhesive under the glass, making it easier to remove, but these machines are not accessible to the average user.
- Complete Chassis Replacement with Pre-installed Cover: This option involves purchasing a new chassis that already includes the glass back cover installed from the factory. Although it can be more expensive, it eliminates the risky process of removing the broken glass. However, it requires transplanting absolutely all internal components of the iPhone X (logic board, battery, cameras, speakers, Taptic Engine, all flex cables, etc.) to the new chassis. It's an equally complex and lengthy task, but with less risk of damaging components while trying to remove the glass.
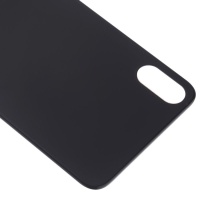
Some replacement back covers are sold with a "large hole" for the rear camera module. This means the opening for the lenses is wider, theoretically allowing the cover to be installed without needing to remove the camera module from the chassis. However, the final fit and aesthetics might not be identical to the original, and dust protection for the lenses could be compromised if not sealed well.
Basic Guide for Back Cover Replacement (Glass-Only Method)
VERY IMPORTANT WARNING: This repair is EXTREMELY difficult and carries a very high risk of causing irreparable damage to other vital components of your iPhone X. It is recommended only for technicians with extensive experience and the proper tools. For most users, it is safer to consider replacing the entire chassis or seeking professional service. iLevante.com is not responsible for any damage you may cause to your device.
If you still decide to try it (at your own risk):
- Complete Disassembly (Recommended): To minimise risks, the safest approach is to completely disassemble the iPhone X: remove the screen, battery, logic board, and all other internal components. Working on an empty chassis reduces the likelihood of damaging something with heat or tools. Trying to remove the glass with components inside is extremely risky.
- Necessary Tools: Heat gun (not a hairdryer, more controlled temperature is needed), safety goggles, thick work gloves (to protect from cuts), thin and strong metal spudgers, opening picks, tweezers, and new iPhone X-specific back cover adhesive.
- Heat Application: Evenly heat the back cover with the heat gun to soften the adhesive. Move the gun constantly to avoid concentrating heat in one spot, which could damage underlying components if not removed, or the chassis itself. The glass should be hot to the touch, but not scalding.
- Removing the Broken Glass: This is the most critical and tedious step. Wearing goggles and gloves, find an entry point (a large crack) and insert a thin metal tool to start lifting the glass pieces. Continue breaking and removing small fragments. Be especially careful around the wireless charging coil area and the edges where flex cables run. It's a slow process requiring a lot of patience and controlled force.
- Cleaning the Chassis: Once all the glass is removed, meticulously clean the chassis of any adhesive residue and small glass fragments. The surface must be perfectly smooth. You can use isopropyl alcohol to help dissolve the adhesive.
- Applying New Adhesive and Cover: Apply the new pre-cut adhesive (if you have it) or a specific liquid adhesive for back covers to the chassis. Carefully place the new glass cover, ensuring it's perfectly aligned with the edges and camera openings. Press firmly for it to adhere well.
- Reassembly: If you disassembled the internal components, reinstall them all in reverse order of disassembly.
The high probability of causing additional damage when attempting to replace only the back glass (such as to the wireless charging coil or even the battery) could make the final repair cost exceed that of a professional service or a complete chassis. At iLevante.com, we recommend you carefully weigh the risks. We offer replacement glass back covers, but we also encourage you to consider the complete chassis if you're looking for a safer option for an advanced DIY repair, and we always warn about the difficulty of this specific procedure.
🔩 Essential Spare Parts for Your iPhone X: Find What You Need!
Beyond screens and batteries, your iPhone X has many other components that may require replacement. Here are some of the most important ones and their associated problems.
Top 5 Key Spare Parts for iPhone X
-
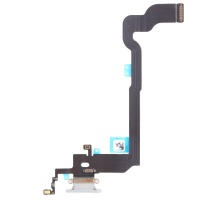
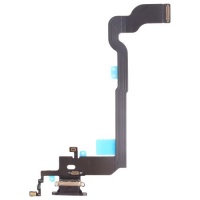
Charging Port (Lightning Connector Assembly):
- Common Problems: The iPhone X doesn't charge or charges intermittently, the Lightning cable doesn't fit well or comes loose, the computer doesn't recognise the device for data transfer, or problems with the bottom microphone during calls (as it's often integrated into the same flex cable). Often, accumulated dirt in the port is the culprit, but if a careful cleaning doesn't solve the problem, the port might be internally damaged.
- Flex Components: This assembly is more than just a connector. On the iPhone X, the Lightning port flex cable usually includes the Lightning connector itself, one or two bottom microphones (crucial for calls and Siri), and connection points for lower cellular antennas. This integration means a port failure can also affect call quality or reception.
- Replacement (Medium-High Difficulty): Changing it involves opening the phone, disconnecting the battery and screen. Then, other components like the bottom speaker and Taptic Engine need to be removed to access and carefully detach the charging port flex assembly from the chassis. The new components are reconnected and tested before closing.
- Basic guide for replacing the iPhone X charging port:
- Follow the initial steps for opening the device (remove Pentalobe screws, apply heat if necessary, carefully separate the screen using a suction cup and picks, and open like a book).
- Disconnect the battery first. Then, disconnect the screen flex cables and remove it.
- Remove the screws holding the bottom speaker and Taptic Engine. Disconnect and remove them to access the charging port flex.
- Disconnect the multiple connectors of the charging port flex from the logic board and any other components it might be attached to (like antenna cables). Pay close attention to how they are positioned.
- Very carefully, peel the charging port flex from the iPhone's chassis. It may be adhered. Pay special attention to the microphones to avoid damaging them and ensure the port itself comes out without forcing.
- Place the new charging port flex, ensuring all its components (microphones, connector) sit correctly in their guides and openings in the chassis.
- Reconnect all flex cables to the logic board. Reinstall the Taptic Engine and bottom speaker.
- Temporarily connect the screen and battery. Turn on the iPhone and test charging, syncing with a computer, and the bottom microphone functionality.
- If everything works correctly, proceed to close the phone following the steps in reverse.
-
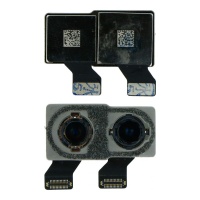
Dual Rear Camera:
- Common Problems: Photos are blurry, out of focus, or have spots or strange artefacts. The camera app shows a black screen, closes unexpectedly, or doesn't allow switching between the wide-angle and telephoto lenses. The flash might not work correctly if the problem lies with the camera module and not the flash flex (which on the iPhone X is with the power button).
- Components: It's a single module containing both lenses (wide-angle and telephoto), their respective image sensors, and a flex cable for connection to the logic board.
- Replacement (Medium Difficulty): Requires opening the iPhone, disconnecting the battery and screen. A small metal shield covering the camera connector is removed, the flex is disconnected, and the module is extracted. Installing the new one is the reverse process.
-
Front Camera with IR (TrueDepth System):
- Common Problems: The most obvious symptom is that Face ID doesn't work. Messages like "Face ID not available" or "Could not activate Face ID" may appear. Portrait mode on the front camera or Animojis might also fail. It's important to note that the selfie camera for photos might still work, but the specific infrared components for Face ID (dot projector, IR camera) are the ones affected.
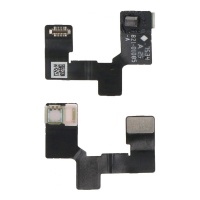
- Critical Components: The iPhone X TrueDepth system includes the front camera (for selfies), the dot projector (which emits thousands of invisible dots onto the face), the infrared camera (which reads that dot pattern), and the infrared illuminator or "flood illuminator" (which helps in low light conditions and is usually on the earpiece flex). All these components are "married" or cryptographically linked to the iPhone's CPU.
- Replacement and Implications for Face ID: This is a critical point. Replacing the front camera module, dot projector, or IR camera with a new part (even an original one from another iPhone) without specialised reprogramming (which generally only Apple or centres with very advanced tools can perform for certain components) will result in the permanent loss of Face ID functionality. Often, if Face ID fails, the problem may lie with the earpiece flex (where the flood illuminator is) and not directly with the main front camera module. Face ID repair is one of the most complex and often involves micro-soldering to transfer original components to a new flex.
-
Earpiece Flex with Proximity Sensor (and Face ID components):
- Common Problems: No audio is heard through the top earpiece speaker (the one you put to your ear) during calls. The screen doesn't turn off automatically when you bring the phone to your face during a call (proximity sensor failure). The screen's automatic brightness doesn't work correctly (ambient light sensor failure). And, very importantly, Face ID failures.
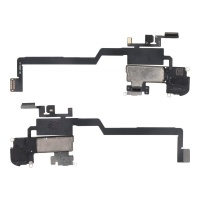
- Integrated Components: This flex cable is a concentration of technology. It houses the earpiece speaker, proximity sensor, ambient light sensor, a secondary microphone (for noise cancellation or Siri), and crucially, the infrared illuminator (Flood Illuminator), which is an essential part of the Face ID system.
- Replacement and Implications for Face ID: When replacing a broken screen, this entire assembly must be transferred from the old screen to the new one. If this flex is damaged during the transfer, or if the entire flex is replaced with a new one (even if it's an original from another phone) without meticulously transferring the original Face ID components (especially the IR illuminator, which requires micro-soldering), Face ID will stop working. Most screen replacement kits do not include this assembly; the technician is expected to transplant it. Buying this flex separately and installing it "as is" will almost certainly disable Face ID.
-
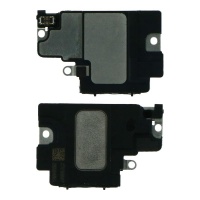
Main Speaker (Bottom or Loudspeaker):
- Common Problems: No sound is heard for ringtones, alarms, music, or videos played in speaker mode. The sound is distorted, crackling, or excessively low even though the volume is at maximum.
- Components: The speaker module itself and its connection to the logic board, sometimes via a small interconnecting flex cable.
- Replacement (Medium Difficulty): It's accessed after removing the screen. It's usually held by several screws and sometimes covered by other components like the Taptic Engine or charging flex.
Many flex cables in the iPhone X are multifunctional, integrating several components. For example, the power button flex not only contains the switch but also the rear LED flash and a microphone. Similarly, the earpiece flex is vital not only for call audio and proximity/light sensors but also for a key part of Face ID. This high integration means that damage to one part of a flex can affect several functions that, at first glance, might not seem related. This underscores the importance of accurate diagnosis and detailed descriptions of spare parts, so that as an iLevante.com customer, you know exactly which part you need and what functions are associated with it.
Other Important Spare Parts for iPhone X
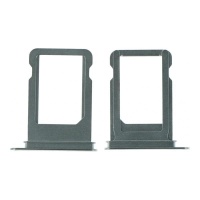
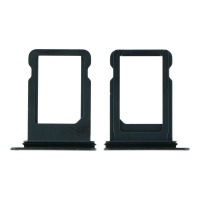
- SIM Tray (with water-sealing ring): This is the small removable piece where the Nano-SIM card is placed. The small rubber ring around it contributes to the device's water resistance. It's easily replaced if lost, bent, or if the ring is damaged.
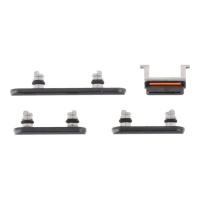
- Side Buttons (Volume, Mute, Power - external): These are the physical covers of the buttons you press. Replacement may be necessary due to aesthetic wear, if they fall off, or break. They should not be confused with the internal flex cables that contain the switches these buttons operate.
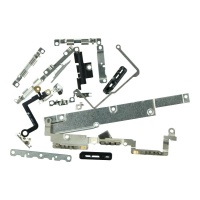
- Brackets and Internal Parts: The iPhone X contains numerous small metal plates, shields, and brackets that secure flex cable connectors to the logic board and keep other components in place. It's common to lose or damage them during a repair. It's vital to replace each one and use the correct screw in the correct place, as a screw that's too long can damage the logic board.
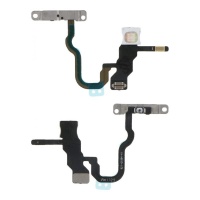
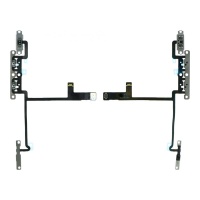
- Power Button Flex Cable: This important flex includes the internal switch for the power/lock button. On the iPhone X, this same flex also integrates the rear LED flash and a microphone used for video recording or noise cancellation. If the power button doesn't respond, the flash doesn't work, or there are problems with that specific microphone, this is the spare part you need.
- Flash Light Flex Cable: As just mentioned, on the iPhone X, the rear LED flash light is integrated into the same flex cable as the power button and a microphone. It is not a separate part as in some older iPhone models.
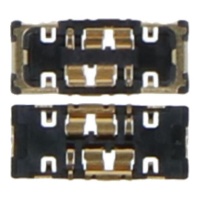
- Battery FPC Connector (on logic board): This is the socket on the mainboard where the battery flex cable plugs in. It can be damaged by mishandling when connecting/disconnecting the battery. Its replacement is an advanced repair requiring micro-soldering.
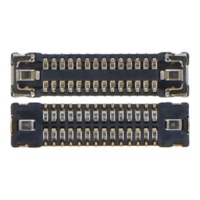
- LCD FPC Connector (on logic board): Similar to the above, this is the connector on the mainboard for the main screen flex cable (which transmits the image). If damaged, the screen may not display an image or may show artefacts. It also requires micro-soldering for replacement.
- Touch Screen FPC Connector (on logic board): This is the connector on the board for the screen's touch digitiser flex cable. Damage here can cause the touch to not work or work erratically. Its replacement involves micro-soldering.
- Volume Flex: This flex cable contains the internal switches for the volume up and down buttons and often also the mute switch (though sometimes the latter can be on a separate flex or with the power flex, depending on the exact model design). If the volume buttons don't respond or the mute switch doesn't work, this flex is usually the culprit.
- Main Speaker Flex (Interconnect Cable): In some cases, the bottom loudspeaker doesn't connect directly to the logic board but via an intermediate flex cable that does connect to the board. This cable can also fail, causing sound problems with the main speaker.
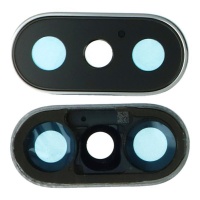
- Rear Camera Lens and Frame: This refers to the external glass that protects the rear camera lenses and the small metal frame around it. The glass, although sapphire, can be scratched or broken by an impact. It's possible to replace just the glass (a delicate task requiring heat and great care not to damage the internal camera lenses), or the glass assembly with its small adhesive bezel. It's important to note that the large structural "frame" of the cameras is an integral part of the phone's chassis.
For iLevante.com, it's crucial to list these spare parts with very precise descriptions detailing all integrated components in each flex cable. This helps the customer buy the correct part and understand the full scope of the repair they are undertaking.
🛠️ Beyond the Common: Other Spares for Your iPhone X
In addition to the main components, there are other internal parts that can fail and affect your iPhone X user experience. Knowing about them will help you better diagnose any problems.
- Taptic Engine: This is the haptic feedback motor in the iPhone X, responsible for the subtle vibrations you feel when interacting with the interface, receiving notifications, or using 3D Touch. If vibrations become weak, erratic, noisy, or disappear altogether, the Taptic Engine likely needs replacing. It's a relatively easy modular component to change once the phone is open.
- Antennas (Wi-Fi, Bluetooth, Cellular): The iPhone X has a complex system of internal antennas to ensure good Wi-Fi, Bluetooth, and cellular connectivity. If you experience persistent problems like weak or intermittent Wi-Fi signal, difficulty pairing Bluetooth devices, or noticeably worse cellular reception than before (after ruling out issues with your carrier or software), one of these antennas could be damaged or disconnected. This can happen after a hard drop or a previous repair where they weren't handled carefully.
- Additional Microphones: We've already mentioned the microphones integrated into the charging flex and the power/flash button flex. The iPhone X also has a microphone in the top earpiece assembly (for noise cancellation and Siri). If audio quality is poor in specific situations (e.g., Siri doesn't understand you well, or videos recorded with the rear camera have bad sound), it could be a failure of one of these specific microphones.
- Screen and Battery Adhesives: These aren't functional components per se, but they are crucial for a well-done repair. The screen adhesive is a thin strip that seals the edge between the screen and the chassis, helping to maintain resistance to dust and splashes (though it never restores it to the factory IP67 level). Battery adhesive strips ensure it stays fixed in place, preventing movement that could damage connectors. It's highly recommended to use new adhesives in every repair.
- Screw Sets: During the disassembly of an iPhone X, you'll encounter multiple screws of different sizes (Pentalobe, Y-Type, Phillips) and lengths. It's extremely easy to lose one or, worse, mix them up and use an incorrect screw in a hole where it doesn't belong, which can cause serious damage, especially to the logic board. Having an iPhone X-specific replacement screw set can save you a lot of trouble.
Components like correct adhesives and screws, although they may seem like minor details, are fundamental to the structural integrity, durability, and even safety of your iPhone X after a repair. Omitting screen adhesive can leave the device vulnerable to dust and moisture ingress, as well as causing the screen not to sit properly. Using a screw that is too long in certain points on the logic board can pierce internal layers and cause a short circuit or irreparable damage. The absence of a small metal bracket can leave a flex cable connector loose, which could lead to intermittent failures of that function. At iLevante.com, when offering you the main spare parts, we also recommend you consider these "small big details" so that your repair is as complete and professional as possible.
🔍 Common iPhone X Problems and How to Identify Them
Over time, even a device as well-built as the iPhone X can develop certain problems. Here we list some of the most common ones and how you can start to identify them:
- Screen Problems:
- "Green Line of Death": A thin vertical green line that appears persistently on the OLED screen. It's often a defect in the panel itself and requires screen replacement.
- Screen Unresponsive to Touch (or modern "Touch Disease"): Touch functionality stops working across the entire screen or in specific areas. Sometimes it can be related to extreme cold temperatures (although Apple released an update, iOS 11.1.2, to mitigate this), but more commonly, it's due to damage to the screen's digitiser or its FPC connector.
- Screen Burn-in: If a static image (like status bar icons or a keyboard) is displayed for a very long time at high brightness, it can leave a permanent "shadow" on the OLED screen. It's less common with normal, varied use.
- Dead or Stuck Pixels: Small dots on the screen that remain black or a fixed colour, regardless of what's being displayed.
- Cracks and Shatters: Obvious physical damage from drops or impacts.
- Battery Problems: As we've detailed extensively, symptoms include rapid charge drain, unexpected shutdowns, a very low "Battery Health" percentage in Settings, or even physical battery swelling.
- Charging Problems: The iPhone doesn't charge when connected, charging is intermittent, the cable doesn't make good contact, or it's not recognised by the computer. This can be due to dirt in the Lightning port, a faulty cable or charger, or a failure in the phone's charging port itself. Wireless charging can also fail if the internal coil is damaged.
- Camera Problems (Rear or Front): Blurry photos, focusing issues, the camera app shows a black screen or closes, the flash doesn't work, or you can't switch between different modes or lenses.
- Sound Problems: Nothing is heard through the earpiece speaker during calls, or the main (bottom) speaker doesn't emit sound for music or notifications, or the sound is distorted or of very low quality.
- Face ID Failures: The iPhone X doesn't recognise your face, displays messages like "Face ID Not Available" or "Unable to activate Face ID," or the unlocking process is very slow or erratic.
- Overheating: The phone gets excessively hot, especially during charging, when using demanding applications (games, video editing), or evenアイドル (at idle) in some cases.
- Unresponsive Buttons: The physical volume, power/lock buttons, or mute switch may get stuck, not "click," or fail to register a press. This is often due to a failure in the internal flex cable they are connected to, rather than the external button itself.
It's interesting to note how certain design features of the iPhone X make it more susceptible to specific types of failures. For example, its innovative TrueDepth system for Face ID, although revolutionary, introduced a set of delicate sensors (dot projector, infrared camera) that can fail or become misaligned, especially if the phone is dropped or if screen repairs are performed incorrectly without due care for the earpiece assembly. Similarly, the decision to use glass on both the front and back, while allowing for wireless charging and a premium design, increased vulnerability to breakage on both surfaces. By detailing these common problems and linking them to the specific spare parts that solve them, at iLevante.com we aim to help you diagnose your problem and find the right solution, improving your experience and allowing you to perform more effective searches like "my iPhone X not charging" or "iPhone X Face ID not working".
👨🔧 Basic Repair Guides: Get to Work (with Caution)
Embarking on an iPhone X repair can be a rewarding experience, but it requires preparation, patience, and the right tools. Here are some general tips and reminders about the basic steps for the most common repairs.
General Tips Before You Start
- Research Thoroughly: Before touching a single screw, watch several tutorials (YouTube videos, written guides from sites like iFixit) specific to the repair you're going to perform on an iPhone X. Each model and each repair has its own peculiarities.
- Get the Right Tools: Don't try to use makeshift tools. You'll need precision screwdrivers (Pentalobe P2 for the exterior, Y-Type Y000 or Tri-Point and Phillips #000 for the interior), plastic opening tools (picks, spudgers), a suction cup, fine-tipped tweezers (preferably anti-static), and for some repairs like the back cover or screen, a heat gun or hairdryer. A bad tool can damage small screws or components.
- Organise Screws and Parts: The iPhone X uses many tiny screws of different sizes! It's crucial to keep them organised to know exactly where each one goes during reassembly. Use a magnetic mat with compartments, small labelled containers, or draw a diagram of the phone and tape the screws to their corresponding locations. Placing an incorrect screw can seriously damage the logic board.
- Work with Patience and Care: Don't force any parts. If something doesn't give easily, stop and check if you've forgotten to remove a screw, if there's a hidden clip, or if a flex cable is still connected. Rushing is the worst enemy in these repairs.
- Anti-Static (ESD) Protection: The internal components of the iPhone are very sensitive to static electricity. Work on an anti-static surface if possible and use an anti-static wrist strap connected to a ground to prevent damage.
- Disconnect the Battery First!: Before disconnecting or connecting any other internal component, ALWAYS disconnect the battery. This prevents short circuits that could damage the logic board or other components.
Summary of Steps for Common Repairs
We've already detailed basic guides in the Screen, Battery, Back Cover, and Charging Port sections. It's essential to remember that these are summaries, and the actual complexity can be greater. The key points common to almost all internal iPhone X repairs are:
- Powering off the device.
- Removing the two bottom Pentalobe screws.
- Applying gentle heat to the screen edges (optional but recommended to soften adhesive).
- Using a suction cup and picks to carefully separate the screen from the chassis.
- Opening the screen "like a book" (being careful with the flex cables).
- Removing internal metal shields.
- Disconnecting the battery.
- Disconnecting the flex cables of the component to be replaced.
- Replacing the component.
- Reverse process for reassembly, testing functionality before completely sealing.
The likelihood of success in a DIY repair on a device as integrated as the iPhone X is directly linked to the user's preparation: prior research, the quality of the tools, meticulous organisation of parts, and the ability to handle tiny, delicate components. A simple mistake, like applying too much force or using a screw in the wrong place, can turn a simple repair into a much bigger problem. At iLevante.com, in addition to offering you spare parts, we want you to be well-informed. Consider purchasing iPhone-specific tool kits and magnetic mats to facilitate the process. This is not just a service, but it also helps ensure that the part you buy from us functions correctly in a well-repaired phone.
🤔 Hardware or Software Problem? A Technical Perspective
Sometimes, the symptoms your iPhone X exhibits can make you think a hardware component has failed, when in reality the problem lies with the software. As a repair technician, it's crucial to know how to differentiate to avoid unnecessary replacements. Here are some clues:
Software Symptoms That Can Be Confused with Hardware Failures
- Rapid Battery Drain: Before blaming the physical battery, consider that a poorly optimised app consuming resources in the background, an error in the current iOS version, or simply the need to calibrate the battery could be the cause.
- Overheating: Certain very demanding applications (graphically intensive games, video editing), charging the phone in very hot places or under direct sunlight, or even a software bug can cause the iPhone X to heat up more than usual.
- Unresponsive Screen or "Ghost Touch": Occasionally, a temporary operating system glitch can cause the touchscreen to become unresponsive or register non-existent touches. A restart usually solves this if it's software-related.
- Erratic or "Unavailable" Face ID: Problems with the initial Face ID setup, the need to rescan your face (perhaps if your appearance has changed), an obstruction on the TrueDepth camera (dirt, a poorly placed screen protector), or an iOS error can prevent Face ID from working correctly, without the sensors being damaged.
- Unexpected Restarts or General Slowness: These can be caused by lack of storage space, too many apps open in the background, a conflicting app, or errors in an iOS update.
- Connectivity Problems (Wi-Fi, Bluetooth, Mobile Data): Often, these issues are resolved by resetting the iPhone's network settings, updating iOS, or restarting the router/Bluetooth device, and do not indicate a failure of the internal antennas.
Basic Software Troubleshooting Steps (Before Opening the Phone)
From a technical perspective, before considering a hardware repair, these software options should always be exhausted:
- Forced Restart: This is different from turning it off and on. For the iPhone X: quickly press and release the volume up button, then quickly press and release the volume down button. Immediately after, press and hold the side button (power) until the Apple logo appears on the screen (ignore the slider to power off). This can resolve crashes or minor glitches.
- Update iOS: Go to `Settings > General > Software Update`. Make sure you have the latest version of iOS compatible with the iPhone X. Updates often include bug fixes and performance improvements.
- Check App Settings: In `Settings > Battery`, review which apps consume the most energy. In `Settings > General > Background App Refresh`, disable this feature for apps that don't need it. Also, review location and notification permissions, which can consume battery.
- Free Up Storage Space: If your iPhone is almost full (you can see this in `Settings > General > iPhone Storage`), it may run slowly or exhibit errors. Try to free up space by deleting unnecessary apps, photos, or videos.
- Reset Network Settings: If you have Wi-Fi, Bluetooth, or mobile data problems, go to `Settings > General > Transfer or Reset iPhone > Reset > Reset Network Settings`. This will erase all saved Wi-Fi networks and VPN/APN settings, but not your personal data.
- Reset All Settings: As a more drastic step before a full restore, you can go to `Settings > General > Transfer or Reset iPhone > Reset > Reset All Settings`. This does not erase your data or media content, but it reverts all system settings to their defaults.
- Restore to Factory Settings (Last Software Resort): If none of the above works, you can restore your iPhone X to its factory settings using a computer with iTunes (on Windows or macOS Mojave and earlier) or Finder (on macOS Catalina and later). This process ERASES ALL DATA from the iPhone, so it's essential to make a full backup beforehand. If the problem persists even after a clean restore (without restoring the backup, to rule out the problem being in it), then it's much more likely to be a hardware failure.
When to Consider a Hardware Repair
If, after following all software troubleshooting steps, the problem continues, or if there is obvious physical damage (broken screen, signs of liquid damage – you can check the LCI or Liquid Contact Indicator inside the SIM tray), then it's time to think about a hardware repair. Very specific problems like a constant green line on the screen, a physical button that doesn't "click" or doesn't work at all, or a component that has clearly stopped working (e.g., one of the rear cameras gives no image) also point directly to a hardware failure.
Performing proper software diagnostics before buying spare parts or attempting a hardware repair can save a lot of time, money, and frustration. A user might think their battery is faulty because the iPhone drains quickly, buy a new one, install it, and find that the problem persists because a specific app was the culprit. Or they might assume their Face ID is broken when it actually just needed a reconfiguration or a cleaning of the sensors. At iLevante.com, we don't just want to sell you spare parts; we want to be a comprehensive resource that helps you correctly diagnose your iPhone X's problem. This builds trust and ensures that if you do need a part, it's the right one.
💬 The "Unknown Part" Message on iPhone X
When performing certain repairs on your iPhone X, especially if you change the battery or screen, you may encounter a system message that says something like "Important Battery Message: Unable to verify this iPhone has a genuine Apple battery" or a similar notice for the screen. What does this mean, and how does it affect you?
Origin and Meaning of the Message
Apple has implemented systems in iOS that verify the authenticity and "pairing" of certain key components with the iPhone's logic board. This is stricter in more recent models, but Apple's philosophy is consistent. For the iPhone X, although messages may be less intrusive than on an iPhone 13 or later, the possibility exists, especially with more updated iOS versions.
The message usually appears in `Settings > General > About` or directly in the component's section (Battery or Display). It indicates that iOS cannot verify that the part is an original Apple part installed through its authorised processes, or that the part is not "married" to that specific logic board.
Impact on Functionality
- Battery: If the message appears for the battery, the most common outcome is that the "Battery Health" section in Settings will not display the maximum capacity percentage or will indicate "Service" or "Unknown". However, the battery itself will function normally: it will charge, discharge, and power your iPhone X. You simply won't have access to that specific iOS diagnostic information.
- Screen: If the message appears for the screen, the screen will display an image and respond to touch without problems, provided it's a quality replacement. The main functionality that might be lost is True Tone, if the data from the original screen has not been transferred to the new one using a programmer. The message itself does not prevent the use of the screen.
- Camera (and Face ID): For the iPhone X, the most critical issue isn't so much an "unknown camera" message, but the loss of Face ID functionality if TrueDepth system components (front camera, dot projector, IR illuminator in the earpiece flex) are replaced incorrectly. These components are cryptographically linked to the logic board.

