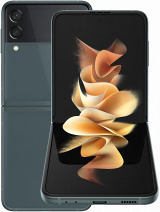
 Repair parts Samsung Galaxy Z Flip 3 5G

Receive it on tuesday 10 de february
Receive it on tuesday 10 de february

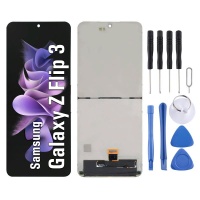
Basic Guide: How to Change the Main Screen on the Z Flip 3 🛠️📱
Let's be honest, this is an advanced-level repair, but it's entirely achievable with patience and the right tools. Replacement screens for the Z Flip 3 usually come with the frame or chassis included, which means you'll have to "transplant" all the internal components from your mobile to the new screen assembly.
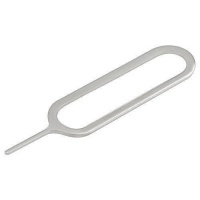
- Preparation: For safety, discharge the battery to below 25%. Switch off the phone and remove the SIM card tray.
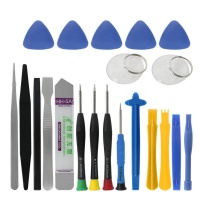
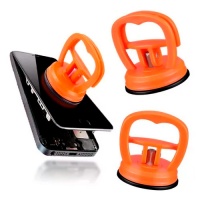
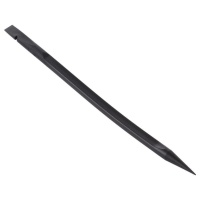
- Opening: With a heat gun or an iOpener, gently heat the edges of the two rear covers to soften the adhesive. Use a suction cup to lift a corner and a plastic pick to cut through the adhesive and remove the covers.
- Safe Disconnection: Safety first! Locate and disconnect the connectors for both batteries. Afterwards, proceed to carefully disconnect all other flex cables and remove the screws holding the boards and components in place.
- The Transplant: With the utmost care, move all the components (motherboard, batteries, speakers, cameras, vibration motor, etc.) from the old chassis to the new replacement screen's chassis.
- The CRITICAL Step - The Flex Cable: When handling the new screen, treat its flex cable as if it were made of glass. Never bend it at an angle greater than 90 degrees or apply pressure to it. One wrong move here can damage the screen before you even install it.
- Testing and Sealing: Before sealing everything up, temporarily connect the battery and the new screen and switch on the mobile to verify that everything works perfectly. Once confirmed, reassemble everything and use new adhesive to stick the rear covers back on.
Drained Battery: How to Revive Your Z Flip 3's Battery Life 🔋⚡
Do you feel like you're living attached to your charger? The battery isn't eternal, and on a mobile as compact as the Z Flip 3, its degradation becomes noticeable sooner. Fortunately, changing it is one of the most rewarding repairs.
Does it Suddenly Switch Off or Not Last? Symptoms of a Faulty Battery ⚠️
- Excessive Draining: The charge drops at an alarming rate, even when you're barely using the mobile.
- Sudden Shutdowns: The phone switches off without warning, especially when it has 20-30% battery left or when you open a demanding app like the camera.
- Only Works When Plugged In: The definitive symptom. The mobile switches off as soon as you disconnect it from the charger.
- Physical Swelling: If you notice the rear covers are bulging or coming away at the edges, it's a danger sign. The battery is swollen and you must replace it immediately to prevent further damage.
The Z Flip 3 Battery: Models and the Secret of OEMs 🤫
As we mentioned, your Z Flip 3 has two batteries. The main one, which is larger and located in the bottom part, has the model number EB-BF711ABY (2370 mAh). The secondary one, smaller and in the upper part, is the EB-BF712ABY (930 mAh). The one that suffers the most wear and is usually replaced is the main one.
Now, let's talk about quality. At iLevante.com you'll find OEM (Original Equipment Manufacturer) batteries. What does this mean? An OEM battery is made by companies that meet the same quality and safety standards as the manufacturers of the original Samsung batteries, but they are sold without the brand's logo. This allows you to get a product with the same reliability, the same life cycles, and the same safety systems as an original, but at a much more competitive price. It's the smart choice: the peace of mind of an original without paying the premium for the brand name.
Quick Guide: Steps to Change the Main Battery 📝
The process is quite accessible and shares its first steps with other repairs.
- Switch off the mobile, heat and carefully remove the bottom rear cover.
- Remove the screws from the shield covering the connectors and disconnect the main battery to work without any current.
- Carefully disconnect and remove the NFC antenna module that is stuck onto the battery.
- The Expert's Trick: Samsung batteries are stuck down with a very strong adhesive. To make removal easier without bending it (which is dangerous), apply a few drops of isopropyl alcohol around the edges of the battery. The alcohol will seep in and soften the glue.
- After a couple of minutes, use a plastic pick or a card to gently pry and lift the battery off.
- Place the new battery, connect everything in reverse order and stick the rear cover back on with new adhesive. Enjoy your new battery life! ✨
The Fantastic 4: The Most Sought-After Replacement Parts 🔎⚙️
Beyond the usual suspects, there are other parts that often cause trouble. At iLevante.com we have a solution for everything, and here we present the four most in-demand replacement parts.
1. Rear Cover: Style and Protection in Your Hands ✨
- The Problem: A silly slip and... crack! The rear glass has broken. It doesn't affect functionality, but it's aesthetically painful and can be a hazard due to the small glass shards.
- The Solution: Changing the rear cover is one of the simplest repairs and does the most to renew your mobile's appearance. At iLevante.com you can find them in all the original colours: Cream, Green, Lavender, Phantom Black, Grey, White, and Pink, so you can make it look like new or even give it a new look!
- How to change it: Heat the broken cover, remove it carefully using a pick, clean the frame thoroughly of any adhesive residue, and stick on the new cover, which already comes with its own pre-cut adhesive. Done in minutes!
2. USB-C Charging Port: Don't Run Out of Power! 🔌
- The Problem: The charging port is a high-wear component. The symptoms are clear: the cable is "loose" and doesn't make good contact, the mobile won't charge, or does so intermittently, it's not recognised by the computer, or you get false "moisture detected" alerts.
- The Solution: The USB-C port is integrated into a small board called an auxiliary board or sub-board, which also often houses the main microphone. Replacing this entire board is much easier and safer than trying to desolder just the port.
- How to change it: It is accessed by removing the bottom rear cover and the speaker module. A couple of flex cables are disconnected, a screw is removed, the board is swapped, and everything is reassembled.
3. The Hinge Flex Cable: The Unsung Hero 🦸♂️
- The Problem: This is the true Achilles' heel of any foldable device. This bundle of flat cables bends and stretches every time you open and close the phone. Over time, the internal tracks can develop micro-cracks, causing the most bizarre and confusing faults.
- The Symptoms (Watch out for this!): A damaged flex cable is a master of disguise. It can cause:
- The main screen to go black or flicker when you open it.
- The camera app to show a "Camera failed" error.
- The top speaker (earpiece) to stop working during calls.
- The Wi-Fi or Bluetooth to work intermittently.
- The Solution: Replace the flex cable. It's a complex repair, often requiring you to un-stick the screen, but it is the correct and definitive solution for these cascading faults. It's for advanced DIY-ers, but at iLevante.com you have the quality replacement part you need.
4. Rear and Front Cameras: Recover the Magic of Your Photos 📸
- The Problem: Your photos come out blurry, the camera app closes with an error, the focus doesn't work, or simply, the outer lens is scratched.
- Differential Diagnosis: Before buying, rule out other causes:
- Is it software? Try clearing the cache and data of the "Camera" app and restart the mobile.
- Is it the flex cable? If the error appeared after a drop or is related to the hinge movement, suspect the flex cable (see previous point).
- Is it the camera? If the problem is with image quality (a spot, a stuck focus) and there are no other symptoms, then yes, it's likely the camera module is damaged.
- The Solution: At iLevante.com you'll find both the complete camera modules (10MP front and the dual 12MP rear set) and the small protective glass for the rear lens, a super cheap repair if that's the only thing that's broken.
Technician's Diagnosis: Is it a Hardware or Software Fault? 👨💻🤔
Sometimes, your Z Flip 3 can do strange things that seem like a serious breakage, but which have a simple software-level solution. Before you get out the screwdriver, try these professional tricks.
Problems That Seem Like Breakages but Are Fixed with Settings 💡
The golden rule for any technician is: rule out software first. It's free and can save you an unnecessary repair.
- Constant Freezing and Rebooting: If your mobile freezes or reboots on its own, before blaming the battery or the motherboard, think about the apps. A poorly optimised application can wreak havoc. The solution is to start in Safe Mode (press and hold the power off icon on the screen until the option appears). If the problem disappears in Safe Mode, the culprit is an app you've installed. Uninstall the most recent ones until you find it.
- Mysterious Battery Drain: Before buying a new battery, go to Settings > Device care > Battery and look at the usage by application. Sometimes, an app that gets "stuck" in the background is the real energy thief.
- Connection Faults (Wi-Fi, Bluetooth, Data): If you can't connect to anything, it's not that the antenna is broken. Try going to Settings > General management > Reset > Reset network settings. This deletes all saved connections and usually solves 90% of these problems without affecting your data.
The Secret Diagnostic Menu (*#0*#): Use Your Z Flip 3 Like a Pro! 🕵️♂️
Samsung includes a hidden diagnostic tool in its phones – the technicians' secret weapon! It allows you to test each hardware component individually to know for sure what is failing.
- How to access it: Open the "Phone" app, go to the dial pad and enter: *#0*# (asterisk, hash, zero, asterisk, hash).
- The Essential Tests You Should Run:
- Red, Green, Blue: The screen turns each of these colours. This is used to detect dead pixels (black dots) or stuck pixels (dots that don't change colour). If you see any, it's a hardware fault with the screen.
- Touch: A grid appears. You have to draw a continuous line through all the squares. If there's a square you can't draw on or that doesn't turn green, that area of the touch panel is damaged. Diagnosis confirmed!
- Speaker: Emits a tone to test that the speakers are sounding correctly.
- Sub-key: Allows you to check that the physical buttons (volume and power) are working.
- Sensor: Shows a list of all the sensors. Here you can test the accelerometer, gyroscope, proximity sensor (important for the screen to turn off during calls), and the Hall IC sensor, which detects if the phone is open or closed.
- Sub Display / TSP Hovering: Specific tests to verify the colours and touch response of the cover screen.
Using this menu gives you absolute certainty. If the screen fails the 'Touch' test, you know you need a new screen and not another component. It's the safest way to buy only the replacement part you really need.
Conclusion: Let's Get to Work! 🚀
Congratulations! You've reached the end of the most complete guide to repairing the Samsung Galaxy Z Flip 3. You no longer see your mobile as an inaccessible black box, but as a device that you can understand, diagnose, and most importantly, repair! You've learned to differentiate a software fault from a hardware one, to identify the symptoms of each component, and to know the different qualities of replacement parts.
Repairing a foldable is no longer an unattainable myth. With patience, the right tools, and the correct information, you have the power to extend the life of your Z Flip 3, saving money and contributing to more sustainable technology consumption.
You have the knowledge. Now, get the best parts. We invite you to explore our complete selection of replacement parts for the Samsung Galaxy Z Flip 3 5G at iLevante.com. From original screens and OEM batteries to the smallest flex cable or screw, we have everything you need. All our products undergo a strict quality selection and come with a guarantee so that your repair is a resounding success. Don't let your Z Flip 3 gather dust in a drawer, bring it back to life today! ✨

