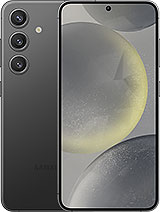
 Repair parts Samsung Galaxy S24

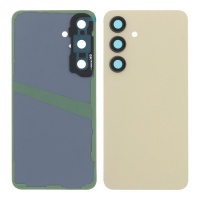
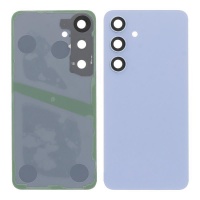
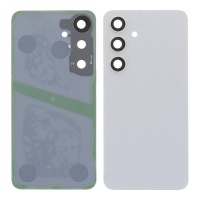
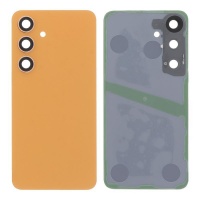
Receive it on friday 13 de february


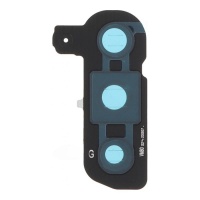
Receive it on friday 13 de february

Technical Manual and Reparability Analysis: Samsung Galaxy S24 Series 🛠️
To perform an accurate diagnosis and effective repair on the Samsung Galaxy S24 series, it is imperative for a technician to have a thorough understanding of its internal architecture and the specifications that define its performance and functionality. This section breaks down the key components, highlighting regional variations and underlying technologies that are crucial for professional technical service.
Processor and Memory Analysis (CPU, GPU, RAM, Storage Variants)
The Galaxy S24 series features a notable fragmentation in its System on a Chip (SoC), an engineering decision with direct implications for component compatibility and performance. The distribution of the processor depends on the geographical region.
- Qualcomm Snapdragon 8 Gen 3 for Galaxy: This variant, present in the US, Canada, and China markets, uses an Octa-Core CPU configuration with speeds up to 3.39 GHz and an Adreno 750 GPU.
- Samsung Exynos 2400: Deployed in most international markets, this SoC has a Deca-Core CPU architecture reaching speeds up to 3.2 GHz and is supported by an Xclipse 940 GPU, based on AMD's RDNA 3 architecture.
This processor duality is a critical factor for the technician. As will be detailed later, components such as camera modules may not be interchangeable between the Snapdragon and Exynos variants, requiring precise verification of the device's model number (e.g., SM-S921U vs SM-S921B) before ordering replacement parts for the motherboard or camera to avoid costly incompatibilities.
Regarding memory, the series is equipped with the latest generation technology to ensure smooth performance:
- RAM: The base Galaxy S24 comes with 8 GB of LPDDR5X RAM, while the S24+ and S24 Ultra models increase this to 12 GB, providing superior capacity for multitasking and demanding applications.
- Internal Storage: Samsung has implemented a differentiation in storage technology. The 128 GB variants use UFS 3.1, while the 256 GB and larger models (up to 1 TB on the S24 Ultra) use the UFS 4.0 standard. UFS 4.0 technology offers significantly faster sequential read and write speeds, resulting in shorter application loading times and faster file transfers, a relevant detail when evaluating the overall performance of the device.
In-depth Study of Display Technology
The display remains one of the most advanced and expensive components of the Galaxy S24 series. All models use a "Dynamic LTPO AMOLED 2X" panel, which offers an adaptive refresh rate that can dynamically vary between 1 Hz and 120 Hz. This LTPO (Low-Temperature Polycrystalline Oxide) technology allows for superior energy efficiency, as the screen can reduce its refresh rate for static content (like reading a text) and increase it for maximum fluidity in games or when scrolling through the interface.
The maximum brightness reaches 2600 nits, a figure that ensures excellent legibility even under direct sunlight, an important factor to consider when evaluating the user experience.
The panel's protection is a key area of differentiation within the series:
- Galaxy S24 and S24+: They use Corning Gorilla Glass Victus 2, an evolution that offers robust protection against drops and scratches.
- Galaxy S24 Ultra: It introduces the new Corning Gorilla Armour. This material not only improves durability against drops, but its main advantage lies in the 75% reduction in reflections compared to conventional glass panels. This dramatically improves screen clarity in various lighting conditions and represents a tangible advancement in usability.
A notable design change in the S24 Ultra is the adoption of a completely flat screen, abandoning the curved edges of its predecessors. This modification is well-received from a repair perspective, as it reduces the fragility of the edges and simplifies the application of screen protectors.
Camera System Breakdown
The camera system of the S24 series is complex and varies significantly between the standard/Plus models and the Ultra model.
- Galaxy S24 and S24+: They feature a triple rear camera system:
- Main (Wide-angle): 50 MP, ƒ/1.8, with Optical Image Stabilisation (OIS).
- Ultra-Wide Angle: 12 MP, ƒ/2.2.
- Telephoto: 10 MP, ƒ/2.4, with OIS and 3x optical zoom.
- Galaxy S24 Ultra: It presents a more advanced four-camera system:
- Main (Wide-angle): 200 MP, ƒ/1.7, with OIS. The sensor used is the Samsung ISOCELL S5KHP2.
- Ultra-Wide Angle: 12 MP, ƒ/2.2.
- Telephoto 1: 10 MP, ƒ/2.4, with OIS and 3x optical zoom.
- Periscope Telephoto 2: 50 MP, ƒ/3.4, with OIS and 5x optical zoom.
All models share a 12 MP front camera with an ƒ/2.2 aperture and autofocus.
A fundamental aspect for the technician is that Samsung, through its System LSI division, manufactures its own image sensors under the ISOCELL brand. This vertical control of production means that original replacement parts for the cameras come directly from the same source as the factory components, ensuring optimal quality and compatibility, provided that the correspondence between the device model and the SoC variant (Exynos or Snapdragon) is respected.
Battery and Charging Systems
The battery's capacity and technology are vital components that often require servicing. The specifications and part numbers are as follows:
- Galaxy S24: Typical capacity of 4000 mAh (rated 3880 mAh). The battery model number is EB-BS921ABY or EB-BS922ABE. It supports 25W fast charging.
- Galaxy S24+: Typical capacity of 4900 mAh (rated 4755 mAh). The battery model number is EB-BS926ABY. It supports 45W fast charging.
- Galaxy S24 Ultra: Typical capacity of 5000 mAh (rated 4855 mAh). The battery model number is EB-BS928ABY. It supports 45W fast charging.
All models are compatible with 15W wireless charging and 4.5W reverse wireless charging. The main manufacturer of these lithium-ion batteries is Samsung SDI, a subsidiary of Samsung. This knowledge is key for sourcing, as it confirms that "OEM" and "Service Pack" batteries come from the same production line as those originally installed in the devices.
Physical Design and Materials
The physical design not only defines the aesthetics but also the durability and feel in the hand.
- Frames: The S24 and S24+ use an "Armour Aluminium 2" frame, a reinforced aluminium alloy that Samsung promotes as more durable than conventional aluminium. The S24 Ultra goes a step further with a frame built from titanium, a material known for its high strength-to-weight ratio and premium feel. While titanium is a significant marketing differentiator, its impact on the device opening repair process is minimal. The heating and prying procedures to remove the glass back cover are identical across all models, as the main barrier is the adhesive, not the frame material. The relevance of titanium for the technician lies more in its resistance to dents and in managing customer expectations regarding the device's robustness.
- Dimensions and Weight: The dimensions vary progressively, with the S24 being the most compact (147.0 x 70.6 x 7.6 mm, 167 g) and the S24 Ultra the largest and heaviest (162.3 x 79 x 8.6 mm, 232 g). These differences are important for handling during repair and for the compatibility of parts such as frames and back covers.
Comparative Technical Specifications: Galaxy S24 vs. S24+ vs. S24 Ultra
| Feature | Samsung Galaxy S24 | Samsung Galaxy S24+ | Samsung Galaxy S24 Ultra |
|---|---|---|---|
| Processor | Exynos 2400 (Deca-Core) or Snapdragon 8 Gen 3 (Octa-Core) | Exynos 2400 (Deca-Core) or Snapdragon 8 Gen 3 (Octa-Core) | Snapdragon 8 Gen 3 (Octa-Core) |
| RAM | 8 GB LPDDR5X | 12 GB LPDDR5X | 12 GB LPDDR5X |
| Storage | 128 GB (UFS 3.1), 256/512 GB (UFS 4.0) | 256/512 GB (UFS 4.0) | 256/512 GB, 1 TB (UFS 4.0) |
| Display | 6.2" Dynamic LTPO AMOLED 2X, FHD+ (2340x1080), 1-120Hz | 6.7" Dynamic LTPO AMOLED 2X, QHD+ (3120x1440), 1-120Hz | 6.8" Dynamic LTPO AMOLED 2X, QHD+ (3120x1440), 1-120Hz |
| Display Glass | Corning Gorilla Glass Victus 2 | Corning Gorilla Glass Victus 2 | Corning Gorilla Armour |
| Rear Camera | 50MP (Main, OIS) + 12MP (UGA) + 10MP (Tele 3x, OIS) | 50MP (Main, OIS) + 12MP (UGA) + 10MP (Tele 3x, OIS) | 200MP (Main, OIS) + 12MP (UGA) + 10MP (Tele 3x, OIS) + 50MP (Tele 5x, OIS) |
| Front Camera | 12 MP, ƒ/2.2, AF | 12 MP, ƒ/2.2, AF | 12 MP, ƒ/2.2, AF |
| Battery | 4000 mAh (EB-BS921ABY) | 4900 mAh (EB-BS926ABY) | 5000 mAh (EB-BS928ABY) |
| Fast Charging | 25W | 45W | 45W |
| Dimensions (mm) | 147.0 x 70.6 x 7.6 | 158.5 x 75.9 x 7.7 | 162.3 x 79.0 x 8.6 |
| Weight (g) | 167 | 196 | 232 |
| Materials | Armour Aluminium 2, Gorilla Glass Victus 2 | Armour Aluminium 2, Gorilla Glass Victus 2 | Titanium Frame, Gorilla Armour |
| Water Resistance | IP68 | IP68 | IP68 |
Common Fault Diagnosis: Protocols for Technicians 🩺
An effective technician must be able to quickly discern between hardware failures and software issues that can present similar symptoms. This section provides a detailed analysis of the most common faults reported for the S24 series and establishes diagnostic protocols to isolate the root cause.
Reported Hardware Faults and their Context
Certain user complaints have become recurrent on technical forums and online communities, pointing to specific hardware issues.
- Green Line on the Screen: This is one of the most notorious hardware failures. It manifests as a thin, bright green vertical line that appears on the screen without any obvious physical impact. Technical analyses suggest that this problem is due to a failure in the physical connection between the screen panel and the motherboard, specifically in the flex cable or its connectors. Although users often associate its appearance with a software update, the underlying cause is hardware. The software update, by generating significant thermal stress on the processor and surrounding components, can act as the catalyst that pushes a marginal connector or a weak solder point to the point of failure. This phenomenon reveals a critical interaction between software-induced stress and a latent hardware vulnerability.
- Camera Rattle: Many users, especially of the Ultra model, have reported a slight rattling sound when shaking the phone, coming from the camera area. It is crucial for the technician to know that this is not a defect. The sound is produced by the movement of the Optical Image Stabilisation (OIS) system components, which are designed to float freely to compensate for movement. On the S24 Ultra, the S Pen can also move slightly in its compartment and contribute to the sound. Informing the customer that this is normal behaviour can prevent unnecessary repairs and increase their trust.
- Charging and USB-C Port Issues: The symptoms of a damaged charging port include a loose connection where the cable wobbles, intermittent charging that activates or deactivates when the cable is moved, or the need to hold the connector at a specific angle for charging to work. These problems are usually due to physical wear of the port's internal contacts or the accumulation of dirt and lint, which prevent a solid connection.
- S Pen Odour (S24 Ultra): Cases have been reported where the S24 Ultra's S Pen emits a smell similar to burnt plastic. Tests indicate that this is likely a reaction of the pen's plastic material to the heat generated by the phone itself during use or charging. It has not been associated with any visible damage, material deterioration, or impact on the S Pen's functionality. It is a cosmetic/olfactory issue, not a hardware failure.
Analysis of Software Problems Manifesting as Hardware
Not all problems that seem like hardware issues actually are. The S24 series has had several software bugs that can be easily mistaken for component failures.
- Scrolling Lag: A common complaint has been a noticeable delay or lack of fluidity when scrolling through applications or the user interface, despite the powerful hardware configuration and 120Hz screen. The most cited solution by the community has been to disable the RAM Plus feature.
- The RAM Plus Debate: This feature has generated considerable confusion. Samsung's description in the user interface suggests that it uses internal storage space to create virtual RAM. Based on this, many users and some articles conclude that since storage is much slower than RAM, this feature can degrade performance, especially on devices with abundant RAM like the S24 series. However, deeper technical analyses argue that RAM Plus is actually an implementation of zRam, a Linux kernel technology that creates a compression block within the physical RAM itself, allowing more data to be stored at the cost of a small amount of CPU usage for compression/decompression, and that it does not use the device's storage. This discrepancy is vital. A technician cannot assume that the "lag" is due to a "failure" of RAM Plus. The problem could be an underlying software optimisation that manifests differently with the feature enabled or disabled. Diagnosing this requires an understanding beyond the manufacturer's superficial description.
- Screen "Vividness" Issue: After the launch, there were widespread complaints that the "Vivid" colour mode in the display settings appeared dull, "washed out," and undersaturated, almost identical to the "Natural" mode. Initially, Samsung Spain stated that this was an "intentional colour adjustment" for a more natural viewing experience, which led many to believe it was a permanent feature of the new panel and not a bug. However, persistent complaints led Samsung to acknowledge the problem and fix it via a software update that introduced a new "Vividness" slider in the advanced settings, allowing users to adjust the saturation to their liking. This case is a perfect example of a software problem (a poorly calibrated colour profile in the firmware) manifesting as an apparent hardware defect (a low-quality screen).
Differential Diagnostic Protocols: Software vs. Hardware
To avoid unnecessary hardware replacements, technicians must follow a logical diagnostic protocol.
- Safe Mode: The first step for performance issues, battery drain, random reboots, or connectivity failures is to boot the device into Safe Mode. This mode loads the operating system with only the essential pre-installed applications, disabling all third-party apps. If the problem disappears in Safe Mode, the cause is almost certainly a malicious or poorly optimised third-party app. To enter Safe Mode, turn off the device and, during startup, press and hold the volume down button when the Samsung logo appears.
- Screenshot Test: This is the quickest and most definitive method to differentiate a display panel failure from a GPU or software issue. The user is asked to take a screenshot when the visual anomaly (lines, spots, flickering) is present. If the defect does not appear in the screenshot image, the problem is hardware and lies with the display panel or its connection. If the defect does appear in the screenshot, the problem is software or related to the graphics processing unit (GPU).
- Diagnostic Menus: Samsung provides integrated diagnostic tools. The service menu, accessible by dialling the code `*#0*#` in the keypad, allows individual components such as the touchscreen (TSP), panel colours (Red, Green, Blue), speakers, sensors, and cameras to be tested. Additionally, the Samsung Members application offers a more user-friendly diagnostic suite that can test the USB connection, wired charging, and other components. Running these tests can help confirm if a specific hardware component is failing.
Community Perspectives: Analysis of Technical Forums
Monitoring forums like Reddit and the Samsung Community provides valuable information on emerging issues and solutions contributed by the community itself. For example, threads about losing mobile connection after a software update on dual-SIM devices point to a specific firmware bug affecting mobile network management, not an antenna failure. Similarly, discussions about GPU or motherboard failures often include diagnostic suggestions like testing the device in DeX mode to see if visual artefacts persist on an external monitor, which would help isolate the problem to the GPU instead of the phone's screen.
Diagnostic Matrix: Symptom to Cause
| Reported Symptom | Probable Cause (Software/Hardware) | Verification/Diagnostic Steps |
|---|---|---|
| Green vertical line on screen | Hardware: Damaged screen connector/flex cable, possibly exacerbated by heat. | 1. Restart the device. 2. Take a screenshot (the line will not appear). 3. Internal physical inspection of the screen connector. |
| Lag or stuttering when scrolling | Software: Possible conflict with RAM Plus or poor software optimisation. | 1. Disable RAM Plus in `Settings > Device care > Memory`. 2. Boot into Safe Mode to rule out third-party apps. 3. Wipe cache partition. |
| "Washed-out" or undersaturated colours | Software: Poorly calibrated "Vivid" colour profile (fixed in later updates). | 1. Ensure the device has the latest software update. 2. Adjust the new "Vividness" slider in `Settings > Display > Screen mode > Advanced settings`. |
| Phone not charging or charging intermittently | Hardware: Dirty or damaged USB-C port. Faulty cable/charger. | 1. Visually inspect the port for lint/dirt and clean carefully. 2. Try with a different, functional OEM cable and charger. 3. Try wireless charging. 4. Run charging diagnostic in Samsung Members. |
| Rattling sound when shaking the phone | Hardware (Normal Behaviour): Movement of the Optical Image Stabilisation (OIS) system. | 1. Explain to the customer that this is normal and expected behaviour of the camera hardware for stabilisation. It is not a defect. |
| Apps crashing or phone restarting | Software/Hardware: Third-party app, overheating, or motherboard failure. | 1. Boot into Safe Mode. 2. Monitor the device's temperature. 3. Wipe cache partition. 4. As a last resort, perform a factory reset (after backing up). If it persists, it is a hardware failure. |
Professional Disassembly and Repair Guide 🔧
This section constitutes an expert-level service manual, designed to guide the technician through the disassembly, component replacement, and reassembly of the Samsung Galaxy S24 series. Official guidelines are integrated with practical warnings and advanced techniques to ensure a safe and effective repair, with special attention paid to preserving the device's integrity.
Essential Precautions and Required Tools
Before starting any procedure, it is essential to prepare the work environment and the appropriate equipment to minimise the risks of damage to the device and the technician.
- Electrostatic Discharge (ESD) Safety: The internal components of smartphones are extremely sensitive to static electricity. It is mandatory to work in an ESD-protected environment. This includes using a properly grounded anti-static wrist strap, anti-static gloves, and an anti-static work mat.
- Handling Swollen Batteries: This is the most critical safety warning. If any sign of battery swelling is detected (such as a bulging back cover or a lifted screen), the protocol changes drastically. UNDER NO CIRCUMSTANCES SHOULD HEAT BE APPLIED to a device with a swollen battery. Heat can accelerate the internal chemical reaction, causing a leak of flammable gases, a fire, or an explosion. In these cases, only 99% isopropyl alcohol should be used, applied moderately to the edges of the back cover to dissolve the adhesive and allow for a cold opening.
- Specialised Tools and Jigs: A professional repair goes beyond a simple set of screwdrivers. The official Samsung service guide specifies the use of specialised equipment to ensure quality and consistency:
- AOD (Automated Opening Device): A machine that applies heat and vacuum in a controlled manner to lift the back cover or screen.
- Press Jigs: Devices that apply uniform and controlled pressure during reassembly to ensure a perfect seal of the adhesives.
- UV Lamps and CIPG (Cured in Place Gasket): CIPG is a liquid sealing compound that is injected into specific channels in the frame and cured with ultraviolet light. This step is indispensable for restoring the device's water resistance.
- Torque Screwdrivers: To apply the exact force specified to each screw, avoiding damage to the threads or insufficient tightening.
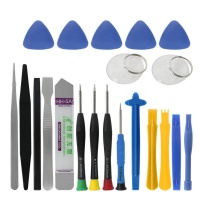
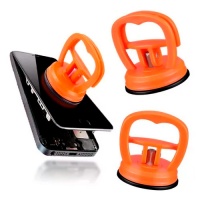
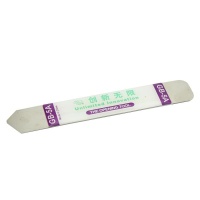
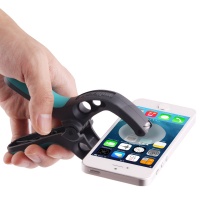
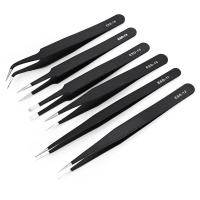
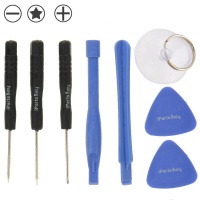
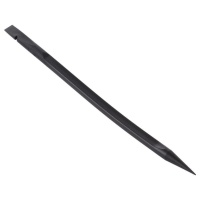
- General Tools: Plastic opening picks, suction cups, tweezers (preferably with plastic or ceramic tips to avoid short circuits), ESD spudgers, and 99% isopropyl alcohol.
Systematic Disassembly Procedure
Disassembly must follow a logical order to avoid damaging components and connectors. The general order of removal is: Back Cover > Rear Assembly > Main Motherboard (PBA) > Secondary Motherboard (Sub-PBA) > Battery and Screen.
- Opening the Device:
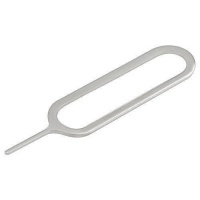
- Remove the SIM card tray with the ejection tool. This step is crucial to avoid damaging the Sub-PBA during disassembly.
- Place the device face down on the AOD and apply heat according to specifications: 75°C on the top plate and 65°C on the bottom plate for 5 minutes for the back cover.
- Activate the AOD's vacuum to lift the cover. Use a plastic opening pick to create an initial gap and cut the perimeter adhesive. Do not insert the pick too far to avoid damaging internal components.
- Critical Action: Immediately after removing the glass cover, and while it is still hot, manually remove the remnants of the double-sided adhesive tape. Waiting for it to cool will make the adhesive much harder to remove. Do not use metal tools for this purpose.
- Removing the Rear Assembly:
- Remove the screws securing the rear assembly. The number varies by model (S24/S24+: 18 rear + 2 on the camera bracket; S24 Ultra: 16 rear + 1 on the camera bracket).
- Disconnect the NFC flex connector, located on the upper part of the assembly.
- Use plastic-tipped tweezers at the designated pry point (marked with an arrow engraved on the frame: bottom left for S24/S24+, bottom right for S24 Ultra) and gently twist to release the clips holding the bottom part.
- Disconnect the battery cable and the top FRC cable from the main motherboard.
- Disconnecting and Removing the Motherboards:
- With a plastic pick, disconnect all flex cables from the main motherboard (PBA). The number of connectors varies (S24/S24+: 6; S24 Ultra: 8).
- Critical Point on S24 Ultra: This model has a hidden connector that must be located and disconnected before attempting to remove the board. The service guide provides an image indicating its location. Ignoring this connector will result in certain damage.
- Disconnect the connectors from the secondary board (Sub-PBA) at the bottom of the device.
- Remove the Sub-PBA screws (3 screws on all models).
- To extract the Sub-PBA, lift it gently by the sides and "wiggle" it to release it from the charging port, which fits by pressure into the frame. Do not lift at a 90-degree angle, as this could fracture the board.
- Lift the main PBA carefully, as the rear camera modules are connected to it.
Detailed Component Replacement Guides
Screen (UB Display) and Frame
Screen replacement is one of the most common and delicate repairs.
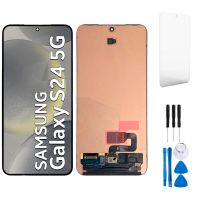
- Extraction: The procedure is similar to opening the back cover, but with the device face up and with different temperatures on the AOD: 65°C on the top plate and 45°C on the bottom plate for 5 minutes. The AOD's vacuum will lift the screen assembly (UB) from the frame.
- Cleaning: Once extracted, it is essential to remove all remnants of the adhesive tapes (outer, middle, and joining) and, crucially, the old Cured in Place Gasket (CIPG). This is removed by pushing with the SIM ejection tool through two small holes on the back of the frame.
Battery
The design of the S24 features an improvement in battery reparability which, however, requires careful analysis.
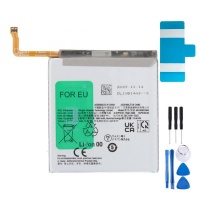
- Extraction: The official method involves using a blue pull-tab. The tab must be lifted and pulled at a 90-degree angle to release the battery from the frame. Samsung has promoted this as a significant improvement that eliminates the need for heat or solvents.
- The Reality of Repair: Despite the presence of the pull-tab, multiple reports from technicians and third-party teardowns indicate that the adhesive used by Samsung remains extremely strong. In practice, pulling the tab often requires considerable force, which increases the risk of bending, deforming, or even puncturing the lithium-ion battery, creating a serious safety hazard. The "false simplicity" of the pull-tab is a potential trap. The best practice recommended by professionals remains the careful application of a small amount of isopropyl alcohol to the battery's edges to soften the adhesive before pulling the tab, thus minimising the required force and the risk of damage.
Glass Back Cover
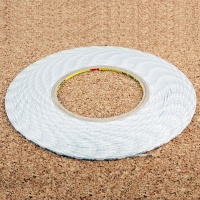
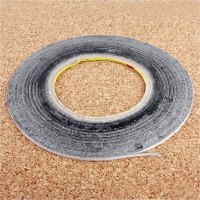
Replacing the back cover is mainly a process of cleaning and applying new adhesives. It is vital to remove all residue of the old adhesive from the frame to ensure a proper seal. OEM pre-cut adhesives should be used to guarantee a perfect fit and correct alignment of the microphone holes.
Charging Port (Secondary Board and Flex)
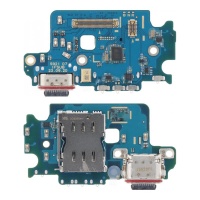
The USB-C charging port is integrated into the Sub-PBA. To replace it, the Sub-PBA disassembly procedure described above must be followed. This modularity is an advantage for repair, as a damaged port does not require the replacement of the main motherboard. Both complete Sub-PBAs and replacement flex cables are available on the market.
Speakers (Earpiece and Main)
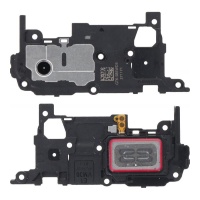
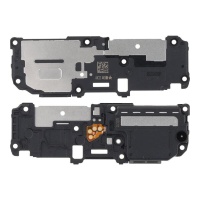
Both speakers are modular components. The earpiece speaker is located in the upper part of the rear assembly, while the main loudspeaker is in the lower part. Their replacement involves disassembling the rear assembly and simply replacing the corresponding module. It is crucial to ensure that the speaker's gold contact pads make a firm connection with the pins on the PBA during reassembly.
Camera Modules (Front and Rear)
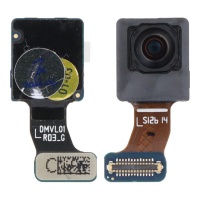
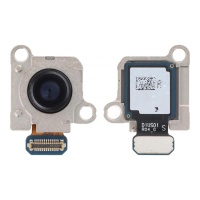
The rear camera modules are disconnected from the main PBA once it has been removed from the device. The front camera (FFC) is also a separate module. Its replacement is relatively simple but requires careful handling to avoid touching the lenses and allowing dust to enter. As mentioned, it is vital to order the correct camera module for the device's SoC variant.
Reassembly and Post-Repair Validation
Reassembly is not simply reversing the disassembly process. It requires specific steps to ensure functionality and durability.
- Application of Adhesives and Pressing: New, pre-cut adhesive tapes must be used for the screen and back cover. The use of alignment jigs is recommended for perfect placement. After placing the components, the device must be subjected to pressure in a Press Jig. The guide specifies pressures of 1N for 30 seconds in several stages to ensure uniform adhesion.
- Restoration of Water Resistance (CIPG): This is the most critical step and is often omitted in unauthorised repairs. After assembling the new screen, the CIPG compound must be injected into the two designated holes in the frame using a syringe with a 21G needle. The compound must fill the channel up to 55%. Then, the device is placed in a Curing Jig with UV lamps for 5 minutes to cure the compound and form a waterproof seal. Without this process, the device's IP68 water resistance is permanently compromised. Any technician must be transparent with the customer on this point: without OEM equipment and materials, water resistance cannot be reliably guaranteed.
- Software Calibrations: After reassembly, it is mandatory to connect the device to a diagnostic system and perform several software calibrations to ensure all components function correctly. These include:
- Vignetting Calibration: If the front camera was replaced.
- Multi TSP and TSP Calibration: For the touchscreen.
- Proximity Sensor Calibration.
- mmWave Calibration: If the main PBA or mmWave antennas were replaced.
Torque Specifications and Screw Count per Model
| Component | S24 / S24+ | S24 Ultra |
|---|---|---|
| Rear Assembly Screws | 18 screws | 16 screws |
| Rear Assembly Torque | 1.3 Kgf·cm ± 7% | 1.25 Kgf·cm |
| Camera Bracket (Cam BRK) Screws | 2 screws | 1 screw (black) |
| Camera Bracket Torque | 1.35 Kgf·cm ± 7% | 1.35 Kgf·cm ± 7% |
| Sub-PBA Screws | 3 screws | 3 screws |
| Sub-PBA Torque | 1.2 Kgf·cm ± 7% | 1.2 Kgf·cm ± 7% |
| mmWave Antenna Screws | 2 screws (left module only) | 2 screws (left module only) |
| mmWave Antenna Torque | 0.9 Kgf·cm ± 7% | 0.9 Kgf·cm ± 7% |
The Spare Parts Ecosystem: A Sourcing Guide for Professionals 🛒
Navigating the spare parts market is a fundamental skill for any repair technician. The choice of components not only affects the cost and profit margin but also the quality of the repair, customer satisfaction, and the likelihood of future failures. This section offers a guide to understanding and selecting the right parts for the Galaxy S24 series.
Part Classifications: Original, OEM, Service Pack, Aftermarket, and Refurbished
It is crucial to understand the quality hierarchy in the spare parts market to make informed purchasing decisions.
- Original / Genuine: These are parts made by or for Samsung, which carry the brand's logo. They are identical to those installed in a new device and are the most expensive.
- OEM (Original Equipment Manufacturer): These parts are made by the same company that produces the original components for Samsung (e.g., a Samsung SDI battery or a Samsung Display screen), but are sold without the Samsung logo. In theory, the quality is identical to the original, but at a lower price, as you don't pay for the brand. However, the term "OEM" is often misused in the market to describe high-quality copies, so careful inspection is required.
- Service Pack: This refers to original (OEM/Genuine) parts packaged specifically for distribution to authorised service centres. They usually come in boxes with Samsung part numbers (e.g., GH82-33386A for a screen assembly) and are a guarantee of authenticity.
- Aftermarket (or Copy): These are parts made by third-party companies not affiliated with Samsung. The quality of these parts can vary enormously, from high-quality copies that come close to OEM to very low-quality parts that can fail quickly or even damage the device.
- Refurbished: These are used original parts that have been recovered from other devices. For example, an original screen with a broken glass can be refurbished with a new glass. The quality depends on the original component and the refurbishment process.
Visual and Functional Identification of Component Quality
An experienced technician should be able to differentiate the quality of parts through visual inspection.
- Screens:
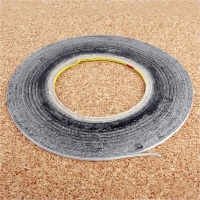
- Bezels and Fit: Aftermarket screens, especially those with TFT/Incell technology, often have thicker bottom bezels (chin) than the originals, reducing the viewing area and altering the device's aesthetics.
- Image Quality: Copies often have lower colour quality, with cooler or bluish tones and less vibrant or "washed-out" colours. The maximum brightness is also noticeably lower, affecting outdoor visibility.
- Markings on Flex Cables: The flex cables of OEM/Original screens usually have QR codes, logos (like Apple's in the case of iPhones, but the principle applies), and sharper, clearer text printing than copies. The absence of these markings or blurry printing is a clear sign of an aftermarket part.
- Batteries:
- Labelling and Finish: The labels on original batteries have high-quality, error-free printing. Copies may have blurry text or typographical errors.
- Physical Construction: Aftermarket batteries often use smaller cells than the originals. To compensate and maintain the dimensions, copy manufacturers sometimes add fillers (like foam) at the edges. Pressing the edges of the battery can reveal if it sinks, indicating the presence of filler and therefore that it is a copy.
- Safety Risks: The main non-visible difference is the protection circuit. Low-quality batteries may lack adequate protection against overcharging, overheating, or short circuits, which poses a significant safety risk.
- Flex Cables:
- Material and Flexibility: OEM flex cables are noticeably softer and more malleable. When bent, they offer little resistance. Copy cables are stiffer and harder, making them more prone to breaking or being damaged during installation.
- Markings and Codes: As with screens, OEM flex cables often carry identification codes and QR codes printed with great clarity. The absence or poor quality of these markings betrays a replacement part.
Comparative Analysis of Replacement Screen Technologies
When replacing the screen of a Galaxy S24, which is originally an AMOLED, the replacement market offers several technologies with a clear trade-off between cost and quality.
- TFT / Incell LCD:
- Technology: These are LCD (Liquid Crystal Display) screens with a constant backlight. "Incell" technology integrates the touch sensor into the LCD layer, making them thinner than traditional LCDs.
- Advantages: They are the most economical option, sometimes costing a fraction of an OLED screen.
- Disadvantages: The image quality is significantly lower. They cannot produce true blacks (black pixels are dark grey due to the backlight), the contrast is low, colours are less vibrant, and viewing angles are limited. Power consumption is higher, especially when displaying dark images.
- Hard OLED:
- Technology: It uses OLED technology, but the organic diodes are deposited on a rigid glass substrate.
- Advantages: It offers much better image quality than LCDs, with perfect blacks and vibrant colours. It is more affordable than Soft OLED.
- Disadvantages: The rigid glass substrate makes them more fragile and prone to breaking on impact compared to Soft OLEDs. They are often slightly thicker and have larger bezels than the originals.
- Soft OLED:
- Technology: It uses a flexible plastic substrate, just like Samsung's original screens.
- Advantages: It is the replacement option that comes closest to the original quality. Its flexibility makes it much more durable and resistant to impacts than Hard OLEDs. It allows for a thinner design and finer bezels, better replicating the aesthetics of the original device.
- Disadvantages: It is the most expensive replacement option.
The cost versus risk dilemma is central to the strategy of a repair workshop. Opting for an Incell or Hard OLED screen can increase the profit margin on an individual repair. However, this decision carries a much higher risk of premature failure, compatibility issues (like "ghost touch"), and lower durability. A Soft OLED screen, although more expensive, drastically reduces the likelihood of a warranty claim, which can cost the technician not only the replacement part and time but also the customer's trust. A solid business strategy involves offering the customer these options transparently, explaining the differences in quality, durability, and price, allowing them to make an informed decision.
Comparison of Aftermarket Screen Technologies for the S24 Series
| Feature | Incell / TFT LCD | Hard OLED | Soft OLED |
|---|---|---|---|
| Colour Quality and Contrast | Low (Greyish blacks, washed-out colours) | High (Pure blacks, vibrant colours) | Excellent (Very similar to original) |
| Brightness | Low to Moderate | Moderate to High | High (Similar to original) |
| Durability (Impact Resistance) | Moderate | Low (Very fragile) | High (Flexible and resistant) |
| Thickness / Bezel Fit | Thicker, noticeable bezels | Slightly thicker, visible bezels | Thinner, almost perfect fit |
| Power Consumption | High | Moderate (efficient with blacks) | Moderate (efficient with blacks) |
| Relative Cost | $ (Lowest) | $$ (Intermediate) | $$$ (Highest) |
Advanced Technical Analysis and Recommendations 📈
This final section offers a critical evaluation of the Galaxy S24 series from a reparability perspective, analyses the engineering causes behind common failures, and provides recommendations for technicians to perform more durable and reliable repairs.
Reparability Assessment: Strengths and Weaknesses of the Design
The design of the S24 series presents a mix of decisions that both facilitate and complicate repair, resulting in a nuanced reparability landscape.
- Strengths:
- Component Modularity: A significant advantage is the modularity of many key components. The speakers, camera modules, vibration motor, and most importantly, the secondary board (Sub-PBA) containing the charging port, are all independently replaceable. This means a failure in one of these components does not require the costly replacement of the main motherboard.
- Screw Standardisation: Samsung has exclusively used standard Phillips screws throughout the device, and they are all the same size. This greatly simplifies the disassembly and reassembly process, eliminating the need for multiple screwdrivers and the risk of mixing up screws, which could damage the motherboard or screen.
- Weaknesses:
- Extensive Use of Adhesive: The main obstacle to repair remains the use of strong and tenacious adhesive, both on the glass back cover and, crucially, under the battery. Opening the device requires the application of heat, a delicate process that carries the risk of damaging components or cracking the glass.
- Screen Assembly Design: Repairing the screen at the component level (i.e., replacing only the glass or the OLED panel) is practically unfeasible for most workshops. The screen is strongly bonded to the metal frame, and the screen's flex cable has no slack, making its removal from the front without damaging the panel extremely difficult. This pushes technicians towards replacing the entire assembly (screen + frame + battery), which is the most expensive but the only realistic and officially supported option. This approach defines the reparability of the S24 as "assembly reparability" rather than "component reparability".
Engineering Analysis of Common Failure Points
Understanding why certain components fail allows the technician not only to repair the symptom but also to advise the customer on how to prevent future failures.
- USB-C Port Vulnerabilities: The design of the USB-C connector, although versatile, has inherent weaknesses. The proximity of its 24 pins (with a pitch of only 0.5 mm) makes it vulnerable to short circuits if conductive debris like metal dust or lint gets in. Furthermore, mechanical stress is a major cause of failure. Continuous use of the phone while charging exerts leverage on the port, which can weaken the solder joints to the Sub-PBA or damage the internal contacts over time. The high-power negotiation of the USB Power Delivery standard (up to 20V and 5A) means that a short circuit between the VBUS pin and a data pin can have catastrophic consequences for the protection circuitry.
- Screen Connector Degradation due to Heat: The "green line" phenomenon is an excellent example of a complex failure cycle. It starts with a design where a ZIF (Zero Insertion Force) screen connector, a heat-sensitive component, is located near the SoC, a major heat source. It continues with use, where tasks like gaming or fast charging generate high temperatures. It is aggravated by software, when a poorly optimised update causes even higher temperature spikes. Finally, the accumulated thermal stress degrades the physical integrity of the connector or its solder joints, leading to a hardware failure. The repair is not just about changing the screen, but understanding that heat is the enemy of these connectors.
- Screen Durability Trade-offs (Gorilla Glass): There is an engineering trade-off between drop resistance and scratch resistance in protective glass. Gorilla Glass Victus 2 and Gorilla Armour are optimised to survive falls from greater heights. However, this does not always translate to greater hardness on the Mohs scale. Tests show that Gorilla Armour on the S24 Ultra scratches at level 7 on the Mohs scale, with deeper grooves at level 8, an improvement over the level 6/7 of previous glasses, but it is not invulnerable. It is crucial to manage customer expectations: a "more drop-resistant" glass is not necessarily "scratch-proof".
Best Practices for Maintaining Post-Repair Integrity
For a repair to be durable and reliable, the technician must adhere to best practices during reassembly.
- Adhesive Management: It is essential to completely remove all residue of the old adhesive from the frame and back cover. Any remnant can create a weak point in the new seal. High-quality or OEM-grade pre-cut adhesives should be used to ensure a perfect fit and a strong, uniform bond.
- The Water Resistance Sealing Process: As detailed in Section 3, the only way to attempt to restore water resistance is to follow the full OEM procedure: application of pre-cut adhesives, injection of the CIPG compound, curing with UV lamps, and uniform pressing with press jigs. Omitting any of these steps will result in a compromised seal. Technicians must be honest about the limitations of a repair without these tools and avoid making false promises of "waterproofing".
- Final Validation and Calibrations: The job does not end when the phone is closed. It is imperative to perform all required software calibrations (TSP, sensors, camera) to avoid functionality issues that might be wrongly attributed to the replaced part. A restart and a full test of all functions (calls, Wi-Fi, cameras, charging, etc.) are the final steps before returning the device to the customer.
Technical Verdict on the Galaxy S24 Series 🧑⚖️
The Samsung Galaxy S24 series represents an iterative evolution in the design of high-end smartphones, with notable improvements in performance, display, and camera capabilities. From a repair perspective, the picture is mixed and presents a clear duality.
On the one hand, Samsung has made concessions to reparability that are welcome. The standardisation of Phillips screws and the modularity of components such as the charging port, speakers, and cameras are positive steps that simplify certain repairs and reduce their cost. The introduction of a battery pull-tab, although imperfect in its execution due to the tenacity of the adhesive, indicates at least an acknowledgement of the problem.
On the other hand, the fundamental design continues to prioritise aesthetics and thinness over ease of maintenance. The intensive use of strong adhesives and the design of the screen assembly, which makes component-level replacement almost impossible, push the repair model towards the costly replacement of complete sub-assemblies. The restoration of IP68 water resistance remains a complex process that requires specialised tools and materials, putting it out of reach for most independent workshops.
For the professional technician, the S24 series is not intrinsically more difficult to repair than its immediate predecessors, but it presents specific "traps" that require in-depth knowledge. These include the incompatibility of parts between SoC variants, the reality of the battery adhesive despite the pull-tab, and the understanding that many "hardware failures" reported by users are actually software issues or complex interactions between software and hardware stress.
Ultimately, the success of a Galaxy S24 repair depends not only on manual skill but on the technician's ability to diagnose accurately, navigate a variable-quality spare parts ecosystem, and be transparent with the customer about the limitations and realistic outcomes of the repair, especially regarding water resistance. The S24 series is repairable, but it demands a level of expertise and knowledge that goes far beyond the surface.

