 Repair parts Samsung Galaxy S10+


Receive it on tomorrow wednesday 11 february
Receive it on tomorrow wednesday 11 february
Receive it on tomorrow wednesday 11 february
Receive it on tomorrow wednesday 11 february
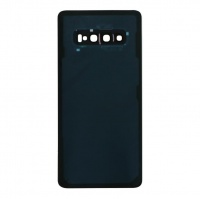
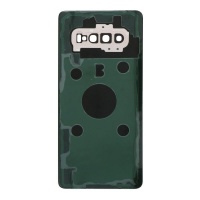
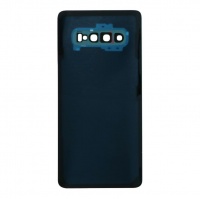
Receive it on tomorrow wednesday 11 february
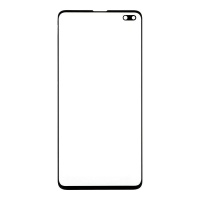


Receive it on tomorrow wednesday 11 february
Receive it on tomorrow wednesday 11 february
Receive it on tomorrow wednesday 11 february

Samsung Galaxy S10+: The Ultimate Guide to Spare Parts and Repairs on iLevante.com
Hello, tech and DIY enthusiast! 👋 If your Samsung Galaxy S10+ has had a mishap or just needs a little TLC to get it back to 100%, you've come to the right place. At iLevante.com, not only do we offer the highest quality spare parts for your S10+, but we also want to empower you with the knowledge you need to make the best decisions about its repair. This article is your complete reference guide, where we'll explore everything from the features of this iconic device to the secrets of replacing its most common components. Get ready to bring your Galaxy S10+ back to life!
1. Getting to Know Your Samsung Galaxy S10+ (SM-G975F and variants)
Launched in March 2019, the Samsung Galaxy S10+ (with models including SM-G975F, SM-G975U, SM-G975W, SM-G975U1, SM-G9750, SM-G975N, SM-G975X, SC-05L) quickly established itself as a benchmark in the high-end smartphone market. And for good reason, its specifications remain impressive even today.
This device shines, first and foremost, for its 6.4-inch Dynamic AMOLED screen with a Quad HD+ resolution of 1440 \times 3040 pixels. This technology not only offers vibrant colours and deep blacks but also pioneered the integration of the ultrasonic under-display fingerprint sensor and minimised bezels thanks to its Infinity-O design, which houses the front-facing camera. The protection of Corning Gorilla Glass 6 on the front and Gorilla Glass 5 on the rear (or ceramic on some versions) gives it remarkable resilience, although, as we know, no mobile is indestructible.
Inside, depending on the region, we find the powerful Exynos 9820 (EMEA/LATAM) or Snapdragon 855 (USA/China) processor. These chipsets, combined with 8 GB or 12 GB RAM options and internal storage ranging from 128 GB to 1 TB (expandable via microSDXC), ensure smooth performance for the most demanding tasks and effortless multitasking.
The photography department is another of its strengths. The S10+ features a triple rear camera system: a 12 MP main sensor with a variable aperture (f/1\.5\-2\.4), a 12 MP telephoto lens with 2x optical zoom, and a 16 MP ultra-wide lens. On the front, a dual 10 MP + 8 MP camera (depth sensor) allows for high-quality selfies and natural blur effects.
Autonomy is provided by a 4100 mAh battery with 15W fast charging, wireless charging, and reverse wireless charging (Wireless PowerShare), allowing you to charge other compatible devices. It also retains the cherished 3.5mm headphone jack, stereo speakers tuned by AKG, and an IP68 certification for water and dust resistance. Originally launched with Android 9.0 (Pie), it is upgradeable to later versions of Android with Samsung's One UI personalisation layer.
Understanding these features is fundamental, as it allows us to appreciate the quality of the original components and the importance of choosing suitable replacement parts when necessary. A device of this calibre deserves components that are up to the task to maintain its performance and functionality intact.
2. The Window to Your Digital World: All About the S10+ Screen
The screen is, without a doubt, one of the most vital and, at the same time, most vulnerable components of your Samsung Galaxy S10+. An unfortunate drop, an accidental knock, or simple wear and tear can lead to the need for a replacement. Fortunately, there are various options on the market, each with its own features, advantages, and disadvantages.
A. Types of Replacement Screens: A Universe of Options
When the original Dynamic AMOLED screen on your S10+ is damaged, you'll face several alternatives. It's crucial to know them to make an informed decision that fits your needs and budget.
-
TFT (Thin-Film Transistor) Screens: These are the most basic and economical option. They use LCD technology where each pixel is controlled by one to four transistors.
- Advantages: Low cost.
- Disadvantages: Inferior image quality compared to OLED/AMOLED, with less vibrant colours, lower contrast, and more limited viewing angles. They consume more power and are usually thicker, which could affect the fit in the S10+ chassis. The change from an original Dynamic AMOLED to a TFT will be very noticeable in terms of brightness and sharpness.
In the context of the S10+, which originally features a very high-quality screen, a TFT would represent a significant downgrade in the visual experience, although it can be a temporary or emergency solution if the budget is very tight.
-
INCELL Screens: This technology integrates the touch panel into the LCD screen's own structure, allowing for thinner panels than traditional TFTs.
- Advantages: They are thinner than conventional TFTs, offer better touch response, and sharper, brighter colours than basic TFTs. They are usually cheaper than OLED/AMOLED screens.
- Disadvantages: Although better than TFTs, the image quality (especially blacks and contrast) does not reach the level of OLED/AMOLEDs. They may have a slight metallic edge visible in some cases.
For the S10+, an INCELL screen can be an acceptable compromise between cost and quality if you don't want to invest in an OLED or AMOLED, offering adequate functionality.
-
OLED (Organic Light-Emitting Diode) Screens: Here we enter the realm of the technology Samsung uses for its high-end ranges. Each pixel emits its own light, which allows for true blacks (pixels are turned off) and infinite contrast.
- Advantages: Excellent colour reproduction with vibrant tones, deep blacks, high contrast, lower power consumption (especially with dark themes), and reduced thickness, ensuring a perfect fit in the S10+. The image response is faster.
- Disadvantages: They are usually more expensive than LCDs (TFT, INCELL). Over time, they can be susceptible to "burn-in" (though this is less common with newer technologies and normal use). The lifespan can theoretically be shorter than LCDs in some aspects, and the colour saturation can be more tiring for some users' eyes.
-
AMOLED (Active-Matrix Organic Light-Emitting Diode) Screens: These are a type of OLED screen that uses an active matrix to control each pixel individually, which improves image quality and refresh rate. Samsung is the main proponent of this technology.
- Advantages: All the benefits of OLEDs, but with more precise pixel management, resulting in superior image quality and greater efficiency.
- Disadvantages: Similar to OLEDs, mainly the cost.
-
Dynamic AMOLED Screens (Original or Original Quality): This is the specific technology fitted to the Samsung Galaxy S10+ from the factory. It is an evolution of Super AMOLED (another AMOLED variant developed by Samsung) that adds HDR10+ certification for an even greater dynamic range and exceptional colour reproduction.
- Advantages: The best possible image quality for your S10+, with accurate colours, excellent brightness even in direct sunlight, perfect blacks, and full compatibility with all device functions, including the ultrasonic fingerprint sensor. An original or "Service Pack" quality replacement (like those offered by Samsung) guarantees the same experience as with a new phone.
- Disadvantages: They are the most expensive option.
At iLevante.com, we recommend opting for original quality or high-quality AMOLED screens for the S10+, as they ensure the user experience is not compromised. The price difference is justified by the visual fidelity and perfect integration with the device.
It is important to note that the market offers different qualities within each technology (e.g., "AAA" for better quality TFTs than generic ones). When searching on sites like eBay or MercadoLibre, you will find many "Unbranded" options for technologies like TFT, INCELL, and OLED. The choice will depend on how much you value the original image fidelity versus the cost of the replacement part.
B. Common Screen Problems and When to Replace It
Screen problems are, unfortunately, quite common. Identifying them in time is key:
- Cracks or Physical Breaks: This is the most obvious problem. A drop can cause anything from a small crack to the complete shattering of the glass. Even if the touch function still works, a broken screen can be dangerous due to glass splinters and can compromise the device's water resistance.
- Dead or Stuck Pixels: Small black, white, or fixed-colour dots that do not change. A few might be tolerable, but if they increase in number, they affect the display.
- Lines on the Screen: Vertical or horizontal lines of strange colours or that flicker. These usually indicate a problem with the panel or its connection.
- Patches or LCD/OLED "Bleeding": Discoloured, dark, or ink-spill-like areas. This indicates internal damage to the panel.
- Screen Flickering: The screen flickers intermittently or constantly. This can be a software issue, but if it persists after a restart or update, it could be a hardware problem.
- Touch Response Issues (Ghost Touch or Dead Zones): The screen registers non-existent touches (ghost touch) or there are areas that do not respond to touch. Sometimes this can be due to a poorly installed screen protector or software issues (phone cache), but if it is persistent, the digitiser (integrated into the screen) may be damaged.
- Screen Burn-in: Typical of OLED screens after displaying static images for a long time (status bar icons, keyboards). Permanent "shadows" of these elements become visible.
- Inconsistent or Too Low Brightness: If the brightness does not adjust correctly or is very dim even at maximum, there could be a fault.
Samsung suggests checking if the software is up-to-date and restarting the device as first steps for display issues. If the problem is due to external impact, it is recommended to visit a technical service centre.
C. Basic Guide to Replacing the S10+ Screen
Replacing the S10+ screen is a delicate task that requires patience and the right tools. If you don't feel confident, it's best to go to a professional. Here is a basic guide for your reference:
Tools Needed:
- Replacement screen compatible with your S10+ (ideally with the frame to make installation easier).
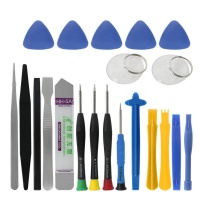
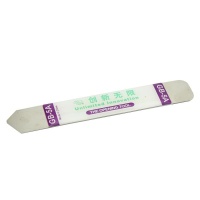
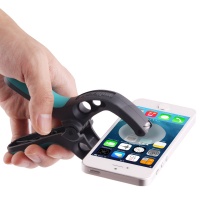
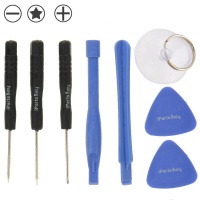
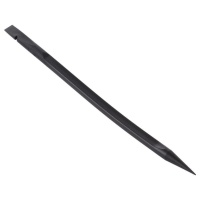
- Mobile phone repair tool kit (precision screwdrivers, opening picks, suction cup, tweezers).
- Heat gun or hairdryer to soften the adhesive.
- Anti-static gloves and safety glasses.
- New screen adhesive if the replacement part doesn't include it or if you are reusing the frame.
General Steps:
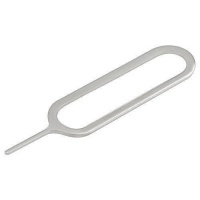
- Preparation: Turn the phone off completely. Remove the SIM card tray. It is recommended that the battery is below 25% to minimise risks.
- Heating the Back Cover: Using the heat gun or hairdryer, heat the edges of the back cover to soften the adhesive that bonds it to the frame. Do not apply excessive heat or for too long in one spot.
- Removing the Back Cover: Place a suction cup on the back cover and pull gently while inserting a thin pick (plastic to avoid scratching) between the cover and the frame. Slide the pick around the edges to cut the adhesive. Be careful with any nearby flex cables.
- Disconnecting Components: Once the cover is removed, locate and carefully disconnect the battery's flex cable. Then, disconnect any other flex cables that may be obstructing access to the screen or are connected to the motherboard and need to be removed (like the wireless charging coil). It is vital to disconnect the battery first to avoid short circuits.
-
Removing the Old Screen:
- If the new screen comes with a frame: This process usually involves transferring the motherboard, battery, and other small components from the old chassis to the new one with the screen already installed. This can be easier for some users.
- If the new screen is just the panel (without a frame): You will need to heat the edges of the front screen to soften its adhesive. Very carefully, use a suction cup and picks to separate it from the frame. This process is riskier as you could damage the frame or internal components if you are not careful. Disconnect the screen's flex cable from the motherboard.
- Cleaning and Installing the New Screen: Clean any old adhesive residue from the frame. Connect the new screen's flex cable to the motherboard. If the screen does not come with pre-installed adhesive, apply new screen-specific adhesive to the frame. Carefully place the new screen, ensuring it fits perfectly.
- Reconnecting and Assembling: Reconnect all the components you disconnected (battery, etc.). Replace any shields and screws you removed.
- Functional Test: Before sealing the back cover, turn on the phone and test all the functions of the new screen: touch response across the entire surface, brightness, colours, absence of dead pixels or lines. Also, check the fingerprint sensor if your screen is compatible.
- Sealing the Back Cover: If everything works correctly, apply new adhesive to the back cover (or on the frame) and place it back, pressing firmly but gently. You can use clamps or rubber bands to keep it pressed while the adhesive cures (approximately one hour, according to some tutorials).
- Aftercare: Consider installing a good quality screen protector and a sturdy case to minimise future risks.
This is a summary. We strongly recommend watching specific video tutorials for the Samsung Galaxy S10+ before attempting this repair. At iLevante.com, you will find complete screens for your Galaxy S10+ / G975 that will make the process easier for you.
3. Power for Your Day-to-Day: The S10+ Battery
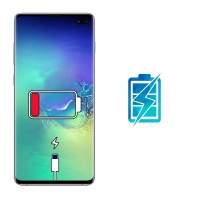
The battery is the energy heart of your Samsung Galaxy S10+, and over time, it's natural for its performance to decline. If you notice that your S10+ doesn't last as long as it used to, shuts down unexpectedly, or takes an eternity to charge, it might be time to consider a replacement.
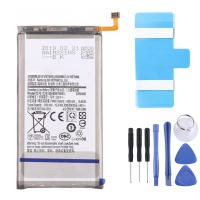
A. Specifications and Battery Model: EB-BG975ABU
The Samsung Galaxy S10+ is equipped with a Li-Ion battery with a nominal capacity of 4100 mAh. The specific battery model for the Samsung Galaxy S10+ is EB-BG975ABU. This battery is not easily user-removable, as it requires opening the device. Its approximate dimensions are 4.8 x 9.1 x 0.3 cm. The voltage is usually 3.85V, with a charging input voltage of 4.4V.
B. How to Know if Your S10+ Battery is Faulty?
Identifying a faulty or degraded battery is key to maintaining the optimal performance of your S10+. Here are some signs:
- Drastic Decrease in Duration: If the battery drains much faster than before with similar usage, it is the most common sign of degradation.
- Unexpected Shutdowns: The phone suddenly turns off, even if the battery indicator shows remaining charge. This can happen especially in cold environments or when using demanding apps, due to voltage drops that the system interprets as an empty battery to protect the components.
- Prolonged Charging Time or Incomplete Charging: The battery takes a long time to charge or does not reach 100%.
- Inconsistent Performance: Battery percentages that jump or drop abruptly.
- Excessive Overheating During Charging or Use: While some warming is normal, if it is excessive and frequent, it may indicate a battery problem.
- Swollen Battery: In more severe cases, the battery can physically swell. This can put pressure on other internal components and even deform the phone's casing. If you detect this, it is crucial to replace it immediately for safety reasons.
- Device Diagnostics: Samsung offers tools to check the battery's health. Through the Samsung Members app, in the 'Support' > 'Phone diagnostics' section, you can perform a battery status test. The app will tell you if the battery life is good, normal, or needs attention. Samsung may also send pop-up notifications if it detects that the battery needs to be replaced.
Factors such as intensive app usage, high screen brightness, and constantly active wireless connections can accelerate battery wear.
C. Brief Guide to Changing the S10+ Battery
Changing the S10+ battery is similar in complexity to changing the screen, as it involves opening the device.
Tools Needed:
- Replacement battery EB-BG975ABU.
- Tool kit (similar to the one for screen replacement).
- Heat gun or hairdryer.
- Adhesive for the battery (if the new one doesn't have it) and for the back cover.
- Isopropyl alcohol (optional, to help remove the old battery).
General Steps:
- Preparation: Turn off the phone, remove the SIM tray. Ensure the current battery is below 25% charge to reduce risks.
- Removing the Back Cover: Follow the same steps as for the screen replacement: heat the edges of the back cover and use a suction cup and picks to carefully separate it from the frame.
- Disconnection: Once open, the first thing is to disconnect the battery connector from the motherboard to avoid short circuits. It might be necessary to remove a shield or screws covering the connector.
-
Removing the Old Battery: The original battery is usually firmly adhered to the chassis.
- Some repair kits include specific adhesive pull-tabs that can be pulled to release the battery.
- If not, you can apply moderate heat to the area of the screen where the battery is located (be very careful not to damage the screen!) to soften the adhesive underneath.
- With a wide plastic pick or a plastic card (never metal, to avoid puncturing the battery), try to lift it slowly. A few drops of isopropyl alcohol around the battery's edges can help dissolve the adhesive. Avoid bending or puncturing the battery.
- Installing the New Battery: Clean any adhesive residue from the battery compartment. If the new battery has pre-applied adhesive, remove the protective film. If not, apply new battery-specific adhesive strips. Place the new battery in its place and connect it to the motherboard.
- Testing and Closing: Before sealing, turn on the phone to make sure it recognises the new battery and starts charging. If everything is fine, apply new adhesive to the back cover and close it, applying even pressure.
As with the screen, it is highly recommended to watch specific tutorials for the S10+. At iLevante.com, we have the EB-BG975ABU 4100mAh battery for your Samsung Galaxy S10 Plus, so you can regain the autonomy of the first day.
D. OEM Batteries: Original Quality Even Without a Logo
When looking for replacement batteries, it's common to come across the term "OEM". OEM stands for "Original Equipment Manufacturer". In the context of batteries, an OEM battery is one produced by the same manufacturer (or one with the same standards) that made the original battery for Samsung, following Samsung's design specifications.
What about OEM batteries without the Samsung logo?
Many high-quality OEM batteries may not carry the brand's logo (Samsung, in this case) due to licensing issues or to be sold as high-quality generic replacements at a more competitive price. This does not necessarily mean they are of lower quality.
What quality to expect?
- Compliance with Specifications: A true OEM battery must meet the original specifications for capacity (4100 mAh for the S10+), voltage, dimensions, and life cycles.
- Quality Components: They must use high-quality lithium-polymer cells and protection circuits (against overcharging, over-discharging, short-circuiting) similar to the original ones.
- Performance: They should offer performance and durability comparable to the original battery when it was new.
- Safety: This is crucial. Reputable OEM batteries have passed safety tests.
Why are they like the originals?
Because they often come from the same production lines or from manufacturers that comply with the rigorous quality standards imposed by the main brand (Samsung). The main difference may be the branding and the distribution channel. An OEM produces based on the design specifications provided by the designing entity (Samsung) and performs quality controls to meet those standards.
It is important to buy OEM batteries from reputable suppliers like iLevante.com, who ensure the quality of their components. Avoid cheap imitations that can not only perform poorly but also be dangerous. The absence of a logo is not a definitive indicator of low quality if the source is reliable and the battery is advertised as quality OEM.
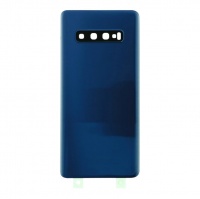
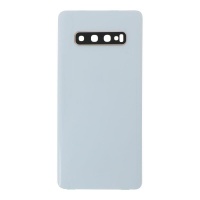
4. Aesthetics and Protection: The S10+ Back Covers
The back cover of your Samsung Galaxy S10+ not only defines much of its aesthetic but also protects the internal components and contributes to the device's premium feel. Made of glass (Corning Gorilla Glass 5) or ceramic in some variants, it is susceptible to cracks or scratches from drops or impacts.
A. Available Colours: Customise Your S10+
The Samsung Galaxy S10+ was launched in an attractive range of colours. If you need to replace the back cover, you can opt for your device's original colour or even change it to another to give it a fresh look. The most common colours include:
- Prism White
- Prism Black
- Prism Green
- Prism Blue
- Canary Yellow
- Flamingo Pink
- Ceramic Black
- Ceramic White
- Cardinal Red
- Smoke Blue
At iLevante.com and other suppliers, you can find back covers in several of these colours, often including the camera lens glass and pre-installed adhesive to facilitate the repair.
B. How to Change the Back Cover: A Detailed Process
The process for changing the back cover is the first step in many S10+ repairs, such as changing the battery or screen. Here we detail how to do it, based on Samsung's guides for its self-repair programme:
Tools Needed:
- Replacement back cover for S10+.
- Heat pack (or heat gun/hairdryer).
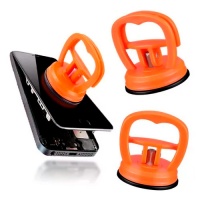
- Suction cup.
- Opening picks (thin metal and plastic).
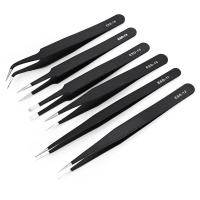
- Tweezers.
- ESD protective gloves, safety glasses, and a mask (especially if the glass is broken).
- Protective cover (if the original glass is very fragmented, to avoid cuts).
Steps to Follow:
-
Preparation:
- Make sure the device is completely turned off.
- Remove the SIM card tray. Disassembly with the SIM tray inserted can damage the device.
- If the rear glass is broken, place a protective cover (wide clear tape can work) over the glass to prevent fragments from scattering and to protect yourself.
- Work in a well-ventilated area.
-
Heating the Back Cover:
- Heat the heat pack in the microwave according to its instructions (make sure the turntable can spin freely). Wear safety gloves when handling it.
- Alternatively, use a heat gun on a low setting or a hairdryer.
- Apply heat evenly around the edges of the back cover for a few minutes to soften the adhesive. Avoid overheating.
-
Creating an Opening:
- Place the suction cup near one of the heated edges of the back cover (e.g., the left edge).
- Gently pull on the suction cup to create a small gap between the rear glass and the phone's frame.
- Insert the tip of a thin metal opening pick into that gap. Be very careful not to insert it too deeply to avoid damaging internal components.
-
Separating the Back Cover:
- Once the metal pick is inserted, you can switch to plastic picks to slide around the edges and cut the adhesive.
- Move the picks around the entire perimeter, applying more heat if necessary if you encounter resistance.
- Be especially careful near the camera module to avoid damaging any flex cables that might be nearby, although on the S10+ the cover is usually just the cover itself.
- Once all the adhesive is cut, carefully lift the back cover.
-
Cleaning and Preparing for the New Cover:
- Remove any old adhesive residue from the phone's frame. Make sure the surface is completely clean for a good bond with the new cover.
- Inspect the inside of the device for any debris or glass fragments and clean them if necessary.
-
Installing the New Back Cover:
- Remove the protective film from the adhesive on the new back cover (if it comes pre-installed). If not, apply new adhesive specific to the S10+ cover on the frame or on the cover itself.
- Carefully align the new cover with the phone's frame, paying attention to the camera opening and other holes.
- Press gently but firmly on all edges to ensure the cover adheres correctly and is well-sealed.
- You can use clamps or elastic bands around the phone for a while (e.g., an hour) to maintain pressure while the adhesive cures.
-
Finishing Up:
- Replace the SIM tray.
- Clean the new cover.
It is important to note that a user-performed repair may compromise the device's IP68 water and dust resistance. Using original or very high-quality parts with a ppropriate adhesives is crucial to try to maintain the best possible seal.
At iLevante.com, we offer back covers for the Samsung Galaxy S10+ in various colours, many of them with the camera glass and adhesive already included, which simplifies the replacement process.
5. Specific Spare Parts: Key Components for Your S10+
Besides the screen, battery, and back cover, there are other components that can fail or get damaged. Below, we detail two of the most requested, along with a list of other important replacement parts.
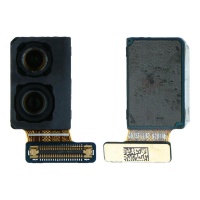
A. Front Camera for Samsung S10 Plus (SM-G975F)
The dual front camera of the Galaxy S10+ is one of its distinguishing features, offering high-quality selfies and the Live Focus function thanks to its 10 MP main sensor (Dual Pixel AF, f/1\.9) and its 8 MP depth sensor (f/2\.2).
Features of the Ideal Replacement:
- Exact Compatibility: It must be specific to the S10+ model (SM-G975F and its variants).
- Original or Equivalent Quality: To ensure that image quality, autofocus (Dual Pixel AF), video recording (up to 4K@60fps), and depth functions (Live Focus) are maintained as in the original.
- Complete Sensors: The replacement module must include both sensors (10MP and 8MP) for the S10+, as they work together.
Common Problems Requiring Replacement:
- Blurry or out-of-focus photos that are not fixed by cleaning the lens or with software adjustments.
- Spots, dots, or artefacts in images that are not external dirt.
- The camera app shows an error related to the front camera or does not detect it.
- Visible physical damage to the lens or module.
- Autofocus failures.
What to Look for in a Good Replacement:
- Reliable Supplier: Purchase from specialised shops like iLevante.com that guarantee the quality and compatibility of the spare part.
- Product Condition: Preferably new and, if possible, OEM or original quality.
- Warranty: A good supplier will offer a warranty on the spare part.
Samsung recommends, in case of camera failures, updating the software, resetting the camera app settings, clearing the app's cache, and even testing the camera in Test Mode (*#0*# in the phone app) to rule out software problems before assuming a hardware failure. If the camera does not work in Test Mode, it is likely a hardware problem.
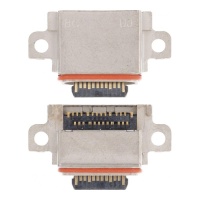
B. Charging Port for Samsung S10 / S10e / S10 Plus / S10 5G / Xcover 4s / Fold 5G
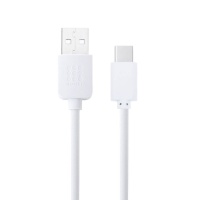
The charging port, being a USB Type-C connector in the S10 family, is essential not only for recharging the battery but also for data transfer and, in some cases, connecting accessories (like Samsung DeX). It is a part that suffers wear from continuous use.
Features of the Ideal Replacement:
- Connector Type: USB Type-C, compatible with the S10 specifications (USB 3.1, OTG, DisplayPort).
- Build Quality: Durable materials to ensure a good connection and withstand use. High-quality connectors are essential for a lasting connection and efficient charging.
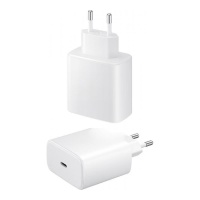
- Function Compatibility: It must support fast charging (15W PD2.0 for the S10+), high-speed data transfer, and, if applicable to the specific module, microphone functionality (sometimes the main microphone is integrated into the charging port board).
Compatible Models (according to the specific replacement part):
The "Charging port for Samsung S10 / S10e / S10 Plus / S10 5G / Xcover 4s / Fold 5G" replacement found at iLevante.com and other suppliers indicates wide compatibility. It is crucial to verify that the specific replacement part you purchase is correct for the exact model you are repairing, as although the base connector is USB-C, the board or flex on which it is mounted can vary slightly between models. For example, some listings specify compatibility for S10 (SM-G973), S10+ (SM-G975), S10e (SM-G970), and S10 5G.
Common Problems Requiring Replacement:
- The phone does not charge or charges intermittently.
- Slow charging despite using a compatible and fast charger and cable.
- The USB cable does not fit well, is loose, or you have to wiggle it to get it to charge.
- The computer does not recognise the device when connected via USB.
- Visible physical damage to the port (bent pins, embedded dirt that cannot be cleaned).
- Persistent moisture detection notifications even when the port is dry (could be a fault in the sensor associated with the port).
What to Look for in a Good Replacement:
- Specification for the Concrete Model: Although there are "universal" replacements for the series, one listed specifically for the S10+ (SM-G975F) or the exact model is preferable.
- Component Quality: "Original" or "High-quality compatible". Some suppliers indicate "Premium".
- Board/Flex Integrity: Often, the charging port comes mounted on a small printed circuit board (PCB) or a flex cable that may include other components like the microphone. Ensure that all necessary components are present and functional.
Samsung advises, in case of charging problems, to first check the charger and cable (that they are original or authorised and not damaged), clean the charging port of dust or debris carefully (by blowing gently or with compressed air, never with metal objects), and try another power source. The Samsung Members app also allows you to perform a diagnostic of the charging port.
6. Top 5 Best-Positioned Spare Parts for Your Samsung Galaxy S10+
Based on popularity, the criticality of the component, and availability in reference stores like iLevante.com, here we present a selection of the 5 most sought-after and best-rated spare parts to keep your Samsung Galaxy S10+ in top shape. Remember that the "best position" can vary depending on the user's specific needs and current offers.
-
Complete Screen for Samsung Galaxy S10 Plus / G975:
- Relevant Information: This is, without a doubt, one of the most in-demand spare parts. Opting for a complete screen (LCD/AMOLED + Touch + Frame, if possible) greatly simplifies the repair and ensures the best visual quality. Original or equivalent quality Dynamic AMOLED screens are the best option for the S10+ to not lose image quality, touch response, or the functionality of the ultrasonic fingerprint sensor. At iLevante.com, the "Complete screen for Samsung Galaxy S10 Plus / G975" is a star product, restoring the original visual experience. They are usually available in the original frame colours (Prism Black, Prism White, etc.).
- Why it's a Top Pick: The screen is the component we interact with the most and the most prone to damage from drops. A quality replacement is fundamental.
-
Battery for Samsung Galaxy S10 Plus EB-BG975ABU 4100mAh:
- Relevant Information: Over time, all batteries degrade. Replacing the 4100mAh EB-BG975ABU battery can restore your S10+'s original autonomy. It is important to look for good quality batteries, ideally OEM or from reliable suppliers that ensure the real capacity and safety mechanisms. At iLevante.com, this spare part is key for users to continue enjoying their device without being tied to a charger.
- Why it's a Top Pick: Good battery life is crucial for the mobile experience. It is one of the most common repairs with the greatest impact on daily usability.
-
Glass Back Cover (with Camera Lens and Adhesive):
- Relevant Information: A broken or heavily scratched back cover detracts from the S10+'s aesthetic and can compromise its integrity. Replacements usually come in the original colours (Prism Black, White, Green, Blue, Ceramic, etc.) and ideally include the protective glass for the cameras and pre-installed adhesive, greatly facilitating assembly.
- Why it's a Top Pick: It restores the phone's premium appearance and protects the internal components. It's a relatively simple repair with a great visual impact.
-
Charging Port (Board with USB-C Connector):
- Relevant Information: Charging problems are frustrating and can render a mobile unusable. The replacement charging port for the S10+ (and compatible models in the S10 series) is usually a small board or flex that contains the USB-C connector and, sometimes, the microphone. Ensuring compatibility with fast charging and data transfer is vital.
- Why it's a Top Pick: It solves one of the most disabling problems a device can have. It is a relatively inexpensive spare part that can significantly extend the phone's lifespan.
-
Rear Camera (Triple Module):
- Relevant Information: Although less common than screen breakage, a failure in the S10+'s impressive triple camera system (12MP main + 12MP telephoto + 16MP ultra-wide) can be a major inconvenience for photography lovers. Replacement modules must be of high quality to maintain sharpness, focus, optical image stabilisation (OIS), and colour reproduction.
- Why it's a Top Pick: The camera is one of the most outstanding features of the S10+. Replacing a faulty module allows you to continue capturing moments with the expected quality. Rear camera modules for the S10/S10+ can be found in specialised shops.
When looking for these spare parts, it is essential to check for compatibility with your exact model (e.g., SM-G975F for the European S10+) and the quality offered by the seller. Suppliers like iLevante.com strive to offer parts that meet high standards.
7. Beyond the Basics: Other Essential Replacements for Your S10+
In addition to the main components, there are many other small but crucial spare parts that may need to be replaced in your Samsung Galaxy S10+. Having access to these parts ensures that you can perform a complete repair and restore all functionalities to your device.
- Earpiece Speaker: This is the speaker you use to listen during phone calls. If calls sound quiet, distorted, or are inaudible (unless you use the loudspeaker), this could be the culprit. Specific replacements for the S10+ are available.
- Loudspeaker/Buzzer: Responsible for ringtones, notifications, music, and audio in loudspeaker mode. If these sounds are of poor quality or non-existent, you will need a replacement.
- Physical Buttons (Power, Volume): Although the buttons themselves rarely fail, the internal mechanism or the flex cable they are connected to can. Both the external buttons (available in the chassis colours) and the internal flex cables that register the press (Power Flex, Volume Flex) are sold.
- Various Flex Cables: Internally, a smartphone like the S10+ uses numerous flexible cables to connect different components to the motherboard. This includes the screen flex, charging port flex, interconnect flex between boards, fingerprint sensor flex, NFC antenna and wireless charging flex, etc. A damaged flex cable can cause a wide variety of problems.
- Vibration Motor: If your phone has stopped vibrating for notifications or calls, the small vibration motor may need to be replaced.
- SIM/MicroSD Tray: Although it seems simple, a broken or lost SIM tray prevents you from using mobile connectivity or expanding storage. They are available in the S10+'s chassis colours and for single or dual SIM versions.
- 3.5mm Headphone Jack: Fortunately, the S10+ retains this port. If you have problems with audio from wired headphones (sound from only one side, crackling, headphones not detected), the headphone jack module may be damaged.
- Rear Camera Lens Glass: Sometimes only the small glass that protects the rear camera lenses gets scratched or broken, while the camera module itself is fine. This glass can be replaced independently and usually comes with a bezel or adhesive.
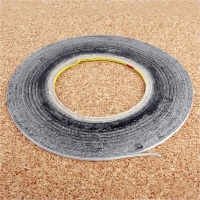
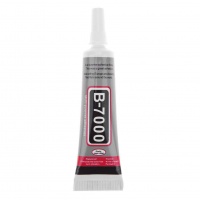
- Adhesives: For many repairs, especially those involving opening the phone (screen, back cover, battery), you will need specific adhesives to ensure a proper seal and, as far as possible, maintain some resistance to dust and moisture ingress.
- Screws: Although it may seem trivial, losing one of the small internal screws during a repair is easy. Having a replacement set or knowing where to get specific ones can be useful.
At iLevante.com, we strive to have a complete catalogue that covers these and other needs, so you can find everything your Samsung Galaxy S10+ may require.
8. Diagnosing Common Hardware Problems in the S10+
Even a device as well-built as the Samsung Galaxy S10+ can develop hardware problems over time, whether from wear and tear, accidents, or component failure. From a technical repair perspective, these are some of the most common hardware issues that lead users to seek spare parts:
-
Screen Damage (Breaks, Dead Pixels, Touch Failures):
- Common Cause: Physical impacts (drops, knocks). Wear of the digitiser.
- Symptoms: Cracked glass, patches on the screen, coloured lines, areas that don't respond to touch, ghost touches.
- Typical Solution: Replacement of the complete screen assembly. At iLevante.com, the complete screen for the S10+ is a fundamental spare part.
-
Battery Degradation or Failure:
- Common Cause: Natural ageing of the battery (charge cycles), exposure to extreme temperatures, use of poor-quality non-original chargers.
- Symptoms: Greatly reduced duration, unexpected shutdowns, battery swelling, the phone won't turn on or charge.
- Typical Solution: Replacement of the battery (model EB-BG975ABU for the S10+).
-
Charging Port Issues (USB-C):
- Common Cause: Wear from continuous use, ingress of dirt or liquids, physical damage to the connector from forced or incorrect cable insertion.
- Symptoms: The phone doesn't charge, slow charging, unstable data connection with a PC, the cable doesn't hold well.
- Typical Solution: Careful cleaning of the port (if it's dirt). If it persists, replacement of the charging port module.
-
Camera Failures (Front or Rear):
- Common Cause: Direct impacts, ingress of dust or moisture if the seal has been compromised, electronic sensor failures.
- Symptoms: Blurry photos, spots, the camera app won't open or gives an error, faulty focus.
- Typical Solution: Replacement of the affected camera module. It is important to first check if it is a software problem.
-
Audio Problems (Speakers or Microphone):
- Common Cause: Obstruction by dirt, liquid damage, component failure.
- Symptoms: Can't hear on calls (earpiece), no ringtones (loudspeaker), the other person can't hear you (microphone).
- Typical Solution: Cleaning the grilles. If that doesn't work, replacement of the corresponding speaker or microphone.
-
Unresponsive Physical Buttons (Power, Volume):
- Common Cause: Wear of the internal button mechanism, damage to the associated flex cable.
- Symptoms: The button is stuck, doesn't "click", or doesn't register a press.
- Typical Solution: Replacement of the external button set or the internal flex cable. Sometimes, a poor contact between the motherboard and the flex can be the cause if the screws are loose.
-
Persistent Overheating:
- Common Cause: Faulty battery, prolonged intensive use, motherboard issues, poor heat dissipation.
- Symptoms: The phone gets excessively hot even with light use or during charging.
- Typical Solution: If it's the battery, replace it. If it's more serious, it may require professional diagnosis. Avoiding leaving the phone in the sun or on hot surfaces and not using it intensively while charging are preventive measures.
-
Problems with the Ultrasonic Fingerprint Reader:
- Common Cause: Incompatible or low-quality replacement screen, unsuitable screen protector, sensor failure (although it's integrated into the screen).
- Symptoms: The reader doesn't recognise the fingerprint or does so erratically. Some users reported problems even with a new device, which were sometimes fixed with updates or by re-scanning their fingerprints.
- Typical Solution: Ensure the replacement screen is high-quality and compatible. Remove problematic screen protectors. Re-register fingerprints.
-
Connectivity Failures (Wi-Fi, Bluetooth, NFC, Mobile Data):
- Common Cause: Antenna problems, failures in the connectivity chips, damage to internal flex cables.
- Symptoms: Unstable or non-existent Wi-Fi or Bluetooth connection, NFC not working, poor mobile signal reception.
- Typical Solution: Diagnosis to isolate whether it's the antenna, cable, or chip. Replacement of the affected component.
For a technician, the first step is always a good diagnosis. This can involve software tests (like the Samsung Members diagnostics), visual inspection, and sometimes, testing with known good replacement components. The internal structure of the S10+, with its glued-on glass back and multiple components interconnected by flex cables, means that repairs require precision and care. iFixit gives it a repairability score of 3 out of 10, indicating it is not the easiest device for a beginner to repair.
9. When Software Causes Problems: A Technical Perspective
Not all problems affecting your Samsung Galaxy S10+ originate in the hardware. Sometimes, the software can be the culprit for strange behaviour or failures that, at first glance, might seem like a physical defect. From a repair technician's perspective, it is crucial to distinguish between a software and a hardware problem to avoid unnecessary replacements.
Common Software-Related Problems and Their Technical Diagnosis:
-
General System Slowdown or Freezes:
- Possible Software Causes: Accumulation of temporary files and cache, too many apps running in the background, lack of storage space, poorly optimised or buggy apps, outdated operating system.
-
Technical Diagnosis:
- Check available storage.
- Optimise the device using the "Device care" feature in Settings (closes background apps, frees up RAM, clears cache).
- Clear the cache of specific apps that seem problematic.
- Update all apps and the operating system to the latest available version.
- Test the device in Safe Mode. If the problem disappears in Safe Mode, a third-party app is likely the cause. Proceed to uninstall recent or suspicious apps one by one.
- As a last resort, perform a factory reset (after backing up data).
-
Apps Closing Unexpectedly (Force Close / Crashing):
- Possible Software Causes: App incompatibility with the current OS version, bugs in the app itself, corrupt app data, a pending or corrupt Android System WebView update.
-
Technical Diagnosis:
- Force close the app and restart it.
- Clear the cache and data of the affected application (Settings > Apps > [App] > Storage).
- Check for app updates in the Google Play Store or Galaxy Store.
- Uninstall and reinstall the application.
- Check for Android System WebView updates in the Play Store.
-
Abnormal Battery Drain (With No Apparent Hardware Cause):
- Possible Software Causes: Apps consuming a lot of power in the background (rogue apps), synchronisation errors, bugs in the operating system after an update, poor management of the "Lift to wake" feature (especially on Exynos versions).
-
Technical Diagnosis:
- Review battery usage by app in Settings > Device care > Battery.
- Disable "Lift to wake" (Settings > Advanced features > Motions and gestures) if this bug is suspected.
- Restrict background usage of high-consumption apps.
- Calibrate the battery (discharge it completely and then charge it to 100% without interruption).
- If the problem arose after an update, consider wiping the cache partition from recovery mode (advanced technical procedure).
-
Connectivity Problems (Wi-Fi, Bluetooth) Not Related to Antennas:
- Possible Software Causes: Corrupt network settings, errors in the OS connectivity services, interference from other apps.
-
Technical Diagnosis:
- Restart the router and the phone.
- "Forget" the Wi-Fi network and reconnect.
- Reset network settings (Settings > General management > Reset > Reset network settings). This will erase all saved connections.
- For Bluetooth, unpair the device and pair it again.
- Check in Safe Mode to rule out app interference.
-
Software Update Failures:
- Possible Causes: Unstable Wi-Fi connection during download, lack of storage space, low battery, corrupt update files.
-
Technical Diagnosis:
- Ensure a stable Wi-Fi connection and sufficient space (delete unnecessary apps/files or use Samsung Cloud for backup).
- Charge the battery to at least 70%.
- Try the update in Safe Mode.
- Use Samsung Smart Switch on a PC to perform the update.
-
Software-Based Camera Errors:
- Possible Causes: Corrupt camera app cache, incorrect settings, conflicts with other apps that use the camera.
-
Technical Diagnosis:
- Force close and restart the Camera app.
- Reset the Camera app's settings from within its own settings menu.
- Clear the cache and data of the Camera app.
- Ensure the OS and the Camera app are up to date.
A repair technician will often use the Samsung Members app to perform system diagnostics and send error reports if necessary, which can help identify whether a problem is software-related or requires a hardware intervention. The key is to be methodical: start with the simplest and least invasive software solutions before considering a factory reset or, of course, opening the device to replace hardware.
10. Quick Repair Guide: Tips and Basic Steps
Embarking on the repair of your Samsung Galaxy S10+ can be a rewarding experience and an excellent way to save money. Although some repairs are complex and best left to professionals, many others, such as changing the battery or back cover, are within reach of a patient user with the right tools.
Essential Tools You Can't Be Without:
Before starting any repair, make sure you have on hand:
- Precision screwdriver kit: The S10+ uses small Phillips screws (PH#00).
- Opening picks: Both plastic (to avoid scratching) and thin metal (to create the first opening).
- Suction cup: To lift the back cover or screen.
- Heat gun or hairdryer: Essential for softening the adhesive.
- Anti-static tweezers: For handling small connectors and screws.
- ESD (electrostatic discharge) gloves: To protect sensitive components.
- Safety glasses: Especially if you are working with broken glass.
- Screw organiser tray: Very useful for not losing the tiny screws and knowing where each one goes.
Golden Rules for a Successful Repair:
- Prior Research: Watch several video tutorials specific to the Samsung Galaxy S10+ and the particular repair you are going to perform. Sites like iFixit offer detailed guides.
- Work Environment: Choose a clean, well-lit, and organised space. A white surface helps to see small components.
- Discharged Battery: For safety, it is recommended that the device's battery be below 25% before you start, to reduce the risk in case of an accidental puncture.
- Organisation: Have all your spare parts and tools ready before you begin. As you disassemble, organise the screws and small parts logically.
- Patience and Care: Do not force any component. If something doesn't give way, check if you have removed all the screws or if you need to apply more heat to the adhesive.
- Disconnecting the Battery: Whenever possible, disconnect the battery as soon as you have access to its connector. This prevents accidental short circuits while you handle other components.
- Photographic Documentation: Taking photos at each step of the disassembly can be an invaluable aid during reassembly.
Basic Steps Common to Several Repairs (Summary):
- Power Off and Remove SIM: Always turn off the device and remove the SIM tray.
- Apply Heat: The back cover and, in some cases, the screen, are held in place with strong adhesive. Apply moderate, even heat to the edges to soften it.
- Careful Opening: Use a suction cup to create a small gap and then insert picks (thin metal first, then plastic) to cut the adhesive around the edges. Proceed slowly and carefully to avoid damaging internal flex cables or scratching the frame.
- Handling Flex Cables: The internal components are connected by delicate flex cables. Disconnect them using a plastic tool (spudger) or your fingernail, lifting the small security tabs on ZIF connectors if there are any. Never pull on the cables.
- Transferring Components (if applicable): If you are replacing a screen with a frame, for example, you will have to transfer the motherboard, battery, cameras, speakers, etc., from the old chassis to the new one. Be methodical.
- Cleaning Old Adhesive: Before placing a new component with adhesive (like a screen or back cover), thoroughly clean all remnants of the old adhesive to ensure a good seal.
- Pre-Closure Testing: Before sealing the device permanently, connect the essential components (screen, battery) and turn on the phone to test the functionality of the installed replacement part.
- Final Sealing: Use adhesive specific to the component and model. Apply even pressure (you can use clamps or rubber bands) for the recommended curing time.
When to Trust a Professional Technical Service:
Although we encourage DIY, there are situations where it is wiser to seek professional help:
- Lack of Experience or Confidence: If the repair seems too complex or you don't feel confident, it's better not to risk it. The S10+ has a low repairability score (3/10 according to iFixit), which indicates it is not for novices.
- Inadequate Tools: Attempting a repair without the correct tools can cause more damage to the device.
- Persistent or New Problems: If after your repair the problem continues or new faults arise.
- Device Under Warranty: If your S10+ is still under warranty, an unauthorised repair could void it. Samsung offers official repair services.
- Motherboard-Level Repairs: Problems that require microsoldering or advanced motherboard diagnostics (e.g., IC failures) are beyond the scope of the average user.
- Severe Liquid Damage: Although the S10+ is IP68-rated, if it has suffered prolonged immersion or contact with corrosive liquids, the repair can be very complex.
Samsung even has a self-repair programme in some regions, providing original parts and guides, but they always emphasise the need to use a ppropriate tools and follow instructions carefully.
11. Your Samsung Galaxy S10+ Still Has a Lot to Offer
We've reached the end of this extensive guide, and we hope you now feel much more informed and prepared to tackle any repair needs your Samsung Galaxy S10+ may have. Repairing your device is not only a smart decision from an economic point of view, avoiding the cost of a new phone, but also a sustainable action that reduces e-waste and allows you to continue enjoying the excellent features the S10+ still offers.
As you have seen, many common problems, from a broken screen to a worn-out battery or a faulty charging port, have a solution. With the high-quality spare parts you'll find at iLevante.com and the right information, a great number of these repairs are within your reach. Whether you need a new Dynamic AMOLED screen to revive those vibrant colours, an EB-BG975ABU battery to regain lost autonomy, a sleek back cover to restore its aesthetic, or more specific components like cameras, speakers, or charging ports, we have what you need.
We invite you to explore our complete section of spare parts for the Samsung Galaxy S10+ (SM-G975F and its variants) on iLevante.com. There you will not only find a wide range of parts but also the necessary tools to carry out your repairs successfully. Our commitment is to offer you quality components, many of them original or OEM-spec, to guarantee the compatibility and performance your S10+ deserves.
Don't let a small mishap separate you from your faithful technological companion. With a little patience, the right tools, and the proper spare parts from iLevante.com, you can be the hero of your own repair and give your Samsung Galaxy S10+ a second life. Your device and your wallet will thank you for it! 👍

