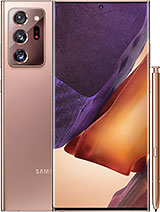
 Repair parts Samsung Galaxy Note 20 Ultra

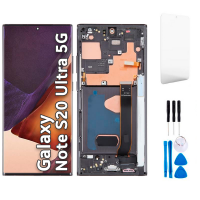
Receive it on tuesday 17 de february
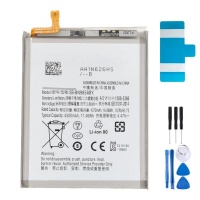
Receive it on tuesday 17 de february
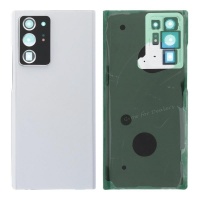
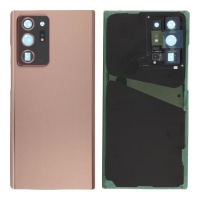
Receive it on tuesday 17 de february
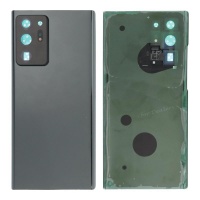
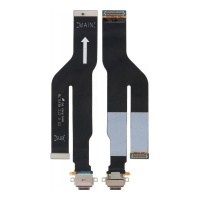

Receive it on tuesday 17 de february
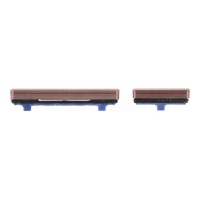
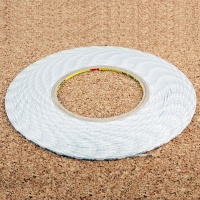
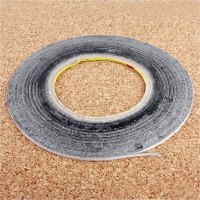
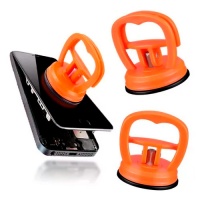
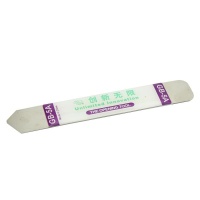
Receive it on tuesday 17 de february

🛠️ Comprehensive Diagnostic and Repair Guide for the Samsung Galaxy Note 20 Ultra
This report presents a detailed technical analysis of the Samsung Galaxy Note 20 Ultra, covering its system architecture, underlying technologies, a diagnostic methodology for common hardware and software faults, and detailed repair guides. The objective is to provide a definitive resource for advanced users, technicians, and enthusiasts seeking to understand, maintain, and repair this flagship device.
🔬 Device Architecture and Core Technologies
To effectively diagnose and repair the Galaxy Note 20 Ultra, a thorough understanding of its hardware and the technologies that define its user experience is imperative. This section breaks down the critical components and their functions.
⚙️ Technical Specifications and Component Functions
Core System Architecture
The foundation of the Note 20 Ultra's performance lies in its sophisticated system architecture, which varies by region.
- Processor Variants: The device was manufactured with two main chipsets: the global version uses the Exynos 990 (7 nm+), whilst the US variant is equipped with the Qualcomm SM8250 Snapdragon 865 5G+ (7 nm+). These differences extend to their CPU architectures (Mongoose M5/Cortex-A76 for the Exynos vs. Kryo 585/Cortex-A77 for the Snapdragon) and GPUs (Mali-G77 MP11 vs. Adreno 650). These variations can lead to notable differences in sustained performance and thermal management, a recurring topic in user community discussions.
- Memory and Storage: The device features 12 GB RAM configurations and UFS 3.0 internal storage options of 128 GB, 256 GB, or 512 GB. A standout feature is the inclusion of a microSDXC card slot, allowing for storage expansion—an increasingly rare attribute in high-end phones.
- Sensor Array: The Note 20 Ultra is equipped with a comprehensive suite of sensors, including an under-display ultrasonic fingerprint sensor, accelerometer, gyro, proximity sensor, compass, and barometer. Each sensor plays a crucial role in the device's functionality, from biometric security to navigation and environmental sensing.
The Dynamic AMOLED 2X Display: A Deep Technical Dive 📱
The display is the device's primary user interface, and its technology is a key selling point.
- Core Technology: The Note 20 Ultra incorporates a 6.9-inch Dynamic AMOLED 2X display with a resolution of 1440 x 3088 pixels (~496 ppi) and HDR10+ certification. AMOLED technology is an active matrix of organic light-emitting pixels integrated into a thin-film transistor (TFT) array. Unlike traditional TFT/LCD screens, which require a constant backlight, each pixel in an AMOLED display generates its own light.
- Performance Comparison (AMOLED vs. TFT/LCD): AMOLED technology offers significant advantages. It provides superior, theoretically infinite contrast ratios and "true blacks," as individual pixels can be completely turned off. This also translates into greater power efficiency when displaying dark content. Conversely, TFT/LCD screens have lower contrast ratios, and their constant backlight consumes more power, especially with bright content. AMOLED screens also offer wider viewing angles and more vibrant colour gamuts. However, TFTs can achieve higher peak brightness, potentially making them better for outdoor visibility.
- Adaptive 120Hz Refresh Rate: A key feature of the Note 20 Ultra's display is its ability to intelligently adjust the refresh rate up to 120Hz, providing smoother scrolling and gaming experiences. The rate is lowered for static content, such as articles, to conserve battery life. Importantly, the 120Hz rate is only available at FHD+ resolution, not the full WQHD+ resolution, presenting the user with a trade-off between fluidity and definition.
The S Pen: A Dual-System Marvel 🖊️
The S Pen is the defining feature of the Note series. Its functionality relies on two distinct but cooperative technologies.
- Wacom EMR (Electromagnetic Resonance): For core writing and drawing functions, the S Pen uses Wacom's passive EMR technology. The phone's display generates an electromagnetic field that wirelessly powers a circuit in the pen. As the pen moves, it disrupts this field, and the sensor grid beneath the screen detects its precise location, tilt, and pressure levels (up to 8192 levels). A key advantage is that the pen needs no battery for these functions, is highly accurate, and supports palm rejection.
- Bluetooth Low Energy (BLE): For "Air Actions" (remote control gestures), the S Pen contains a supercapacitor and a Bluetooth module. When removed from the phone, it connects via BLE, allowing button presses and gestures (e.g., waving the pen to change camera modes or control media playback) to be transmitted wirelessly to the phone. The pen charges its capacitor when docked inside the phone. This dual system explains why the writing function can still work even if Air Actions are disconnected or the pen is "dead".
Functional Overview of Key Internal Modules
Below is an introduction to the function of other frequently replaced components.
- Camera Module: The Note 20 Ultra features a complex triple-lens rear camera system: a 108MP wide, a 12MP ultrawide, and a 12MP periscope telephoto with 5x optical zoom, supported by a laser autofocus sensor for rapid focusing. Each lens serves a specific photographic purpose, and the module itself is an intricate assembly of lenses, sensors, and processing hardware.
- Audio System (Earpiece vs. Loudspeaker): The device uses a stereo speaker setup. The earpiece speaker, located at the top of the phone, is smaller and optimised for voice calls held close to the ear. The main loudspeaker, located at the bottom, is larger and more powerful, designed for media playback, ringtones, and speakerphone functionality. Failure symptoms are distinct: earpiece issues affect call clarity, whilst loudspeaker issues affect all other audio output.
- Haptic Feedback (Vibration Motor): This is a compact DC motor—either an Eccentric Rotating Mass (ERM) or a more advanced Linear Resonant Actuator (LRA)—that generates vibrations for notifications and haptic feedback. Its function is to provide tactile alerts in silent mode or to enhance the user interface.
- Antenna Assemblies: These are typically flexible printed circuits (FPCs) or "flex cables" responsible for transmitting and receiving cellular (GSM, LTE, 5G), Wi-Fi, Bluetooth, and NFC signals. A damaged antenna flex cable can lead to poor or no connectivity.
🩺 Diagnostics and Troubleshooting
This part provides a structured methodology for identifying the root cause of common problems, enabling the user to distinguish between simple software glitches and genuine hardware failures that may require repair.
🔍 Identifying and Resolving Common Faults
Symptomatology of Hardware Failures
A guide to recognising the signs of failing physical components.
- Battery Degradation: The primary signs are a drastic decrease in runtime, unexpected shutdowns even with remaining charge, and in extreme cases, a physical bulging of the battery at the rear of the device. These symptoms are caused by the natural electrochemical deterioration of the lithium-ion cell after hundreds of charge cycles.
- Screen Anomalies: Common issues include a green tint to the display (an "OLED lottery" issue), flickering, dead or discoloured pixels, all of which typically indicate that the AMOLED panel is failing and needs replacement.
- Charging Port Malfunction: Symptoms include the phone not charging, charging intermittently (requiring the cable to be held at a certain angle), or a "moisture detected" warning when the port is dry. This is often due to physical wear and tear from repeatedly plugging and unplugging or the presence of debris in the port.
- Button Failure: The physical side buttons can become unresponsive or fall off entirely due to the degradation of the plastic retaining clips over time.
- Vibration Motor Failure: Symptoms range from a complete lack of vibration to weak, inconsistent, or noisy/rattling vibrations. This can be caused by a dislodged motor, debris, or complete motor burnout.
Software-Induced Issues and Their Solutions 💻
Many problems that appear to be hardware-related are, in fact, software glitches, especially after an operating system update.
- Random Reboots and Freezing: A significant number of users report their devices freezing or entering reboot loops, especially after software updates. This can be caused by a rogue third-party app, corrupted cache files, or a bug in the update itself. Troubleshooting involves booting into Safe Mode, wiping the cache partition, and, as a last resort, a factory reset.
- Post-Update Network Loss: A common and frustrating issue where the phone loses all cellular connectivity after a software update. This is a clear software bug. Solutions include resetting network settings, verifying APN settings, and looking for a subsequent patch from Samsung.
- Accelerated Battery Drain: Whilst often a sign of a dying battery, a sudden and severe battery drain immediately following a software update is usually a software optimisation issue. Wiping the cache partition and resetting app preferences can often resolve this.
Special Investigation: The "Ghost Touch" Phenomenon 👻
This issue, where the screen registers touches without user input, is a complex problem with both hardware and software causes.
- Common Causes: Faulty or low-quality charging cables/adapters that disrupt the screen's digitiser, dirt or moisture on the screen, ill-fitting screen protectors that trap air or debris, and software glitches.
- Troubleshooting Steps: The process involves isolating the variable: changing the charger, cleaning the screen, removing the case and screen protector, restarting the device, toggling "Touch sensitivity" and "Accidental touch protection" settings, and running diagnostics. If these fail, a factory reset may be necessary. If the problem persists, it is a hardware failure of the digitiser, requiring a screen replacement.
S Pen Diagnostics
Troubleshooting the stylus requires a specific approach.
- Connection Loss ("S Pen disconnected"): This is a common issue where Air Actions stop working. The first steps are to try resetting the S Pen via the settings menu (Settings > Advanced features > S Pen > Air actions > Reset S Pen) and wiping the phone's cache partition.
- Input Recognition Failure: If the pen is not recognised at all or only in certain areas, the cause could be a magnetic case interfering with the EMR field, a worn-out S Pen nib, or a software setting.
- Air Actions Malfunction: If gestures are not working, check that the S Pen is charged, is within the ~30-foot (~9-metre) range, and that Airplane mode is off. Resetting the S Pen is also a primary solution here.
📈 Advanced Diagnostic Framework
Using On-board Diagnostic Tools
A guide to accessing and interpreting the phone's self-diagnostic utilities.
- Samsung Members App: This app provides a user-friendly interface for running diagnostics on individual components, including the battery, touchscreen, sensors, and vibration motor.
- Secret Dialer Codes: Accessing the hardware test menu by dialling
*#0*#allows for direct testing of screen colours (Red, Green, Blue), touch sensitivity, speaker output, and sensor readings. This is a powerful tool for isolating hardware faults.
Diagnostic Decision Tree (Hardware vs. Software)
A critical challenge for users is determining whether a fault is rooted in software or hardware. A systematic process can prevent unnecessary repairs or frustrating software troubleshooting.
- Identify the Issue: The user observes a fault (e.g., random reboots).
- Software-First Approach: The first step should always be the least invasive. Does the problem persist in Safe Mode? If no, a third-party app is the likely cause. If yes, proceed.
- Cache & Settings Reset: The next step is to wipe the cache partition and reset all settings. These actions clear temporary files and configurations without deleting user data and can fix many update-related bugs. Does the problem persist? If no, a software configuration error was the issue. If yes, proceed.
- Hardware Verification: Use the diagnostic tools from Section 3.1 (Samsung Members, dialer codes) to test the specific component suspected of failing. Does the component fail the diagnostic test (e.g., vibration test does not work, touch test shows dead spots)? If so, this is a confirmed hardware failure.
- The Final Software Step: If diagnostics pass but the issue remains, the last software-based solution is a Full Factory Reset (after a complete data backup). If the problem still persists after a factory reset, it points to an intermittent or complex hardware fault (such as a motherboard issue) that diagnostics might not catch.
This structured tree provides a clear path from simple fixes to definitive hardware condemnation, saving the user time and money.
📖 The Complete Repair Manual
This part is the practical core of the guide, providing the knowledge and step-by-step instructions needed to perform the most common repairs. Emphasis is placed on safety, best practice, and informed decision-making.
🛠️ DIY Smartphone Repair Fundamentals
The Essential Toolkit
A detailed list of the tools required for almost every Note 20 Ultra repair.
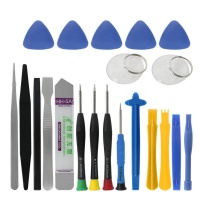
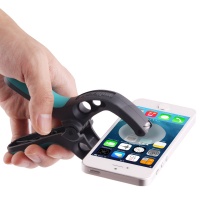
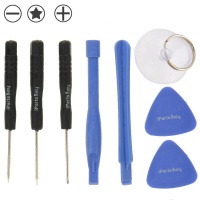
- Opening Tools: A heat gun or hair dryer, a suction cup or iSclack, and thin but strong prying tools like the iFlex and plastic opening picks. These are indispensable for separating the heavily-adhered glass back cover and screen.
- Screwdrivers: A precision screwdriver set including Phillips #00 bits is essential for the internal screws.
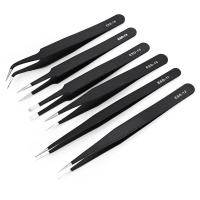
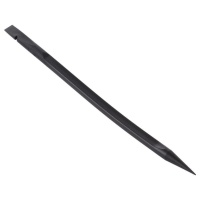
- Handling Tools: ESD-safe tweezers for manipulating small flex cables and components, and a plastic spudger for safely disconnecting press-fit connectors.
- Workspace Organisation: A magnetic project mat is strongly recommended to keep track of the numerous, different-sized screws and prevent their loss or incorrect reassembly.
- Safety Gear: Samsung's own repair guides mandate the use of ESD-safe gloves, safety glasses, and a face mask, especially when handling broken glass.
Workshop Best Practices
- Preparation: Work in a clean, well-lit, and organised space. Back up all device data before beginning any repair. Fully discharge the battery to below 25% to minimise the risk of fire if it is accidentally punctured.
- Screw Organisation: This is a critical discipline. Use a magnetic mat or labelled containers. A common DIY method is to draw an outline of the phone on a piece of paper and tape the screws to their corresponding locations as they are removed. This prevents "long screw damage," where a long screw is inserted into a short hole, potentially piercing the motherboard.
- Handling Flex Cables: These ribbon-like cables are extremely fragile. Use a plastic spudger to gently pry up the press-fit connectors. Never pull on the cable itself. Be careful not to bend them more than 90 degrees or create sharp creases, as this can break the internal copper traces.
The Adhesive Dilemma (Pre-cut vs. Liquid)
- Pre-cut Adhesive: This is the preferred method for resealing the glass back cover or screen. It is custom-cut for the device, ensuring a precise fit and an even bond. It is easier for beginners to apply correctly.
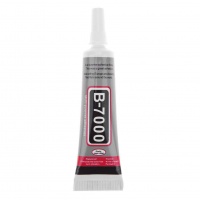
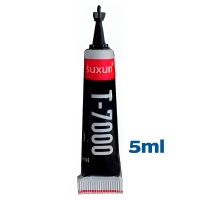
- Liquid Adhesives (B-7000/T-7000): These are strong, flexible industrial glues popular in the repair community. They are useful for securing spots that might lift due to a bent frame but can be messy and require careful application with a precision tip. They are water-resistant once cured but require a 24-48 hour curing time for maximum bond.
Special Report: The IP68 Rating is a One-Time Seal 💧
A crucial and often misunderstood aspect of phone repair is water resistance. The factory IP68 rating is achieved under precise manufacturing conditions with specific adhesives and pressure application that cannot be replicated in a DIY setting or even most professional repair shops.
The logic is as follows: the Note 20 Ultra is rated IP68, meaning it can withstand submersion in up to 1.5 metres of fresh water for 30 minutes when it leaves the factory. This seal is dependent on a strong, perfectly applied adhesive around the glass back cover and the screen assembly. Any repair that requires opening the device—such as replacing the battery, screen, or charging port—involves breaking this factory seal. Whilst new adhesive strips or glues are applied during reassembly, it is highly unlikely to restore the original IP68 integrity. Factors like microscopic dust particles, imperfect pressure application, or a slightly bent frame can create micro-gaps. Manufacturers like Google explicitly state that water resistance is not a permanent condition and can be lost due to a repair, and that liquid damage voids the warranty regardless of the IP rating.
Therefore, the user must assume that the phone is no longer water-resistant after any repair. It may be "splash-resistant" or "rain-proof," but submersion should be avoided at all costs. Only repairs performed by a Samsung-Authorised Service Centre, using OEM-standard gaskets and sealing processes, have a chance of restoring the rating.
🔩 Step-by-Step Component Replacement Guides
This section will synthesise official Samsung guides (which are often generic) with more practical and detailed text and video guides from the repair community to create a definitive set of instructions.
Back Glass Replacement
- Process: Heat the edges, use a suction cup to create a gap, insert picks, carefully slice through the adhesive, remove the broken glass, clean the frame of all old adhesive, apply the new pre-cut adhesive, and press the new back glass into place.
Battery Replacement
- Process: Follow steps to remove the back glass. Disconnect the battery connector. Use isopropyl alcohol to soften the battery adhesive. Carefully pry out the old battery without bending or puncturing it. Install the new battery with new adhesive strips.
Screen Assembly Replacement
- Sub-section: With Frame vs. Without Frame - A Critical Decision. The choice between a "with frame" and "without frame" screen is the most important decision in a screen repair, with major implications for difficulty, risk, and final quality. A "without frame" screen is just the glass and OLED panel. This requires the technician to heat and separate the old, broken screen from the phone's original metal frame, meticulously scrape away all the old adhesive and glass shards, and then glue the new screen into the old frame. This is high-risk; the new screen can easily be broken during installation, and achieving a perfect, water-resistant seal is extremely difficult.
A "with frame" screen comes with the OLED panel pre-installed into a new metal frame. This eliminates the most difficult and riskiest part of the repair. The process becomes a "simple" component swap: transferring the motherboard, battery, charging port, vibration motor, and other small parts from the old frame to the new one. Whilst the component transfer is time-consuming and requires careful organisation, it is generally considered far easier and safer for beginners and even many professionals, resulting in a higher-quality, factory-like finish. Therefore, despite a slightly higher cost, the "with frame" option is almost always the recommended route for a DIY repair to minimise risk and maximise the chance of success.
Charging Port Assembly Replacement
- Process: Follow steps to remove the back glass. Remove the loudspeaker module. Disconnect the main flex, antenna, and other connectors from the daughterboard. Unscrew and remove the old charging port assembly. Install the new one and reconnect everything.
Main Camera Module Replacement
- Process: Follow steps to remove the back glass. Remove the motherboard cover. Disconnect the battery. Disconnect the camera connectors from the motherboard. Carefully lift out the camera module. Install the new module.
Side Buttons and Flex Cable Replacement
- Process: This is an advanced repair. It may require motherboard removal. The external buttons are pushed out from the inside, and the new buttons are clipped into place. If the internal flex cable is damaged, it must be carefully peeled away and replaced.
Speaker Assembly (Earpiece and Loudspeaker) Replacement
- Process: The loudspeaker is straightforward (remove back glass, remove module). The earpiece speaker is more complex, often integrated with other components like the antenna cover and requiring motherboard removal.
S Pen Nib Replacement
- Process: Use the included tweezer-like removal tool to grip the old nib firmly and pull it straight out. Gently insert the new nib, narrow end first, until it clicks into place. Do not reuse old nibs. There is conflicting information on whether the Note 20 Ultra's S Pen nib is officially user-replaceable, with some support chats claiming it is not, whilst manuals and parts availability suggest it is. The evidence strongly supports that it is replaceable.
✅ Component Sourcing and Quality Assurance
This part provides critical guidance for navigating the complex and often misleading market for replacement parts, with a focus on screens and batteries, where quality differences are most pronounced.
🛒 Navigating the Aftermarket Parts Market
Decoding Screen Quality Tiers
- OEM (Original Equipment Manufacturer): Screens made by Samsung, identical in every way to the original. They offer the highest quality, guaranteed compatibility with features like the ultrasonic fingerprint sensor, and the best colour/touch performance, but are the most expensive.
- Service Pack: This term generally refers to genuine OEM parts, often packaged by Samsung for authorised service centres. They are identical in quality to OEM screens and are the best choice for a high-quality repair that maintains original performance.
- Aftermarket (OLED): Screens made by third-party manufacturers using OLED technology. The quality can be very good, often approaching OEM levels in brightness and colour, but may have slight variations in colour temperature or touch response. They are a good value-for-money option.
- Aftermarket (Incell/TFT/LCD): The lowest tier. These screens use LCD instead of OLED technology. This results in significantly inferior quality: greyish blacks, lower contrast, poorer colour reproduction, and possible motion blur. They are the cheapest option but represent a major downgrade in the viewing experience and may not be compatible with the in-display fingerprint sensor.
| Feature | OEM / Service Pack | Aftermarket OLED | Aftermarket Incell/TFT/LCD |
|---|---|---|---|
| Technology | Dynamic AMOLED 2X | OLED | TFT LCD |
| Manufacturer | Samsung / Samsung Approved | Third-Party (e.g., TCL CSOT) | Various Third-Party |
| Colour/Contrast | Excellent, true blacks, perfect colour accuracy | Good to Very Good, vibrant, high contrast | Poor, greyish blacks, lower contrast, potential colour inaccuracy |
| Brightness | Excellent | Good | Moderate to Poor |
| Refresh Rate | Supports Adaptive 120Hz | Typically 60Hz, may vary | 60Hz |
| Fingerprint Sensor | Guaranteed Compatibility | Varies, often incompatible | Incompatible |
| Durability | Original Gorilla Glass Victus | Varies by manufacturer | Varies, often lower-grade glass |
| Cost | Highest | Medium | Lowest |
🔋 Battery Integrity and Consumer Safety
OEM vs. Non-OEM Batteries
- OEM: Manufactured by or for Samsung to the device's exact specifications (model EB-BN985ABY, 4500 mAh). They offer guaranteed compatibility, performance, and safety, but are more expensive.
- Non-OEM/Aftermarket: Produced by third parties. Quality can vary enormously. Whilst some are reliable, many are made to lower standards, may not have the advertised capacity, will have a shorter lifespan, and may lack critical safety features. They are cheaper but carry significant risks.
The Hidden Dangers of Low-Quality Batteries
A cheap battery is not just a performance risk; it is a safety and device integrity risk. The danger extends beyond the battery itself to the phone's core circuitry. Low-quality batteries often use inferior materials and lack rigorous quality control. Crucially, they may have a substandard or non-existent Battery Management System (BMS). The BMS is a circuit that protects against over-charging, over-discharging, and overheating. Without a proper BMS, a faulty charger or an internal cell defect can lead to overcharging. This causes the battery to heat uncontrollably, a condition known as thermal runaway, which can result in fire or explosion.
Furthermore, an unstable voltage output from a cheap battery can place stress on the phone's Power Management Integrated Circuit (PMIC) on the motherboard. A faulty PMIC can lead to a host of issues, including boot loops, an inability to charge, or complete device death—mimicking the symptoms of a bad battery but requiring a much more complex motherboard repair. The implication of using a cheap battery, therefore, is not just poor battery life, but the potential for catastrophic and irreparable damage to the phone's logic board.
Understanding Battery Safety Certifications
- CE (Conformité Européenne): A mandatory mark for products sold in the EEA. It signifies that the battery meets EU health, safety, and environmental protection standards. It includes tests for electrical safety (overcharging), mechanical safety (crush test), and thermal abuse.
- UL (Underwriters Laboratories): A global safety certification company, primarily for the US market. UL certification (e.g., UL 2054) involves rigorous testing for fire, electrical, and mechanical hazards to ensure the battery is safe under normal and foreseeable use.
- IEC (International Electrotechnical Commission): The IEC 62133 standard is a key international benchmark for the safety of portable rechargeable batteries. It is a benchmark for battery safety worldwide and covers overcharging, short-circuits, and thermal runaway.
| Certification | Body/Region | Main Focus | What It Assures the User |
|---|---|---|---|
| CE | European Economic Area (EEA) | Health, Safety, Environment | The battery meets fundamental European safety standards for consumer products. |
| UL | Underwriters Laboratories (Global, strong US focus) | Product Safety | The battery has been independently tested to be safe from fire, shock, and other hazards. |
| IEC 62133 | International Electrotechnical Commission (Global) | Battery Safety | The battery meets a globally recognised standard for preventing common failures like short-circuits and overheating. |
🚀 Maximising Device Longevity
This final part moves from reactive repair to proactive maintenance, providing strategies to prolong the lifespan of the device and its components, particularly the battery.
💡 Proactive Maintenance and Optimisation Strategies
Software-Based Battery Optimisation
- On-board Settings: Utilising the device's built-in tools, such as Adaptive power saving and Power saving mode, which limit CPU speed, decrease brightness, and restrict background data to extend daily use.
- App Management: Identifying and disabling or uninstalling apps that consume an excessive amount of battery, particularly those that run in the background or frequently use GPS.
Advanced Charging Strategies for Long-Term Health
- The "40-80 Rule": An exploration of the principle that keeping a lithium-ion battery's state of charge between 40% and 80% minimises stress on the cell's chemistry, thereby reducing degradation and significantly extending its overall lifespan. Charging to 100% and deep-discharging to 0% puts the most strain on the battery.
- Practical Application: Whilst not always practical, this section will advise users to avoid overnight charging to 100% and to perform shallow top-up charges where possible. It will also explain that features like Samsung's "Protect battery" (which limits the charge to 85%) and Apple's "Optimised Charging" are commercial implementations of this very principle, validating its effectiveness. The goal is to shift the user's mindset from a "full charge" to a "healthy charge".
✅ Samsung Galaxy Note 20 Ultra
The Samsung Galaxy Note 20 Ultra remains a powerful and capable device, but like any complex piece of technology, it is susceptible to both software and hardware failures. The key to its longevity lies in accurate diagnosis and informed maintenance. Users should adopt a methodical approach to troubleshooting, beginning with the least invasive software solutions (Safe Mode, cache wipe) before concluding a hardware fault exists.
For DIY repairs, success hinges on preparation, using the right tools, and making critical decisions, such as opting for "with frame" replacement screens to minimise risk and using high-quality OEM or Service Pack parts, especially for the screen and battery. Using cheap, uncertified batteries presents a significant risk not only to performance but to the safety of the device and the user.
Finally, it is crucial for users to understand that any internal repair will compromise the factory IP68 seal. After a repair, the device should be considered splash-resistant, but not waterproof. By combining careful diagnosis, safe repair practices, and proactive battery maintenance, owners can significantly extend the usable life and functionality of their Galaxy Note 20 Ultra.

