
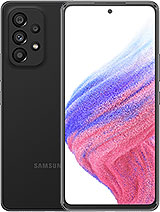
 Repair parts Samsung Galaxy A53 5G


")

 Wristband for Repairs")


Your Ultimate and Detailed Guide to Samsung Galaxy A53 5G Parts on iLevante.com 🚀
Hello! If you've landed here, it's likely because you want to go the extra mile in caring for your Samsung Galaxy A53 5G. You're not just here to find a part; you're here to understand your device, to take control, and to give it a second, third, or even fourth life. In a world that pushes us to dispose and replace, you've chosen the hero's path: the path of repair! Not only does this save you a good deal of money, but it's also a huge gesture for the environment. And best of all, the satisfaction of fixing something with your own hands is priceless.
The Samsung Galaxy A53 5G, launched in the spring of 2022, established itself as the king of the mid-range for a reason. It offered a near-perfect balance: a breathtaking screen, a versatile and reliable camera system, and outstanding battery life, all backed by the trust of the Samsung brand and its promise of updates. But even the best champions have their weak spots. An unexpected drop, the natural wear and tear of the battery, a charging port that becomes temperamental... these are part and parcel of the job. At iLevante.com, we celebrate the "Do It Yourself" (DIY) spirit and want to be your arsenal and your encyclopaedia on this mission. Let's break down every component and every problem so you can become an expert!
The Screen: The Heart of Your A53 5G and Its Replacement Options
The screen is, without a doubt, the component we interact with the most and the most vulnerable. A crack is not only unsightly, but it can make the mobile unusable. Your Galaxy A53 5G's screen is a spectacular 6.5-inch Super AMOLED display with FHD+ resolution and a 120Hz refresh rate. These specs translate to incredible fluidity, colours that burst with life, and blacks so pure they merge with the phone's frame. When the time comes to find a replacement, it's crucial to thoroughly understand the available technologies to make an informed and wise choice.
A Technical Analysis of Screen Types: Which to Choose? 🤔
- Original or Service Pack Screens: These are the "no-compromise" option. A Samsung Service Pack is, literally, the same part used in authorised service centres. It comes pre-assembled in its frame, guaranteeing a perfect fit and, most importantly, full and seamless compatibility with the integrated optical fingerprint sensor. The panel quality, brightness, colour calibration, and touch response are identical to the day you took the mobile out of the box. If your budget allows and you want a perfect repair, there is no better option.
- OLED and Super AMOLED Screens: Technically, these are the closest alternatives to perfection. OLED (Organic Light-Emitting Diode) technology is revolutionary because each pixel generates its own light. What does this mean? To display the colour black, the pixels simply turn off. This not only saves a considerable amount of battery (especially with dark mode), but it also provides an "infinite" contrast that makes images seem to jump off the screen. "Super AMOLED" is Samsung's trade name for its OLED panels that integrate the touch layer into the panel itself, eliminating an air gap and bringing the image closer to your fingers. The high-quality OLED screens we offer at iLevante are virtually indistinguishable from the originals in daily use.
- INCELL Screens: This technology is an evolutionary leap from traditional LCD screens. In a standard LCD panel, there are several layers: the backlight, the LCD panel, and the touch digitiser. "In-Cell" technology fuses the LCD and the touch layer into one. This makes them thinner, lighter, and reduces parallax (the small gap between the glass and the image), resulting in a more direct and precise touch sensation. Although the colour quality and contrast can't compete with an OLED, they are a fantastic mid-range option that offers a very satisfactory user experience at a contained price.
- TFT LCD Screens: The most budget-friendly option. A TFT LCD (Thin-Film Transistor Liquid-Crystal Display) uses a constant light source (backlight) that illuminates all pixels from behind. The liquid crystals of each pixel rotate to let more or less light pass through a colour filter. This means they can never achieve a true black (it will always be an illuminated dark grey) and tend to have more limited viewing angles. They are a functional and cheap solution, but be prepared to sacrifice image quality.
The Great Dilemma: The Fingerprint Sensor
This is a CRITICAL point for the A53 5G. The fingerprint sensor is an optical type located under the panel. It works like a micro-camera that needs to "photograph" your fingerprint through the screen. OLED screens allow this to happen because light can pass between the organic pixels. However, the structure of a TFT LCD screen, with its backlight layer and liquid crystals, physically blocks the sensor's "view". Therefore, the vast majority of TFT screens and some low-end INCELL screens are not compatible with the fingerprint sensor. If this feature is important to you, you must opt for a quality OLED or an Original screen.
Diagnosing Common Screen Faults
- Cracked Glass, Perfect Image: You're lucky (in a way). Only the top layer of glass (Gorilla Glass 5) is broken. The official repair is to change the entire module.
- Black Spots or "Ink Bleeds": This indicates that the OLED panel is broken internally. Those pixels are dead, and the spot will grow over time. It cannot be fixed; you need a new screen.
- Vertical Coloured Lines: A classic. It can be due to a sharp impact that has damaged the delicate circuits of the panel or the connecting flex cable. Sometimes, reseating the flex cable on the motherboard can miraculously fix it, but 95% of the time, it's irreparable damage to the screen.
- Black Screen but the Mobile Makes Sounds: The phone is alive, but the screen is not. It could be a simple disconnected flex cable or, more likely, the panel has died. It's time for a replacement.
- Ghost Touch: The mobile goes crazy and opens apps on its own. First, rule out a software issue with a restart. If it persists, the digitiser is damaged.
- Screen Burn-in: Do you see a permanent ghost of the keyboard or status bar? That's "burn-in," an uneven wear of the OLED pixels. It's permanent and can only be fixed by changing the screen.
Battery for Samsung A53 5G: Breathe New Life into Your Mobile! 🔋
The battery is the engine of our mobile phone, and its degradation is inevitable. The Samsung A53 5G is equipped with a powerful battery with the model number EB-BA336ABY, with a nominal capacity of 5000 mAh. This capacity is designed to last all day, but after a couple of years (around 500-800 charge cycles), its performance starts to plummet. Recognising the symptoms in time is key.
Advanced Diagnosis of a Faulty Battery
- Accelerated Draining: This is the most obvious symptom. You go from a full day of autonomy to needing a charger by mid-afternoon.
- Sudden Shutdowns: The mobile shows 30% or 40% battery and then suddenly turns off. This happens because the battery can no longer supply the necessary voltage for peak demands (like opening the camera or a game).
- Unstable Percentages: The battery level jumps erratically, for example, from 70% to 50% in an instant.
- Excessive Heating: It's normal for the mobile to get a bit warm when charging or playing games, but if it gets too hot with light use or during charging, it could be a sign of a failing battery.
- Slow or Incomplete Charging: If it takes much longer than usual to charge or never reaches 100%.
DANGER: SWOLLEN BATTERY!
If you notice that the back cover of your mobile is bulging or that the screen is lifting at the edges, it's very likely you have a swollen battery. This is a critical and dangerous fault. The gases inside the battery have expanded, and there is a risk of fire or explosion. DO NOT charge it. DO NOT press or puncture it. Handle it with extreme care and take it immediately to an electronics recycling point. Then, come to iLevante.com for your safe replacement.
Original, OEM, or High-Capacity Battery?
We've already explained what OEM (Original Equipment Manufacturer) batteries are: the same quality as the original, without the logo, at a better price. They are our main recommendation. But you will sometimes see "high-capacity" batteries. These promise 5500 mAh or more. While the idea is tempting, be cautious. Often, these figures are inflated, and the quality of the cells is inferior, which can lead to a shorter lifespan and, in the worst cases, safety issues. For guaranteed reliability and safety, a standard capacity OEM battery is the smartest bet.
Detailed Guide to Changing the A53 5G Battery
- Preparation: Discharge the battery to below 25% for safety. Gather your tools: a heat gun or hair dryer, suction cup, plastic picks and spudgers, a Phillips #00 screwdriver, tweezers, and isopropyl alcohol.
- Apply Heat: Evenly heat the edges of the back cover. It should be hot to the touch, but not so hot that it burns you. This softens the industrial adhesive that seals it.
- Careful Opening: Attach the suction cup near the charging port and pull gently to create a small gap. Insert a plastic pick into that gap. Slide the pick along all the edges, applying more heat if necessary. Go slowly to avoid cracking the plastic cover.
- Accessing the Board: Once the cover is removed, you'll see a large plastic shield protecting the motherboard and connectors. Remove all the Phillips screws holding it in place. Keep them organised; they are not all the same size!
- Safe Disconnection: Locate the battery connector. Use a plastic spudger to lift it and disconnect it from the board. This is the most important step to avoid short circuits!
- Removing the Battery: The battery is firmly glued to the chassis. Don't just pry at it wildly. Apply a few drops of isopropyl alcohol around the edges of the battery and wait a minute. The alcohol will dissolve the adhesive. Then, use a plastic card or a wide pry tool to lift it slowly and without bending it.
- Installation and Closing: Clean off any old adhesive residue from the chassis. Place the new battery, connect its flex cable, and screw the protective shield back on. Before sealing the back cover, turn on the mobile to verify that the battery is recognised and charges correctly. If all is OK, apply new adhesive (double-sided tape or B-7000 glue) to the frame and press the back cover down firmly for a few minutes.
Back Covers: Refresh the Style of Your A53 5G ✨
A cracked or scratched back cover makes your device look terribly worn. Changing it is one of the easiest repairs with the greatest aesthetic impact. The A53 5G's back cover is made of a material Samsung calls "Glasstic," a polycarbonate with a glass-like finish, offering durability and lightness. The process to replace it is exactly the first step of any other internal repair: heating and peeling it off. Our high-quality replacement covers come in all the original colours and often include the adhesive pre-installed, making the job even easier!
Available Official Colours
- Awesome Black: The classic, elegant, and sober choice.
- Awesome White: Clean, minimalist, and always in style.
- Awesome Blue: A fresh and youthful light blue tone.
- Awesome Peach: A soft and distinctive colour, between pink and orange.
Key Spare Parts for Your Samsung Galaxy A53 5G at iLevante.com
Your mobile is a complex ecosystem of small components working in harmony. When one fails, the whole experience suffers. Here we detail the most sought-after spare parts with their diagnostics.
Top 5 Essential Parts and Their Secrets:
- Power and Volume Button Flex Cable: Symptoms: The button is sunken, you have to press it very hard, or it doesn't respond. Repair tip: It's a single flex cable glued to the inner side of the chassis. Replacing it requires patience to peel off the old flex cable without damaging anything. The new one will fit into place and restore the original tactile feel.
- 64MP Main Camera: Symptoms: Blurry photos (if autofocus isn't working), black spots (internal dirt or damaged sensor), or the camera app closes with an error. Repair tip: Before buying, clean the external lens thoroughly. If the problem persists, the camera module is a "plug and play" component. It is easily disconnected and replaced.
- Charging Port (Sub-board): Symptoms: Intermittent charging, the PC doesn't recognise the mobile (data failure), or the main microphone isn't working (people can't hear you on normal calls). Repair tip: This bottom board (sub-board) is easy to replace. You disconnect the main flex cable going to the motherboard, the antenna coaxial cable, and remove it. Make sure you buy the exact version for the A53 5G (SM-A536B)!
- Fingerprint Sensor Flex Cable: Symptoms: The sensor doesn't respond, you can't register new fingerprints, or it constantly gives an error, even with a compatible screen. Repair tip: This small optical sensor is glued to the back of the screen. Sometimes, after a screen replacement, it needs to be recalibrated via software, but if it's damaged, replacing it is the only way.
- Rear Camera Lens: Symptoms: Photos with a flare or are blurry in a specific area, or the protective glass is visibly cracked or scratched. Repair tip: The cheapest and most rewarding repair! With heat, you remove the pieces of broken glass. Thoroughly clean the surface and the exposed camera lens. Then, stick on the new glass. Your photos will be sharp again!
Tools and Precautions: Your Essential Repair Kit
Embarking on a repair without the right tools is like going to war with a fork. Investing in a good basic kit is fundamental for a clean and safe job.
Your Technician's Shopping List:
- Precision Screwdriver Kit: Essential. For the A53 5G, you will mainly need a Phillips #00 bit.
- Heat Gun or iOpener: Necessary to soften the adhesive on the back cover and screen. A hair dryer can work, but it's less precise.
- Suction Cup: To create the first gap when separating the cover or screen.
- Plastic Picks and Spudgers: Your best friends. For cutting adhesive and disconnecting connectors without causing damage. Never use metal near the motherboard!
- Precision Tweezers: For handling tiny screws and manipulating flex cables with care.
- Isopropyl Alcohol (99%+): Perfect for cleaning and dissolving adhesives without leaving residue.
- Replacement Adhesive: Pre-cut double-sided tape or a tube of B-7000 glue to seal the phone at the end.
The Golden Rules of Repair:
- Patience and Order: Work in a clean, well-lit space. Use a magnetic mat so you don't lose a single screw.
- BATTERY DISCONNECTED: This is the FIRST thing you should disconnect when opening the mobile and the LAST thing you should connect before closing it.
- Never Force Anything: If a component won't come out, you've probably missed a screw or there's still adhesive. Review the steps.
- Document the Process: Take photos as you disassemble. It will be a lifesaver when reassembling.
Software Problems: The Ghost in the Machine
Before you pick up a screwdriver, it's crucial to rule out a software fault. Many performance issues, battery drain, or reboots originate from the operating system or a malicious app.
Software Resuscitation Steps:
- Safe Mode: Restart the mobile and hold down the volume down button during boot-up. The mobile will start with only the system apps. If it works fine here, the culprit is an app you've installed. Uninstall the most recent ones until you find it.
- Wipe Cache Partition: Turn off the mobile. Enter Recovery Mode (with the mobile connected to a PC, press Volume Up + Power). In the menu, navigate with the volume buttons and select "Wipe cache partition". This deletes corrupt temporary files and does not erase your personal data. It solves many unexplained problems.
- Factory Reset (Hard Reset): The nuclear option. From the same Recovery Mode, select "Wipe data/factory reset". This will erase ABSOLUTELY EVERYTHING. Make a backup beforehand. It's the ultimate solution for persistent software problems.
If, after a factory reset, the problem continues (for example, the camera still won't open, or Wi-Fi won't activate), then you can be 99.9% sure you have a hardware fault. Now, it's time to browse the iLevante.com catalogue.
Congratulations, you've completed the masterclass in Samsung Galaxy A53 5G repair! You are now equipped with the knowledge to diagnose, choose, and repair. We've given you the keys to the workshop. Now it's up to you to get to work. Explore our complete selection of spare parts at iLevante.com and be proud to give your mobile the life it deserves. 💪


