 Repair parts Samsung Galaxy A34

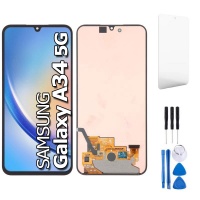
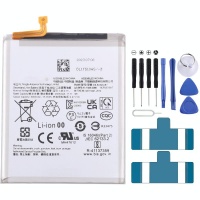
Receive it on tuesday 10 de february
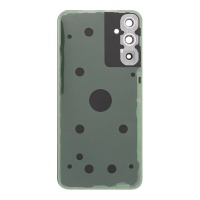
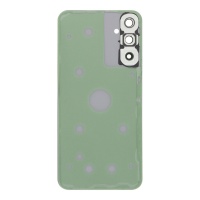


Receive it on tuesday 10 de february

1. Your Samsung Galaxy A34: Get to Know It Inside Out and Prepare It for Battle! 🛠️
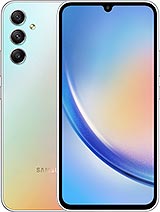
Hello, tech enthusiasts! If your Samsung Galaxy A34 has had a mishap or just needs a bit of TLC to get back to 100%, you've come to the right place. This mobile is a true all-rounder, perfect for daily use, but like any tech warrior, it sometimes needs a helping hand with a spare part. At iLevante.com, we want this article to be your bible for finding those parts and bringing your A34 back to life. Let's get to it!
Star Features of the Galaxy A34 You Should Know
Before you get your hands dirty, it's good to know what a gem we're dealing with. Knowing its strengths will remind you why it's worth repairing and not giving up on it at the first scratch.
- A Screen to Fall in Love With: The Galaxy A34 boasts a spectacular 6.6-inch Super AMOLED display. With an FHD+ resolution of 1080 x 2340 pixels and a 120Hz refresh rate, smoothness and sharpness are guaranteed. What's more, its 1,000 nits in high brightness mode (HBM) make it look stunning even in direct sunlight. These specs are key, because if you have to replace it, you'll want to maintain that level of visual quality.
- Performance That Lasts: At its heart beats an Octa-Core processor (capable of reaching speeds of 2.6GHz and 2GHz), which, along with its 6GB or 8GB RAM options, gives it the power needed to handle your apps, games, and multitasking without breaking a sweat. Add to that 128GB or 256GB of storage, expandable up to 1TB with a microSD card, and you've got a machine for the long haul. Good performance is undoubtedly a great reason to opt for a repair.
- A Tireless Battery: Worried about running out of juice? Its 5,000mAh (typical) battery is designed to last more than two days with moderate use and features adaptive charging to optimise its lifespan. Over time, all batteries degrade, and this is one of the most common reasons to look for a replacement.
- "Awesome" Design and Durability: Samsung defines it with a "simple and elegant" design and a "glastic" finish (a plastic that mimics glass). Although this material is lightweight and looks good, it can be more prone to scratches than pure glass, which might lead you to need a new back cover to keep it pristine. It also has an IP67 rating, meaning it can withstand dust and a dip in fresh water (up to 1 metre for 30 minutes), but be careful, it's not recommended for the beach or pool. This resistance is a plus, but accidents happen and sometimes water gets where it shouldn't.
- Cameras to Capture Everything: Its multi-camera system, with Optical Image Stabilisation (OIS), allows you to take sharper and more stable photos and videos. Although not the focus of this article, camera modules are also replaceable parts.
The fact that the Galaxy A34 has these high-end features, such as its 120Hz Super AMOLED screen or its powerful battery, makes it a device that users value and want to keep. When a component fails, the natural tendency is to want to repair it to continue enjoying those features, rather than discarding it. That's why investing in quality spare parts makes perfect sense.
Why Repair Your Samsung A34 Instead of Buying a New One?
- Easy on Your Wallet 💰: Let's be honest, repairing is usually much cheaper than getting a brand-new phone. Your bank account will thank you!
- A Gesture for the Planet 🌍: Giving your A34 a second life means less electronic waste. A small act that adds up to a lot!
- Sentimental Value: You already know your phone, its tricks, its quirks... Don't ditch it at the first sign of trouble!
2. Samsung Galaxy A34 Screens: Don't Be Left in the Dark! 💡
The screen is, without a doubt, one of the stars of your Galaxy A34. If it's broken or starting to act strangely, don't worry! There are solutions.
The Jewel in the Crown: The Original A34 Super AMOLED Screen
Let's recall its credentials: 6.6 inches, Super AMOLED technology, 1080 x 2340 (FHD+) resolution, a 120Hz refresh rate for incredible fluidity, 16 million colours, and a brightness of up to 1,000 nits in HBM mode. Super AMOLED technology means more vivid colours, more intense contrasts, and truly deep blacks, as the pixels turn off completely to display black. This not only improves the image but can also be more energy-efficient than traditional LCD screens.
Types of Replacement Screens for Your Galaxy A34: A World of Options
When the original screen gives up, you have several alternatives on the market. It's important to know them to choose the one that best suits your needs and budget:
- Original Samsung Screens: These are the "premium" option, the crème de la crème. Exactly the same quality, compatibility, and performance as the one that came with your phone from the factory. If you want no surprises and are looking for perfection, this is your screen.
- OLED/AMOLED Screens (High-Quality Aftermarket): These are the closest alternatives to the original, as they use the same base technology (Organic Light-Emitting Diode). They offer excellent contrast, pure blacks, and vibrant colours. Some high-quality AMOLED screens even maintain the functionality of the in-display fingerprint sensor, a crucial detail for many. Within aftermarket OLEDs, you can find "Soft OLED" (more flexible and durable, similar to originals) and "Hard OLED" (a bit more rigid and fragile, but sometimes cheaper).
- INCELL Screens: This technology is a type of LCD where the touch layer is integrated directly into the LCD panel, making them thinner than traditional LCDs. They represent a good balance between cost and quality, being superior to basic TFT/LCDs. The image quality and colours are decent, but don't expect the deep blacks or spectacular contrast of an OLED. A very important point to consider is that, generally, INCELL screens are not compatible with the in-display fingerprint sensor of the Galaxy A34.
- TFT/LCD Screens: The acronym TFT stands for "Thin Film Transistor," a type of LCD technology. They are the most budget-friendly options on the market. However, this economy comes with sacrifices in image quality: colours are less vibrant, viewing angles are more limited, and blacks tend to look more greyish. Additionally, they can consume slightly more power than OLEDs, as they need a constant backlight for all pixels. They are an option to consider if your budget is very tight, but be aware of the difference in visual experience and the possible loss of functions like the fingerprint sensor.
The functionality of the fingerprint sensor is something many users are unwilling to lose. The original Galaxy A34 integrates it into its Super AMOLED screen. If, when replacing it, a technology like INCELL is chosen, which typically does not support this feature, the user experience will be affected. Therefore, it is vital that as a user, you are well-informed about which type of replacement screen maintains this function. This will allow you to make an informed decision and avoid unpleasant surprises.
Comparison Table of Replacement Screen Types for Samsung Galaxy A34
| Screen Type | Image Quality | Colour Fidelity | Black Levels | Brightness | Power Consumption | In-Display Fingerprint Func. | Relative Price | Ideal For... |
|---|---|---|---|---|---|---|---|---|
| Original Samsung | Excellent | Maximum | Pure/Infinite | Very High | Efficient | Yes | ££££ | Those who want the best, identical to the factory screen. |
| OLED/AMOLED Aftermarket | Very Good - Excellent | Very High | Very Deep - Pure | High - Very High | Efficient - Moderate | Usually Yes (check specs) | £££ | Premium quality-price ratio, experience very close to the original. |
| INCELL | Good | Good | Dark Greyish | Medium - High | Moderate | Usually No | ££ | A tight budget with decent image quality. |
| TFT/LCD | Acceptable | Standard | Greyish | Standard - Medium | Moderate - High | No | £ | Only the most basic and cheapest, with sacrifices in quality. |
Cracked or Faulty Screen? When to Say "Enough!" and Replace It
Sometimes it's obvious, but other times not so much. Here are some signs that your screen is crying out for a replacement:
- Obvious Knocks and Drops: Cracks, shatters, a spiderwebbed screen... no doubt about it.
- Mysterious Stains or Lines: Black spots that don't go away, vertical or horizontal coloured lines, or pixels that are dead (black) or "stuck" (on a fixed colour). An impact can cause this internal damage even if the outer glass isn't badly damaged.
- Touch Issues: The screen doesn't respond when you touch it, responds erratically (the infamous "ghost touch," if caused by physical damage), or there are areas that don't detect your finger at all.
- Display Failures: Constant flickering, brightness that goes up and down on its own, or the screen stays completely black even though you can hear the phone turning on.
- Moisture Damage: If your A34 has taken a longer-than-advised dip and the screen has started to fail, it probably needs a replacement.
Basic Guide to Changing Your A34's Screen: Let's Get to Work!
Warning: Changing the screen is a delicate repair. If you don't feel confident, it's best to go to a professional. This is a very general guide.
- Preparation: Get the right tools (precision screwdriver set, plastic prying picks, a suction cup, heat gun or hairdryer). It's recommended that the phone's battery is below 25% to minimise risks. And don't forget to back up your data!
- Careful Opening: On many recent Samsung phones, accessing the screen means removing it from the front, although sometimes you have to start with the back cover. Gently heat the edges of the screen (or back cover) to soften the adhesive. Use the suction cup to create a small gap and then insert the plastic picks to carefully cut through the adhesive.
- Disconnection: Once the screen (or cover) is separated, locate the flexible cables (flex cables) that connect it to the main board. Disconnect them with a plastic tool, never by pulling abruptly. You may also need to disconnect the battery.
- Installing the New Screen: Connect the new screen. A good tip is to test it before sealing the phone completely. Turn it on and check that the image and touch are working correctly.
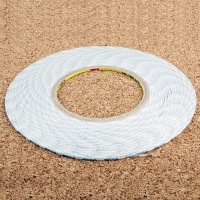
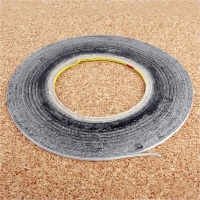
- Closing and Sealing: If everything is OK, disconnect the screen to work more comfortably. Thoroughly clean any old adhesive residue from the phone's frame. Apply the new adhesive specific to your model (or quality double-sided tape for mobiles). Place the new screen, reconnect all the flex cables, and close the phone, applying uniform pressure so the adhesive seals well.
Remember that Samsung offers a self-repair programme for some of its devices, where you can find parts and manuals. There are also many guides and video tutorials on platforms like YouTube.
3. Galaxy A34 Battery: May the Power Be With You! 🔋
The battery is the energy heart of your mobile. If it starts to weaken, the user experience suffers greatly. But don't worry, there's a solution!
The Power Within: A34 Battery Specifications
Your Samsung Galaxy A34 comes equipped with a Lithium-Polymer (Li-Po) battery with a typical capacity of 5000 mAh, which is not directly user-removable. This amperage provides considerable autonomy: up to 22 hours of internet Browse (LTE or Wi-Fi), up to 21 hours of video playback, or a whopping 84 hours of audio playback. It also supports 25W fast charging, so you don't waste much time tethered to a socket (although the charger isn't always included in the box). A compatible battery model mentioned for the A34 (and also for the A54) is the EB-BA546ABY.
Is Your Battery on Its Last Legs? Clear Signs You Need a Replacement
Over time and with charge cycles, all batteries degrade. Here are some clues that yours might be asking for a replacement:
- It Drains in a Flash: If it used to last you all day and now barely makes it to the afternoon with the same use, that's a clear sign.
- Unexpected Shutdowns: The phone suddenly turns off, even though the battery indicator shows it still has charge (e.g., it shuts down at 30% or 40%).
- Charging Problems: It won't charge to 100%, takes forever to charge, or the charge percentage drops even while plugged in.
- Gets Too Hot When Charging: It's normal for it to get a little warm, but if you notice it's burning hot or unusually warm, it could be a symptom of a faulty battery.
- Danger! Swollen Battery: If you notice the back cover of your phone is bulging, or the screen is lifting at the edges, it's very likely the battery is swollen. This is dangerous, as a swollen battery can explode or catch fire. You need to replace it immediately!
- The Phone is Slow: Sometimes, a severely degraded battery can't supply enough power for the processor to run at full speed, which can make the phone slower than usual.
You can check your battery's health in Settings > Battery and device care > Battery. There you'll see which apps consume the most and, on some models, even a small diagnostic. However, keep in mind that rapid drain isn't always the battery's fault; sometimes a misbehaving app running in the background or even issues with the charging port can be the culprits. So, it's a good idea to rule out software problems first.
OEM Unbranded Batteries: The Best Kept Secret?
Perhaps you've seen "OEM unbranded" batteries and wondered what they are. Let's explain!
- What is an OEM battery? OEM stands for "Original Equipment Manufacturer." In theory, these are batteries made by the same company that makes the original batteries for Samsung, or at least to their same specifications and quality standards.
- And why "unbranded"? Sometimes, these batteries are made for the spare parts distribution channel, or they are produced by the OEM to be sold under other brands (known as ODM or "Original Design Manufacturer," although the concepts sometimes overlap). To avoid brand conflicts or due to commercial agreements, these batteries may not carry the Samsung logo.
- Are they good quality? If they are truly OEM and come from a reliable supplier, the quality should be very similar, if not identical, to the original battery that came with your phone. They meet the same standards for design, capacity, and safety. - The advantage: They are usually cheaper than batteries sold in "official" Samsung packaging, which is a relief for your wallet!
- Be careful! It's crucial to buy these batteries from trusted stores, like iLevante.com. This ensures you're buying a quality OEM battery and not a cheap imitation that could cause problems or, even worse, be dangerous.
Explaining this is important because, as a customer, you might be hesitant when you see a product without the "official seal." Understanding that OEM batteries can be just as good as the originals, but at a more competitive price, helps you make an informed decision and trust the alternative we offer.
Let's Get to Work: Quick Guide to Changing the Samsung Galaxy A34 Battery
EXTREME CAUTION! Lithium batteries are delicate. Do not puncture, bend, or expose them to extreme heat. Work carefully, and if you're not sure, go to a professional.
The Galaxy A34's battery is not easily removable and is stuck down with quite a strong adhesive. This makes its replacement more complicated than in older phones. Here are some general steps:
- Tools Needed: A heat gun or hairdryer, suction cup, plastic picks, suitable screwdrivers, and very importantly, a plastic spudger (never a sharp metal one!) to lift the battery. Isopropyl alcohol is your best friend here.
- Preparations: Turn off the phone. Ideally, the battery should be below 25% charge to minimise risks.
- Opening the Phone: Generally, you'll need to remove the back cover. Heat the edges with the heat gun to soften the adhesive. Use the suction cup and picks to open it carefully, as explained in the back cover section.
- Disconnect and Access: Disconnect the battery's flex cable from the main board. There may be other connectors or screws covering the battery or its surroundings; remove them carefully.
- The Master Trick (Isopropyl Alcohol): The A34's battery will be well and truly stuck. Apply a few drops of isopropyl alcohol around the edges of the battery and let it sit for a few minutes. This helps to dissolve the adhesive and makes removal much easier.
- Gentle Removal: With a wide, thin plastic spudger, start to lift the battery GENTLY from one side. Go slowly, applying a little more alcohol if necessary. Do not pry abruptly or bend it! You can see this process in disassembly videos.
- Installation and Closing: Place the new battery in its place (some come with new adhesive; if not, you can use specific double-sided tape for batteries). Connect everything, replace any screws, and close the phone, applying new adhesive to the back cover.
4. Samsung A34 Back Covers: Style and Protection 💅
The back cover not only protects the internal components of your Galaxy A34, but it's also a style statement! If yours has seen better days, replacing it is a great way to give your phone a fresh look.
The "Awesome" Look: Material and Design of the Back Cover
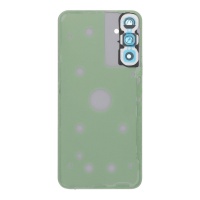
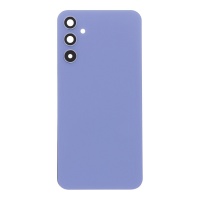
The Samsung Galaxy A34 features a finish that the brand calls "glastic." Essentially, it's a high-quality type of plastic designed to mimic the look and feel of glass, giving it an elegant and modern touch without the fragility (or cost) of real glass. Its design is characterised by simple, clean lines, following Samsung's minimalist aesthetic.
Although "glastic" is relatively durable, its plastic nature makes it more susceptible to fine scratches and wear from daily use compared to materials like Gorilla Glass. Therefore, it's not uncommon to want to replace the cover over time, not just because of a break, but also to restore that pristine, out-of-the-box look.
Official Colour Palette for Your Galaxy A34
Samsung launched the A34 in a pretty cool and modern range of colours, so you can choose the one that suits you best:
- Awesome Lime: A fresh and eye-catching lime green.
- Awesome Silver: An elegant and timeless silver tone.
- Awesome Violet: A modern and bold purple with personality.
- Awesome Graphite: A sophisticated dark grey, almost black.
It's worth mentioning that Samsung also offers official cases like the "Smart View Wallet Case" in colours like Black, Lime, or Blueberry, and the "Card Slot Case" in Black or Lime. However, here we are focusing on the colours of the phone's back cover itself, which is the spare part we're interested in.
Shattered or Scratched-Up Back Cover? Time for a Facelift!
There are several reasons why you might need a new back cover:
- Breaks and Cracks: The most obvious one. An unfortunate drop can leave your back cover in a mess.
- Deep Scratches and Wear: Over time and with use, even "glastic" can accumulate scratches that mar the phone's appearance. Sometimes, you just want it to look brand new again.
- Loss of Colour or Shine: Constant friction or exposure to certain elements can affect the finish.
- Access for Internal Repairs: To change the battery, screen, or any other internal component, you almost always have to remove the back cover first. If it gets damaged during this process (which can happen if not done carefully), you'll need a replacement.
Simple Guide to Replacing Your A34's Back Cover
Remember: This is a basic guide. Look for specific tutorials for the Galaxy A34 if you decide to do it yourself.
- Tools at Hand: You'll need a heat gun or a hairdryer, a suction cup (optional but helpful), thin but sturdy plastic prying picks, and gloves to protect you from the heat and to avoid leaving fingerprints.
- Preparations: Completely turn off your Galaxy A34.
- Heat to Soften: Evenly heat the edges of the back cover with the heat gun on a low or medium setting. The goal is to soften the adhesive holding it to the phone's chassis. Keep the heat gun moving constantly to avoid concentrating heat on one spot and damaging any components.
- Let's Get It Open: If the cover already has a large crack, you can try to insert a pick there. If not, place the suction cup near an edge (preferably the bottom or one of the sides) and pull gently to create a small gap between the cover and the frame.
- Cutting the Adhesive: Insert a thin plastic pick into that gap. Carefully slide it around the entire perimeter of the phone to cut the adhesive. You can use several picks to keep the gap open as you go.
- Careful When Lifting!: Once you feel the cover is loose, lift it very carefully. On some models, there may be flex cables attached to the cover (e.g., for NFC or wireless charging, although the A34 doesn't seem to have the latter as standard). Check carefully before pulling. Disassembly videos will show you if there's anything to watch out for.
- Deep Clean the Old Adhesive: This step is CRUCIAL. Remove ALL of the old adhesive residue from the phone's frame. If you don't, the new cover won't seal properly. You can use a plastic spudger and a bit of isopropyl alcohol to help.
- New Adhesive and Placement: Apply the new adhesive specific to the Galaxy A34's cover (they come pre-cut) or, failing that, a thin and strong double-sided tape made for mobiles. Carefully align the new cover on the chassis and press it down firmly on all edges so the adhesive sticks well. You can use clamps or rubber bands for a few hours to ensure a perfect bond. ol>
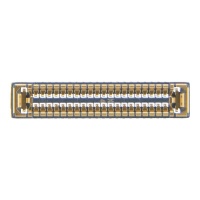
- What is it and what does it do?: This small but vital component is an FPC (Flexible Printed Circuit) connector. Imagine a tiny bridge: its mission is to connect the USB port module (where you plug in the charger and data cable) to the phone's main board. It is responsible for transmitting both power for charging and data for synchronisation. If this "bridge" fails, communication is cut off.
- Key Technical Specifications:
- Type: FPC Connector.
- Pins: It has 40 pins, a crucial detail that ensures specific compatibility with the Samsung Galaxy A34 5G.
- Quality: You can find these connectors in Original quality, which guarantees optimal performance.
- Main Function: To serve as a link between the USB charging port module and the device's main logic board.
- Common Problems Indicating Failure:
- Your Galaxy A34 doesn't charge or charging is intermittent (sometimes it charges, sometimes it doesn't).
- The computer doesn't recognise the phone when you connect it via USB cable.
- You have trouble transferring files between the mobile and the PC.
- Sometimes, damage to this connector can be the result of a strong pull on the USB cable, liquid ingress, or a previous repair attempt in the charging port area.
- Colours/Variants: These connectors are internal components, and their design is purely functional, so "colour" is not a relevant factor for the user. They are sometimes sold in packs of several units, aimed more at repair shops.
- Additional Relevant Information: It is described as an "essential component," and it is mentioned that wear from constant use or accidental damage may necessitate its replacement. At iLevante.com, you can find this part at very competitive prices (reference price €2.95 at the time of consultation). Some suppliers indicate that these connectors are compatible with several models in the Galaxy A range (like A54, A34, A14), which suggests a shared design in certain components, and they highlight their ability to withstand high temperatures (up to 105℃).
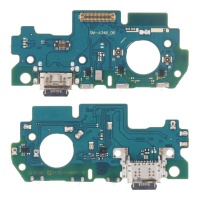
- What is it and what does it do?: This is the assembly or module that houses the physical USB Type-C connector, i.e., the little hole where you plug in the cable to charge your A34 or connect it to the computer. Often, this small board not only carries the USB port but can also integrate other important components like the main microphone (the one you use for phone calls) or some antenna connections.
- Key Technical Specifications:
- Physical Connector Type: USB Type-C.
- Integrated Components: As mentioned, it can include the main microphone, antenna contacts, and on some mobiles (though this doesn't seem to be the case for the A34, which follows the modern trend of removing it) the 3.5mm headphone jack.
- Format: It is usually a small printed circuit board (PCB) with the USB-C connector soldered on. This board connects to the phone's main board via a flex cable, sometimes using the 40-pin FPC connector we saw earlier, or with a direct connection.
- Common Problems Indicating Failure:
- The USB cable doesn't fit well in the port, is loose, comes out easily, or you have to "wiggle" it to make contact.
- The phone doesn't charge at all, or only does so if you place the cable in a very specific position.
- Charging is excessively slow (after having already ruled out the cable or charger as the problem).
- The main microphone doesn't work during calls (people can't hear you or hear you very faintly), if it is integrated into the charging port board.
- Problems with the computer recognising the phone or transferring data.
- Visible physical damage inside the port (bent or broken pins, or heavily embedded dirt that cannot be carefully cleaned).
- Colours/Variants: As it is an internal part, the colour of the board is not relevant. What's important is its functionality and compatibility.
- Additional Relevant Information: In online stores like Amazon or eBay, and in specialised shops like Tekadie, this spare part is sold as a "charging port replacement board" or "charging port flex." Prices can vary, but it's a much more affordable repair than replacing the entire main board. It is crucial to verify the exact compatibility with your Galaxy A34 sub-model (A346U, A346B, A346M, etc.), although they are often compatible with each other.
- Opening the Device: As with most internal repairs, you'll have to start by opening the phone, usually by removing the back cover (see section 4).
- Disconnecting the Battery: This is always the first safety step once the mobile is open! Disconnect the battery's flex cable.
- Locating the Part: The main board's FPC connector or the charging port board are usually located at the bottom of the phone.
- Disconnecting Flex Cables: Very carefully and using a plastic spudger, disconnect the flex cables that are connected to the charging port board or the FPC connector area. These connectors often have small security latches that need to be lifted first.
- Removing Screws: Remove any screws that may be holding the charging port board to the phone's chassis.
- Replacing the Part:
- For the charging port module: Once disconnected and without screws, the module should come out easily. Place the new module, making sure it fits perfectly.
- For the FPC connector on the main board: As we've said, if you're referring to the female connector soldered directly onto the main board, its replacement requires microsoldering skills and tools. This is not a repair for beginners. If the problem is the male connector on the end of the charging port flex, then it is solved by changing the entire charging port module.
- Reconnection and Assembly: Reconnect all the flex cables in their place, being careful not to damage them. Replace the screws. Connect the battery. Before closing the phone, it's a good idea to do a quick test to see if it charges and transfers data. If all is well, proceed to close the phone.
- Camera Modules:
- Rear Cameras (Main, Wide-Angle, Macro): If your photos start coming out blurry, with strange spots, or the camera app gives you an error and you've already ruled out a software problem, it might be time to change one of the modules. The Galaxy A34 has a triple rear camera system: a 48MP main with OIS, an 8MP ultra-wide-angle, and a 5MP macro. In spare parts catalogues, you can find modules like the "Rear Camera 48M AF 1/2".
- Front (Selfie) Camera: If your selfies no longer have that "Awesome" quality or the front camera isn't working, you can also replace it. The A34 has a 13MP front camera.
- Interconnection Flex (Main Flex): These are flat, flexible cables that act as data and power highways inside your mobile, connecting the main board with other important components (like the sub-board where the charging port might be, the screen, etc.). If one of these cables gets damaged during a repair (they are delicate) or from an impact, it can cause multiple, seemingly unrelated failures. Spares like the "Main flex - Galaxy A34 / A54" are available. Sometimes users buy a "Replacement motherboard connector flex cable" along with the charging port.
- Physical Buttons (Power, Volume): With use, the power or volume buttons can get stuck, stop responding, or even fall off. Often, these buttons are mounted on a small flex cable assembly that can be replaced.
- Earpiece Speaker: If during calls you hear the other person very quietly, with distortion, or not at all, and the problem isn't with your network coverage or the other person, the earpiece speaker could be damaged.
- Main Speaker (Loudspeaker): This is the speaker that plays ringtones, music, videos, or hands-free audio. If the sound is non-existent, very quiet, or sounds "crackly," you'll need a replacement. In parts lists, it's often grouped under "Audio (speaker/mic)".
- Vibration Motor: If your phone has stopped vibrating when you receive notifications or calls, and you've checked in the settings that vibration is enabled, the small vibration motor might have failed.
- SIM Tray / SIM Reader:
- SIM Tray: It's easy for the small tray where you place your Nano-SIM card (or microSD, as the A34 has a hybrid Dual-SIM slot: SIM 1 + SIM or MicroSD) to break, bend, or simply get lost. Replacements are available, such as the "SIM Tray (dual) - Graphite".
- SIM Reader: If the phone doesn't detect any SIM card (and you've tried several that work in other phones), the problem could be with the internal SIM reader, which is soldered to the main board. This is a more complex repair.
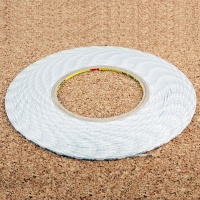
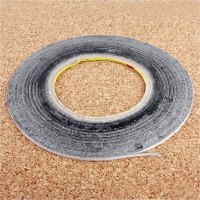
- Specific Adhesives: Don't underestimate them! After opening the phone for any repair, it is crucial to use new, specific adhesives to reseal the back cover, the screen, or even to secure the battery. Reusing the old ones is a shoddy job that compromises the seal and adhesion. You'll find "Adhesive Tape Rear Cover" and "Adhesive Tape, Battery".
- Mid-Frames (Middle Frame/Chassis): If your phone's central frame or chassis is badly bent or damaged from a heavy impact, it may need to be replaced. Sometimes, replacement screens come pre-mounted on a new frame, which makes the repair easier.
- Other Small Components: The list is long: screws of different sizes, small protective rubber gaskets, metal shields for internal components, and even specific chips like an "IC Power supervisor" can be found as spare parts.
- Possible Hardware Causes: Although overheating is often due to software (demanding apps, intensive use while charging, sun exposure), if it persists after optimising the software, it could be a warning sign. A faulty battery that gets excessively hot when charging or discharging, a damaged charging port that creates resistance, or in rarer cases, a problem with the main board (a short circuit or a faulty component) could be the culprits.
- Hardware Solutions: If the extreme heat is localised to the battery or charging port area, consider replacing these parts. A main board problem is more complex and usually requires a specialised technician.
- Possible Hardware Causes: If your A34 constantly loses Wi-Fi connection, the Bluetooth won't pair, or mobile data comes and goes (and it's not a problem with your provider or router), there could be a hardware failure. The internal antennas may have become disconnected or damaged, especially after a drop or a poorly executed previous repair. There could also be problems with the board that houses the SIM or the modem.
- Hardware Solutions: If you've opened the phone, check that all antenna connections are secure. If an antenna is visibly damaged, it will need replacing. Persistent problems with SIM detection might require a careful cleaning of the reader or, ultimately, replacement of the SIM tray or the reader itself (if it's a separate module).
- Possible Hardware Causes: If your Galaxy A34 doesn't recognise any microSD card (and you've tried several that work fine in other devices), or if you experience constant read/write failures on the phone's internal memory (this is rarer, but can happen), we could be looking at a hardware failure.
- Hardware Solutions: For the microSD problem, the card reader could be damaged. If it's a replaceable component, that would be the solution. Serious internal memory failures are usually a main board issue and, unfortunately, often involve its complete replacement.
- Hardware Causes:
- Damaged Screen: Even without visible cracks, the digitiser (the layer that detects touches) can be internally damaged.
- Faulty Digitiser in a Replacement Screen: If the problem appeared right after changing the screen, the new one could be faulty.
- Poorly Installed Screen: A screen that is not properly seated in the frame, or has too much pressure on a certain point, can cause ghost touches.
- Loose Connections: The flex cable connecting the screen to the main board could be loose or poorly connected.
- Screen Protector or Case: A poor-quality screen protector, poorly applied, with bubbles, or a case that presses on the edges of the screen can interfere with the touch functionality.
- Faulty Charger or Cable: A low-quality charger or cable can generate electrical interference that affects the digitiser, especially while charging.
- External Electromagnetic Interference: Although less common, powerful sources of EMI could, in theory, affect the screen.
- Hardware Solutions: Try removing the screen protector and case. Use an original or good-quality charger and cable. If the problem persists, check the internal connections of the screen's flex cable. As a last resort, replace the screen assembly. In user forums, touch sensitivity issues on the A34 have been reported, which underscores the importance of a good diagnosis.
- High-Pitched Noise When Using the Camera: Some Galaxy A34 users have reported a "high-pitched noise" when using the camera, especially the main one. This could indicate a problem with the camera module itself (perhaps the OIS system is faulty) or a nearby electronic component generating interference. The most direct solution is usually to replace the affected camera module.
- Phone Freezing and Not Turning On: A worrying case is that of a user whose A34 repeatedly froze and eventually would not turn on again, showing no signs of heating up when trying to charge it. This type of "sudden death" failure can be due to a serious problem with the main board (a crucial component has failed) or, in some cases, a completely dead battery that won't accept a charge.
- Grainy Screen at Low Brightness with 120Hz: Another reported issue is an apparent grainy texture on the screen when the brightness is low and the refresh rate is set to 120Hz. This could be an inherent characteristic of some AMOLED panels under certain specific conditions, or a particular defect of that user's panel. If it's very annoying, a screen replacement could be considered, although software settings should be ruled out first.
- Abnormal Battery Drain 📉: Is your A34's battery disappearing faster than an ice cream in August? Before blaming the physical battery, investigate if you have a "vampire" app sucking power in the background, or if poor operating system optimisation is responsible.
- Software solution: Go to
Settings > Battery and device care > Battery > Battery usage. There you can see which applications are the most power-hungry. Try putting those you don't need constantly active to sleep, restrict their background activity, or uninstall them if you don't use them.
- Software solution: Go to
- Extreme Lag and Slowness 🐌: If your phone is stuttering, apps take an eternity to open, or it's constantly "thinking," it's not always a sign of aging hardware. It could be that you have too many apps open, the cache is full to the brim, the internal storage is almost full, or the operating system simply needs a good restart.
- Software solution: Close the apps you aren't using from the multitasking manager. Clear the cache of the applications (especially the ones you use most) and the system cache (if your version of One UI allows it easily). Free up space by deleting unnecessary files. And the classic: restart the phone!
- Overheating Caused by Software 🔥: Sometimes, the phone heats up not because of a faulty physical component, but because a poorly optimised app is pushing the processor to its limits unnecessarily, or a system process has got "stuck."
- Software solution: Try to identify if the overheating coincides with the use of a specific app. Limit its background activity or temporarily uninstall it to see if it improves. Also, make sure that both the operating system and all your applications are updated to the latest version, as updates often include optimisation fixes.
- Unusual overheating.
- Problems with camera operation.
- Failures in mobile data or Wi-Fi connection.
- Issues with the screen's touch response.
- In more severe cases, even "bootloops" (the phone restarts in a loop and doesn't boot up).
- Software Causes of Ghost Touch:
- Bugs in the Android operating system or the One UI layer.
- Applications running in the background that interfere with touch input.
- Touch calibration issues (this is rare in modern phones without specific tools, but not impossible).
- Features like "Touch sensitivity" (designed to improve response with screen protectors) that are poorly adjusted or causing conflicts.
- Software Solutions for Ghost Touch:
- Restart the phone: The classic "turn it off and on again" solves more problems than you think.
- Clean the screen: Although it seems obvious, dirt, grease, or moisture on the screen can confuse the digitiser.
- Remove the screen protector and case: To rule them out as the cause.
- Adjust "Touch sensitivity": Go to
Settings > Displayand try toggling this option on or off. - Enable "Accidental touch protection": Also in the display settings, this feature can help prevent unintentional touches.
- Check recent apps: If the problem started after installing a new app, or you suspect an app that runs in the background, try force-stopping or uninstalling it.
- Update the software: Make sure your A34 has the latest available software version, for both the operating system and applications.
- Factory reset: As always, the last resort if nothing else works. Don't forget to back up!
- Restart the device: Simple but effective.
- Check for pending updates: For both the operating system and applications. Install them if there are any.
- Test in Safe Mode: Safe Mode starts the phone with only the essential system apps and services, disabling any third-party apps you have installed. If the problem disappears in Safe Mode, then one of your apps is the culprit. (Search on Google how to enable Safe Mode on your Samsung Galaxy A34; it's usually by pressing and holding the power button, then long-pressing the "Power off" option on the screen).
- Clear the cache: Clear the cache of the applications you think might be causing problems, or even the system cache partition (if you know how, the process varies by model and Android version).
- Check battery and performance settings: Make sure you don't have an extreme power-saving mode enabled that is unexpectedly limiting performance.
- Consider a factory reset: If nothing works and you strongly suspect a software problem, this is the most drastic option. Remember that it will erase all your data, so make a full backup first.
- If the problem persists after trying all reasonable software solutions.
- If there is obvious physical damage (cracked screen, bent phone, visibly damaged charging port).
- If the problem appeared right after an impact, a fall, or the phone getting wet.
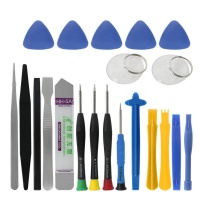
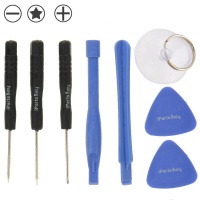
- Precision Screwdriver Set: Essential. Samsung usually uses small Phillips screws (PH00, PH000), but it never hurts to have a varied set.
- Plastic Opening Picks: Of different thicknesses. They are your best friends for separating casings and screens without damaging the plastic or metal.
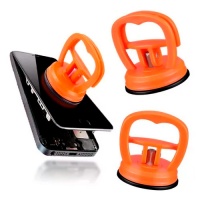
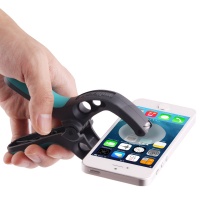
- Suction Cup: Very useful for lifting screens or back covers, creating the first gap to insert the picks.
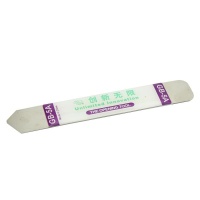
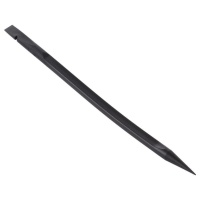
- Plastic Spudgers: For disconnecting flex cables, lifting small components, or helping to remove batteries. They come in different shapes and sizes.
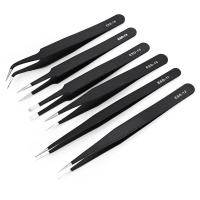
- Tweezers: Preferably anti-static and with a fine tip. For handling tiny screws and small components.
- Heat Gun or Hairdryer: Necessary to soften the adhesive that seals back covers and, sometimes, screens. Use heat in moderation!
- Isopropyl Alcohol (90% or higher): Great for cleaning old adhesive residue and for helping to remove stubborn batteries.
- Microfibre Cloths: For cleaning without leaving lint.
- Anti-static Gloves (Recommended): To protect components from the static electricity from your body.
- Safety Goggles: Essential if you're going to be working with broken glass! You don't want a piece of screen in your eye.
- Anti-static Wrist Strap (Highly Recommended): It connects to a ground and prevents you from damaging delicate electronic circuits with an electrostatic discharge (ESD).
- BACK UP NOW! 💾: We can't say it enough. Before touching anything, make a full backup of all your important data (photos, videos, contacts, messages, etc.). Any mistake could cost you your memories.
- LOW BATTERY, LOW RISK 🔋: Try to have your phone's battery below 25% charge. Lithium batteries can catch fire or explode if accidentally punctured, and the risk is lower if they are not fully charged.
- TURN OFF THE PHONE 🔌: Make sure the phone is completely off, not just in sleep mode or with the screen locked.
- PREPARE YOUR WORKSPACE ✨: Find a clean, well-lit, clear area where you won't be disturbed. A flat surface is ideal. Use a magnetic mat to organise screws or small labelled containers. Losing a screw is very easy!
- CONSULT SPECIFIC GUIDES FOR YOUR REPAIR 📖: This article gives you an overview. But for each specific repair (changing the screen, battery, charging port...), you MUST look for detailed step-by-step videos or tutorials for the Samsung Galaxy A34. Not all phones open the same way or have the components in the same place.
- Heat with Care, not with Fury: When using the heat gun or hairdryer, move it constantly around the edges. Do not apply too much heat to one spot for too long, as you could damage sensitive internal components (like the battery or the screen itself if you only want to remove the back cover).
- Patience and Finesse are Your Allies: In mobile phone repairs, haste makes waste. Don't force any part. If something doesn't give, double-check if you've missed a hidden screw, a clip, or a connected flex cable.
- Screw Organisation is Vital!: Phones use screws of different sizes and lengths. Don't mix them up! If you put a long screw where a short one goes, you can damage the main board or the screen. A good trick is to draw a diagram of the phone on a piece of paper and tape the screws to their corresponding positions as you remove them, or use a screw organiser tray.
- Flex Connectors, Fragile Treasures: Flex cables are very delicate. Many have small security latches on their connectors (ZIF connectors) that you must lift with a plastic spudger before gently pulling the flex to disconnect it. To reconnect them, make sure they are properly aligned and press gently until they "click" or the security latch is down. Never pull on the cable itself, always on the rigid end of the connector!
- Adhesives, the Key to a Good Seal: ALWAYS completely remove the old adhesive residue from the phone's frame and the part you are replacing. Use new, pre-cut adhesives specific to your phone model and the part in question (back cover, screen, battery). This ensures an optimal seal and a firm hold.
- Test Before Final Closing: Before sealing the phone completely (especially if you have changed the screen or battery), temporarily connect the battery and the new part, turn on the phone, and check that everything works correctly (image, touch, charging, etc.). It will save you from having to open it up again if something went wrong.
- Samsung's Self-Repair Programme: Samsung has started to offer original parts, tools, and repair manuals for some of its devices. It's worth checking their official website to see if the Galaxy A34 is included or if there are guides for similar models that can guide you!
- iFixit.com: Considered by many to be the bible for repairers, both amateur and professional. They have step-by-step guides with high-quality photos and videos for a huge number of devices, including many models from the Samsung Galaxy A series. It's an essential resource.
- YouTube: It's a goldmine of repair tutorials. Look for channels specialising in mobile phone repair that show "teardowns" and part replacements for the Samsung Galaxy A34. Channels like PBKreviews, Der HandyRetter, and many others often upload very useful videos where you can see the actual process. Watching someone do it gives you much more confidence.
An important detail is that the complete removal of the old adhesive and the correct application of the new one are fundamental for the new cover to be sealed properly. This not only affects the aesthetics but also the structural integrity and, as much as possible, helps to maintain the splash resistance that the phone offers from the factory.
Furthermore, although we always recommend keeping the original colour to preserve the factory aesthetic, the availability of covers in the different official colours gives you a small opportunity for "customisation." If you had a Graphite A34 and the cover breaks, you could opt for an Awesome Silver if you fancy a change, as long as the part is the correct one for your model!
5. Key Spare Parts for Your Samsung Galaxy A34: The Essentials! ✨
There are some components that, due to their function or the frequency with which they fail, become the kings of spare parts. Let's get to know the most important ones for your Samsung Galaxy A34.
USB to Board 40-pin FPC Connector for Samsung A34 5G (SM-A346)
Charging Port (Charging Board / Charging Dock) for Samsung A34 5G (SM-A346B, A346E, A346M)
It's important to understand the difference between the "USB to board FPC connector" and the "Charging Port (or charging board)". The former can refer to the female connector soldered onto the main board (a very advanced repair requiring microsoldering) or the male connector at the end of the flex cable coming from the charging port module. For the average user, the most feasible and common repair is to replace the entire charging port module. This module already includes the USB-C port, often the microphone, and the flex cable with its FPC connector ready to be plugged into the main board. This greatly simplifies the repair.
A faulty charging port will not only leave you without a battery; it can also prevent data transfer and, if the microphone is integrated into that part, seriously affect the quality of your calls. That's why replacing this module can solve several problems at once.
Basic Guide for Replacing FPC Connectors and Charging Ports
Attention, handypeople: These repairs are more delicate than changing a cover or a battery. They require patience, a steady hand, and the right tools. If you don't feel confident, it's better to leave it in the hands of a professional.
Samsung offers general guides for replacing the charging port on some Galaxy models, and although they may not be specific to the A34, the principles of opening and handling components are usually similar.
Using a low-quality charging port or FPC connector can lead to premature failures, persistent slow charging, or even, in the worst-case scenario, damage to your phone's main board. That's why at iLevante.com, we strive to offer you quality spare parts that guarantee a lasting repair.
6. Other Spare Parts to Keep Your Galaxy A34 at 100% ⚙️
Besides screens, batteries, and charging ports, there are other components of your Samsung Galaxy A34 that may need replacing to keep it running like new. Let's take a look!
The wide availability of these smaller, more specific spare parts is good news. It suggests that the Samsung Galaxy A34 is a device with a fairly modular design, which facilitates repairs at the individual component level rather than having to replace entire, more expensive modules. This is a point in favour of repairability and for users who want to extend the life of their mobile without spending a fortune.
A detail that is often overlooked is the importance of adhesives. The specific mention of adhesive tapes for the back cover and battery underscores that you should not reuse the old adhesive. These adhesives are single-use and lose their properties once peeled off. Using pre-cut adhesives designed for your model ensures a perfect fit and an optimal seal, which is crucial for maintaining the device's integrity.
7. Common Hardware Problems in the Samsung A34 and Their Solutions 🔩
Sometimes, our beloved Samsung Galaxy A34 can start showing strange symptoms. Identifying whether it's a hardware problem and which part might be failing is the first step to restoring its health. Let's look at the most common ailments and their possible cures!
Table of Symptoms and Possible Spare Parts Needed for Samsung Galaxy A34
| Problem Symptom | Possible Hardware Cause(s) | Suggested Spare Part(s) on iLevante.com |
|---|---|---|
| The phone doesn't charge at all, or charging is intermittent. | Damaged charging port, faulty battery (unable to hold a charge), damaged charging FPC connector, faulty charging board. | Charging Port for A34, Battery for A34, USB to Board FPC Connector for A34. |
| The screen is cracked, has black spots, coloured lines, or doesn't respond to touch. | Screen (LCD/OLED panel and/or digitiser) broken or faulty due to an impact or internal failure. | Complete Screen for A34 (Original, OLED, INCELL depending on preference). |
| The battery drains very quickly (e.g., in 2 hours), suddenly shuts down, or is swollen. | Degraded, faulty, or end-of-life battery. | Battery for A34 (Original or quality OEM). |
| The back cover is broken, cracked, or heavily scratched. | Physical damage from a drop or impact. | Back Cover for A34 (in the corresponding colour). |
| The power or volume buttons don't work or get stuck. | Damaged button flex cable or broken button mechanism. | Button Flex Cable for A34. |
| A high-pitched noise or buzz is heard when using the camera. | Faulty camera module (possibly the OIS stabiliser or an electronic component). | Rear Camera Module for A34. |
| The phone registers "ghost touches" on the screen when no one is touching it (after ruling out software issues). | Damaged screen/digitiser (even without visible cracks), loose screen flex connection, faulty replacement screen. | Complete Screen for A34, check internal connections. |
| Nothing is heard during calls (earpiece). | Damaged earpiece speaker or faulty connection flex. | Earpiece Speaker for A34. |
| The phone emits no sound from the main speaker (ringtones, music, hands-free). | Damaged main speaker (loudspeaker) or faulty connection flex. | Main Speaker for A34. |
| The computer doesn't recognise the phone when connected via USB. | Damaged charging port, faulty data FPC connector, faulty USB cable (rule out the cable first). | Charging Port for A34, USB to Board FPC Connector for A34. |
Overheating: Does Your A34 Feel Like a Toaster? 🔥
Connection Failures (Wi-Fi, Bluetooth, Mobile Data) 📶
Storage Problems (Beyond "Memory Full") 💾
"Ghost Touch" (Hardware Origin) 👻👆
This is one of the most frustrating problems. If your screen seems to have a life of its own and registers touches you haven't made, and you've already ruled out software causes (which we'll look at later), hardware could be the culprit:
Other Faults Reported by the User Community
Sometimes, the most specific problems arise from the real-world experience of users:
Diagnosing problems like "ghost touch" or overheating can be complex because the causes can be multiple, both hardware and software. Therefore, it is advisable to follow a methodical approach, trying the simplest and cheapest solutions first (like removing a screen protector or changing a cable) before deciding to replace more expensive components like the screen.
Although this article focuses on spare parts, a little prevention tip: using good-quality chargers and cables can help protect the charging port and the battery, and even though your A34 has an IP67 rating, avoid unnecessarily exposing it to water and dust to extend its lifespan.
8. A Touch of Software: When the Problem Isn't Entirely Physical 💻
Hold on! Not everything that looks like a hardware failure is one. Sometimes, the software on your Samsung Galaxy A34 can play tricks on you and make you think you need a spare part when, in fact, the solution is just a few clicks away. Before you rush to buy parts, give the software a chance!
When Software Disguises Itself as Broken Hardware
There are classic symptoms that make us think of replacing a part, but which can have a purely digital origin:
Beware of Updates! Post-Update Bugs (e.g., One UI 6.0) 🐞
Software updates are, in theory, meant to improve our phones. But, let's be honest, sometimes they come with new "gifts" in the form of bugs. Samsung's customisation layer, One UI, is very comprehensive, but like any complex software, it is not free from errors, especially in the first versions after a major update.
For example, after the update to One UI 6.0, some users of the Galaxy A34 and similar models have reported various problems that could be mistaken for hardware failures:
What to do if you suspect an update is the culprit? First, be patient. Samsung often releases patches or minor updates shortly after to fix these errors. You can look for information on official Samsung forums or user communities to see if others are experiencing the same thing. As a more drastic measure (and always backing up your data first), a factory reset could solve some persistent problems, but it should be your last resort.
"Ghost Touch" Caused by Software 👻💻
Let's go back to ghost touches. If you've already ruled out the hardware causes we saw earlier, it's very possible that the problem lies with the software:
Advice from the Technician's Trench: Software or Hardware?
As a repair technician, I'll give you a golden rule: always try to rule out software problems before buying hardware spare parts (unless, of course, the physical damage is obvious, like a screen cracked from a fall).
Here are some basic software diagnostic steps you can follow:
When to seriously suspect a Hardware failure?
Guiding you to rule out software problems BEFORE buying hardware is fundamental. A customer who solves their problem with a simple restart or a software tweak, instead of spending money on a part they didn't need, will value the honesty and knowledge of iLevante.com. This builds trust, and that trust can translate into future purchases when you actually need a spare part.
9. Basic Repair Guide: Dare to be a DIY Pro! 💪
If you've made it this far, it's because you have the soul of a repairer and are willing to face the challenge of fixing your Samsung Galaxy A34. Great! But before you put on your work gear, there are a few things you should know and have on hand.
The DIYer's Survival Kit: Essential Tools
You can't go to war without weapons, right? Well, for mobile phone repair, you need your own arsenal:
Before Starting the Surgery: Vital Precautions
Before you draw the first screwdriver, stop for a moment! These precautions are crucial:
Disassembly and Assembly Manoeuvres: General Tips
Where to Find the Secret Blueprints? (Detailed Guides)
Fortunately, you are not alone in this adventure. There are many resources where you can find detailed guides:
This section aims to empower you with the basic knowledge to dare to repair. It is not an exhaustive manual, but a roadmap with the critical points and necessary warnings. Directing you to specialised sources like iFixit or Samsung's own resources is the safest way to get detailed instructions for your specific repair.
And remember, safety first. Discharging the battery, wearing safety goggles, and not puncturing the battery are tips that will prevent scares.
10. Ready to Revive Your Samsung Galaxy A34? At iLevante.com We'll Help You! 🛒
Congratulations, brave one! You've reached the end of this guide and, hopefully, you now have a much clearer idea of how your Samsung Galaxy A34 works on the inside and how you can bring it back to life if something goes wrong. Repairing your phone is not only a smart choice for your wallet but also a kind gesture to the planet.
Quality Matters: Don't Gamble with Cheap "No-Name" Parts
Throughout this article, we have insisted on the importance of using good quality spare parts. Whether they are original Samsung parts or trusted OEM alternatives, investing a little more in a reliable component makes a big difference. A poor-quality part can fail after a short time, not offer the same performance, or even, in the worst-case scenario, damage other components of your phone. At iLevante.com, we take care to select and offer you parts that meet quality standards so that your repair is a lasting success.
Your Samsung Galaxy A34 Has Plenty of Life Left in It!
With the right parts, a little patience, and the correct information, your Samsung Galaxy A34 can continue to be your faithful companion for much longer. Don't let a cracked screen, a worn-out battery, or a rebellious charging port force you to say goodbye to it prematurely. Repair is possible and within your reach!
It's Time to Act! Your A34 Needs You
Do you feel ready to give your mobile a new lease of life? Great!
👉 Explore our full catalogue of spare parts for the Samsung Galaxy A34 at iLevante.com. Find screens of all qualities (Original, OLED, INCELL), batteries, back covers in all their "Awesome" colours, FPC connectors, charging ports, cameras, flex cables, speakers, SIM trays, adhesives, and all those little parts you need to make it like new again.
See Spare Parts for Samsung Galaxy A34
If you have any doubts about which part you need exactly, or if you simply want some advice before embarking on the repair adventure, don't hesitate to contact us! Our team of experts at iLevante.com is ready to help you find the perfect solution for your Samsung Galaxy A34.
Good luck with your repair, and may the force (and the right tools) be with you! 😉

