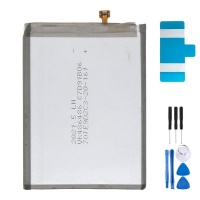
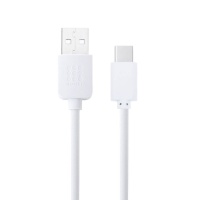
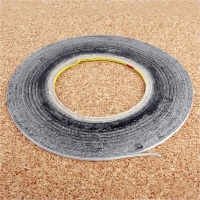
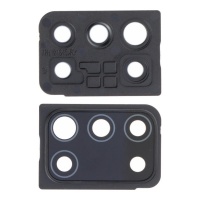
 Repair parts Samsung Galaxy A21s





Receive it on friday 06 de february


The Samsung Galaxy A21s: A Complete Technical, Diagnostic, and Repair Analysis
To effectively diagnose and repair any electronic device, it is imperative to first establish a precise technical baseline. This section provides a detailed and definitive profile of the hardware architecture and capabilities of the Samsung Galaxy A21s, laying the groundwork for accurate fault identification and the selection of compatible replacement components.
1.1 Model Variants and Regional Differences
The Samsung Galaxy A21s is not a monolithic entity; it was released in multiple variants tailored to different global markets. Correctly identifying the model number is the first critical step in any repair process, as it determines the compatibility of crucial components such as motherboards, screen assemblies, and connectivity modules. The main model numbers include:
- SM-A217F & SM-A217F/DS: The most common international variant, often with dual-SIM (DS) capability.
- SM-A217M & SM-A217M/DS: Aimed at the US and Latin American markets.
- SM-A217F/DSN: A specific sub-variant for the Russian market.
- SM-A217N: Another regional variant.
The most significant difference between these variants lies in the network band support and the availability of Near Field Communication (NFC) functionality. Whilst most European and global models include NFC, this feature may be absent in some versions intended for specific markets, affecting contactless payments and quick device pairing. Purchasing a motherboard from a different region can result in mobile network incompatibility.
| Model Number | Main Region | RAM/Storage Configurations | NFC Support | Key 4G Bands (FDD LTE) |
|---|---|---|---|---|
| SM-A217F/DS | International/Global | 3GB/32GB, 4GB/64GB, 6GB/64GB | Yes (market dependent) | 1, 2, 3, 5, 7, 8, 20, 28 |
| SM-A217M/DS | USA / LATAM | 3GB/32GB, 4GB/64GB | Yes (market dependent) | Varies by operator, but generally includes North American/LATAM bands |
| SM-A217F/DSN | Russia | 3GB/32GB, 4GB/64GB | Yes | 1, 3, 5, 7, 8, 20, 28, 38, 40, 41 |
1.2 Core Hardware Specifications: Processor, Memory, and Storage
The Galaxy A21s's performance is dictated by its entry-level hardware, a design decision geared towards hitting a competitive price point.
- Chipset: The device is powered by the Samsung Exynos 850 System-on-Chip (SoC), manufactured on an 8nm process.
- CPU: The central processor is an octa-core configuration consisting of two identical clusters: 4×2.0 GHz Cortex-A55 & 4×2.0 GHz Cortex-A55. This architecture is designed for power efficiency rather than peak performance.
- GPU: Graphics processing is handled by the Mali-G52 unit.
- Memory and Storage: The A21s was offered in a wide range of configurations, with RAM ranging from 2GB to 6GB and internal storage of 32GB, 64GB, or 128GB. It is vitally important to note that the internal storage type is eMMC 5.1, a considerably slower technology than the UFS (Universal Flash Storage) standards found in mid-range and high-end devices. This hardware choice has profound implications for the device's long-term performance, as the storage read/write speed is a fundamental bottleneck for operating system and application responsiveness.
1.3 Display Technology: An In-Depth Look at the Original PLS TFT Panel
A common point of confusion in the aftermarket is the A21s's original screen technology. Unlike many other Samsung devices, it does not use an AMOLED display.
- Technology: The factory display is a 6.5-inch PLS TFT LCD panel. PLS (Plane-to-Line Switching) is a Samsung-proprietary technology similar to IPS (In-Plane Switching), offering better viewing angles and colour reproduction compared to older TFT panels, but it is still an LCD technology.
- Specifications: The display has a resolution of 720×1600 pixels (HD+), resulting in a pixel density of approximately 270 ppi (pixels per inch). It features a 20:9 aspect ratio and an "Infinity-O" design, with a circular cutout for the front-facing camera in the top-left corner.
1.4 Camera and Sensor Array: Capabilities and Limitations
The Galaxy A21s was marketed with a quad-camera system, a notable feature for its price segment at the time of its release.
- Rear Camera Module:
- Main Camera: 48 MP, f/2.0 aperture, wide-angle, with phase detection autofocus (PDAF).
- Ultra-Wide Camera: 8 MP, f/2.2 aperture, 123° field of view.
- Macro Camera: 2 MP, f/2.4 aperture.
- Depth Sensor: 2 MP, f/2.4 aperture, used for background blur effects (Live Focus).
- Front-Facing Camera: A single 13 MP camera with an f/2.2 aperture.
- Additional Sensors: The device includes a rear-mounted fingerprint sensor, an accelerometer, a gyroscope, a proximity sensor, and a compass. The absence of an ambient light sensor is noteworthy and may explain some erratic auto-brightness behaviour reported by users.
1.5 Battery and Charging System Specifications
Battery life was one of the main selling points of the A21s, thanks to its high-capacity component.
- Battery: The device is equipped with a non-removable 5000 mAh Li-Po (Lithium Polymer) battery (4900 mAh rated capacity). The model number for this battery is EB-BA217ABY, a crucial reference for sourcing the correct replacement part.
- Charging: It supports 15W wired charging via its USB Type-C 2.0 port. It does not have wireless charging capabilities.
1.6 Physical Design, Materials, and Official Colours
The design of the A21s is representative of budget phones of its era, utilising cost-effective materials.
- Dimensions and Weight: It measures 163.7×75.3×8.9 mm and weighs 192 grams.
- Construction: The phone is built with a glass front, a plastic frame, and a plastic back cover.
- Official Colours: Samsung released the A21s in four main colours: Black, White, Blue, and Red. Knowing these is essential when ordering replacement back covers to ensure an aesthetic match.
The combination of these specifications paints a clear picture. The Galaxy A21s was designed as a budget device with key selling points like a large battery and a versatile camera system. However, the trade-offs made to reach this price point, especially the choice of a modest processor and slower eMMC 5.1 storage, are the root cause of many of the performance issues that users would later report in the device's lifecycle. As the Android operating system and applications became more demanding, these hardware limitations became critical bottlenecks, leading to the sluggishness, freezes, and general instability detailed in the next section.
Common Failure Points: A Diagnostic Guide
Analysis of user forums, repair guides, and technical documentation reveals a consistent pattern of failures in the Samsung Galaxy A21s. This section systematically categorises these problems, providing a comprehensive overview of the device's vulnerabilities to guide accurate diagnosis.
2.1 Power, Charging, and Battery-Related Malfunctions
Power issues are among the most reported and can manifest in several ways, often with overlapping causes.
Symptoms:
- The device does not power on at all, with no response to pressing the power button.
- The device does not charge or charging is intermittent; the charging icon may appear and disappear.
- The device is stuck in a boot loop, repeatedly showing the Samsung logo but failing to start up completely.
- The battery drains abnormally quickly, even with light usage.
- Unexpected shutdowns, especially when the battery is below a certain percentage or when using demanding applications.
Potential Causes:
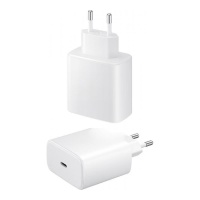
- External: Faulty or incompatible charging cable or power adapter. Using Samsung-authorised accessories is strongly recommended.
- Physical (Minor): Accumulation of dust, lint, or other debris in the USB-C charging port, preventing a proper connection.
- Hardware (Components): A degraded battery that has reached the end of its lifespan and can no longer hold a charge or supply the necessary voltage. A failure in the charging port daughterboard, which houses the USB-C port and microphone.
- Hardware (Motherboard): Failure of the power management integrated circuits (ICs) on the main motherboard, such as the over-voltage protection (OVP) IC or the main charging IC (IFPMIC).
- Software: Software glitches or system corruption that can cause boot loops or excessive battery drain.
2.2 Screen and Touch Issues
Screen failures are another common category of problems, ranging from obvious physical damage to more subtle functional faults.
Symptoms:
- Black screen ('black screen of death'), where the phone appears to be on (making sounds, vibrating) but the display remains off.
- The screen freezes and becomes unresponsive to touch inputs.
- Appearance of vertical or horizontal lines on the display.
- Colour distortion, such as the appearance of pink or sepia tones, or inverted colours, especially in dark areas.
- Visible physical damage, such as cracks in the glass or liquid crystal leakage (black spots).
Potential Causes:
- Software: An operating system crash can make the screen appear dead. This is often resolved with a forced restart.
- Connection: A loose or damaged screen FPC (Flexible Printed Circuit) connector on the motherboard, often as a result of a drop or a previous poorly executed repair.
- Hardware: A faulty display panel, either due to a manufacturing defect, impact damage, or the use of a low-quality replacement screen.
2.3 System Performance Issues: Sluggishness, Freezes, and Random Reboots
This is perhaps the most widespread set of complaints among A21s users, and it stems directly from its hardware limitations.
Symptoms:
- The device runs sluggishly (lags), with noticeable delays when opening apps or navigating the interface.
- Apps crash unexpectedly or freeze during use.
- The phone reboots randomly without user intervention.
Potential Causes:
- Resource Management: Internal storage is almost full, which slows down the operating system. Excessive accumulation of data in the application and system cache. Too many applications running in the background, consuming RAM and CPU cycles.
- Software: Software bugs, especially after an operating system update or security patch. Multiple users on Samsung community forums have directly correlated the onset of these issues with recent updates.
- Hardware (Rare): In less common cases, a faulty motherboard could cause chronic instability.
2.4 Camera System Failures
Problems with the camera can be software or hardware-related, and often manifest after an update.
Symptoms:
- A 'Camera failed' or 'Camera not working' warning message appears when opening the app.
- The camera app freezes or crashes when attempting to use it.
- The camera cannot focus on objects correctly.
- The outer camera lens glass is physically cracked or scratched, degrading image quality.
Potential Causes:
- Software: A software conflict or a bug introduced by a system update. Corrupted data or cache in the camera application.
- Hardware: The camera module itself is damaged or disconnected from the motherboard. The protective lens glass is damaged, preventing focus or introducing image artefacts.
2.5 Connectivity Issues (Wi-Fi, Bluetooth, USB, Mobile Signal)
Connectivity failures can isolate the device and severely limit its functionality.
Symptoms:
- Inability to connect to known Wi-Fi networks or frequent disconnections.
- Problems pairing or maintaining a stable connection with Bluetooth devices.
- The computer does not recognise the phone when connected via USB.
- Weak or non-existent mobile signal ('No Service').
Potential Causes:
- Software: Incorrect or corrupt network settings. Software driver issues, often related to updates.
- Hardware: Damaged or disconnected internal antenna or antenna coaxial cable. Faulty SIM tray or SIM reader. A damaged USB-C port that only allows charging but not data transfer.
2.6 Issues with Peripheral Components (Loudspeaker, Microphones, Vibration Motor)
These failures affect the phone's basic audio and haptic feedback functions.
Symptoms:
- No sound is heard from the main loudspeaker when playing music or during calls on speakerphone mode.
- The loudspeaker sound is distorted or very quiet.
- People on the other end of a call cannot hear the user.
- The device does not vibrate for notifications or calls.
Potential Causes:
- Hardware: Damaged or disconnected loudspeaker module. Faulty main microphone (located on the charging port board). Disconnected or burnt-out vibration motor.
The interconnectedness of these problems is a key point. There is a strong correlation reported by users between software updates and the onset of symptoms that appear to be hardware failures. For example, random reboots and camera errors often begin immediately after installing a new security patch or operating system update. This is not a mere coincidence; it suggests that the A21s's software may not be perfectly optimised for its specific hardware, particularly the Exynos 850 chipset. An update can introduce a driver conflict or a bug that destabilises the system, causing a kernel panic (resulting in a reboot) or a failure of a high-level application like the camera.
This dynamic creates a significant diagnostic challenge. A user experiencing these issues might incorrectly assume a hardware fault (a faulty battery, a broken camera) and proceed with a costly and potentially unnecessary repair. Therefore, it is crucial to adopt a software-first troubleshooting approach, as detailed in the next section, to rule out non-physical causes before considering any hardware intervention.
| Symptom | Potential Software Cause | Potential Hardware Cause | Recommended Initial Action |
|---|---|---|---|
| No power / Not charging | Deep OS crash, boot error | Dead/faulty battery, dirty/damaged charging port, faulty cable/charger, board failure | Test with another genuine cable/charger, clean port, perform a forced restart |
| Black screen (with sound/vibration) | Operating system crash | Loose/damaged screen connector, faulty screen | Perform a forced restart |
| Sluggishness / Freezes | Low storage, excessive cache, background apps, OS bug | (Unlikely) Memory or CPU failure | Free up space, clear app cache, use Safe Mode to rule out third-party apps |
| Random reboots | OS bug (post-update), conflicting app | Faulty battery, motherboard failure | Perform a "Wipe Cache Partition", use Safe Mode |
| Camera error | Corrupt app cache/data, OS bug (post-update) | Damaged/disconnected camera module | Clear Camera app data/cache, perform a "Wipe Cache Partition" |
| No Wi-Fi/Bluetooth connection | Corrupt network settings, OS bug | Damaged/disconnected antenna | Reboot router, Reset network settings |
| No sound from loudspeaker | OS bug | Damaged/disconnected loudspeaker | Reboot phone, test in Safe Mode |
Systematic Troubleshooting: A Step-by-Step Protocol
Before considering any physical repair, it is crucial to follow a logical and orderly troubleshooting protocol. This process is designed to isolate the root cause of a problem, progressing from the least invasive software solutions to the most comprehensive system resets. Following this hierarchy can resolve a vast majority of issues without needing to open the device.
3.1 Initial Non-Invasive Software Solutions
These are the first steps to take for any anomalous device behaviour, as they are quick, safe, and do not involve any data loss.
Forced Restart (Soft Reset):
This is the fundamental first step for any device that is frozen, unresponsive, or showing a black screen. A forced restart does not erase any data but forces the hardware to reboot, closing all background processes and often resolving temporary software glitches. For the Galaxy A21s, the procedure is to press and hold the Volume Down button and the Power button simultaneously for approximately 10 to 15 seconds, until the device vibrates and the Samsung logo appears.
Application Management:
If a problem seems related to a specific application or if general performance is slow, app management is the next step.
- Force Stop: Immediately stops all processes of a misbehaving application. Accessed via Settings > Apps > [App] > Force stop.
- Clear Cache and Data: Clearing the cache removes temporary files that can become corrupted and cause issues, without affecting user data. Clearing data, on the other hand, resets the app to its initial state, as if it were just installed (logins and settings will be lost). Accessed via Settings > Apps > [App] > Storage > Clear cache / Clear data.
- Uninstall Unnecessary Applications: Freeing up storage space and reducing background processes is crucial for performance on a device with eMMC 5.1 storage. Unused applications should be uninstalled.
Safe Mode:
This is a critical diagnostic step. Safe Mode starts the device by loading only the operating system and pre-installed Samsung applications, disabling all third-party apps the user has downloaded. If the problem (such as random reboots, extreme sluggishness, or camera failures) disappears in Safe Mode, the cause is almost certainly a poorly programmed or conflicting third-party app. The next step would be to uninstall recently installed apps, one by one, until the problem is resolved. To enter Safe Mode:
- Press and hold the Power button until the power off menu appears.
- Press and hold the "Power off" icon on the screen until it transforms into a "Safe mode" icon.
- Tap the "Safe mode" icon to reboot the device into this mode.
3.2 Leveraging Internal and External Diagnostic Tools
Samsung provides several tools to help diagnose hardware problems directly.
- Samsung Members App: This pre-installed (or downloadable) application contains a suite of diagnostic tools. It allows for individual tests on components like the battery, charging port, touchscreen, sensors, and cameras. A failure in one of these tests is a strong indicator of a hardware problem. It is found in Samsung Members > Support > Phone diagnostics.
- Hidden Diagnostic Menu (
*#0*#): This is an engineering test menu accessed by dialling the code*#0*#in the phone app. It allows for low-level tests on the screen hardware (red, green, blue, black pixels), the touch sensor (allowing you to "draw" on a grid to check the responsiveness of the entire surface), sensors (accelerometer, gyroscope), cameras, and the vibration motor. It is an extremely powerful tool for differentiating a hardware fault from a software one, as it operates at a layer below the main operating system. - Samsung Smart Switch: Although its primary function is data transfer, the PC or Mac version of Smart Switch can also check for and install software updates for the phone. In cases where over-the-air (OTA) updates fail, connecting the device to a computer and using Smart Switch can successfully force the update.
3.3 Advanced Software Resets
If the above steps do not resolve the issue, more profound resets can be attempted before resorting to a complete data wipe.
Reset Network Settings:
This option is the preferred solution for all connectivity issues (Wi-Fi, Bluetooth, mobile data). It resets all network configurations to their factory defaults without erasing any personal data. The user will need to re-enter Wi-Fi passwords and re-pair Bluetooth devices. It is found in Settings > General management > Reset > Reset network settings.
Wipe Cache Partition:
This is one of the most effective and often overlooked troubleshooting steps, especially for performance issues, battery drain, and random reboots that appear after a system update. It removes temporary and outdated system files accumulated from previous Android versions, which can cause conflicts. It is important to note that, unlike many older models, the Galaxy A21s requires being connected to a PC or Mac via a USB cable to access the Android Recovery Menu. A user attempting the button combination without this connection will not be able to access the menu.
- Power off the phone completely.
- Connect the phone to a computer via a USB cable.
- Press and hold the Volume Up button and the Power button simultaneously.
- Release both buttons as soon as the Samsung logo appears.
- In the Android Recovery Menu, use the volume buttons to navigate to the "Wipe cache partition" option and press the Power button to select.
- Confirm by selecting "Yes" and pressing the Power button.
- Once completed, select "Reboot system now" to restart the device.
3.4 The Final Software Step: Factory Reset
This is the last resort in software troubleshooting. A factory reset erases all user data, applications, and settings, returning the phone's software to its original factory state.
- Mandatory Backup: Before proceeding, it is absolutely essential to perform a full backup of all important data (photos, contacts, documents) using Samsung Smart Switch, Google Drive/Photos, or another method.
- Procedure: The reset can be initiated from Settings > General management > Reset > Factory data reset.
3.5 Confirming a Hardware Fault
The logic of this protocol is systematic and conclusive. If a problem persists even after a full factory reset has been performed, it can be stated with a high degree of certainty that the root cause is not software-related. A device with its software in a factory state that continues to exhibit the same fault (e.g., not charging, showing lines on the screen, or the camera still failing) has a confirmed hardware defect. At this point, and only at this point, is it justified to proceed with a physical component repair.
The Repair Manual: A Detailed Component Replacement Guide
Once a hardware fault has been confirmed through systematic diagnosis, this section serves as a practical and detailed guide for the physical repair of the Samsung Galaxy A21s. The instructions synthesise best practices from multiple technical sources and are designed for a technician or a DIY enthusiast with the proper tools.
4.1 Essential Tool Kit and Workshop Safety Protocols
The success of any modern smartphone repair depends as much on skill as on proper preparation. Using the correct tools and following safety protocols is not optional, but essential to avoid further damage to the device or personal injury.
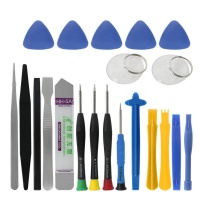
Required Tools:
- Heat Source: A low-temperature heat gun or a hairdryer is indispensable for softening the adhesive holding the plastic back cover. It is also necessary for more delicate repairs like replacing the camera lens glass.
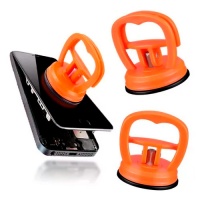
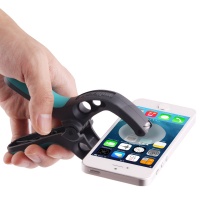
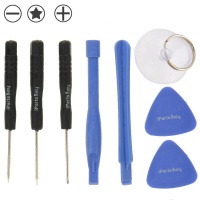
- Suction Cup: Used to create an initial small gap between the back cover and the phone's frame once the adhesive has softened.
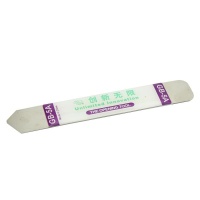
- Plastic Opening Picks: Thin, flexible picks, similar to guitar plectrums, that are inserted into the gap created by the suction cup to slice through the adhesive around the device's perimeter without scratching the plastic.
- Precision Screwdriver Set: A Phillips #00 or #000 screwdriver is required to remove all the internal screws securing the mid-frame and other components.
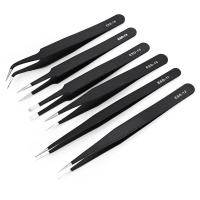
- Tweezers: Essential for handling small flex cable connectors, screws, and other tiny components. ESD-safe tweezers are recommended.
- Plastic Pry Tool (Spudger): A non-conductive plastic tool used to safely disconnect the battery and other flex cable connectors from the motherboard.
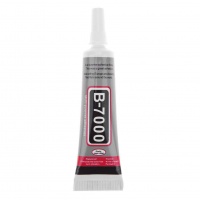
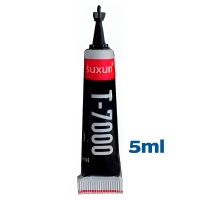
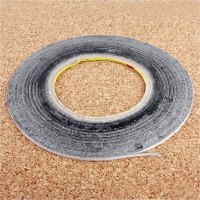
- Adhesive: Electronics-specific liquid adhesive like B-7000 or T-7000, or pre-cut double-sided adhesive tape, is needed to re-seal the back cover and other components during reassembly.
| Tool | Purpose | Type/Recommendation |
|---|---|---|
| Heat gun / Hairdryer | Soften adhesive on the back cover and screen | Adjustable to low temperature to prevent damage |
| Suction cup | Lift the back cover to create an initial gap | Small, high-suction |
| Plastic opening picks | Cut perimeter adhesive without damaging the chassis | Flexible, various thicknesses |
| Precision screwdriver | Remove internal screws | Phillips #00 |
| Tweezers | Handle small connectors and components | ESD-safe, fine-tipped |
| Spudger / Pry tool | Safely disconnect flex connectors | Plastic, anti-static |
| Adhesive | Re-seal the device | B-7000/T-7000 liquid or pre-cut tape |
Safety Protocols:
- Work Environment: Work in a clean, well-lit, and organised area to avoid losing screws and small components.
- Anti-Static (ESD) Protection: Electronic components are sensitive to electrostatic discharge. Use an anti-static wrist strap connected to a ground or work on an anti-static mat to protect the motherboard from damage.
- Device Safety: Ensure the phone is completely powered off before beginning any disassembly. Disconnecting the battery should be the very first step after removing the mid-frame.
- Battery Safety: If you are handling or replacing the battery, it is recommended that it be discharged below 25%. A fully charged lithium-polymer battery can release a significant amount of energy if accidentally punctured, posing a fire hazard.
- Personal Protective Equipment: When handling broken glass (from the screen or camera lens), always wear safety glasses and gloves to prevent injury.
4.2 General Disassembly and Reassembly Procedure
Most internal repairs on the A21s follow a common disassembly sequence.
- Removing the Back Cover:
- Power off the device and remove the SIM card tray.
- Evenly heat the edges of the plastic back cover for 1-2 minutes to soften the adhesive.
- Place a suction cup near one of the bottom edges and pull gently to create a small gap.
- Insert an opening pick into the gap and carefully slide it around the entire perimeter to cut the adhesive. Be especially careful near the fingerprint sensor to avoid damaging its flex cable.
- Once the adhesive is cut, lift the cover carefully. Do not remove it completely; it is connected to the motherboard by the fingerprint sensor cable. Disconnect this cable with a spudger before fully removing the cover.
- Removing the Mid-Frame and Disconnecting the Battery:
- Locate and remove all the Phillips screws securing the plastic mid-frame (which also functions as an antenna) to the main housing.
- Carefully pry up the clips holding the mid-frame to the main chassis and remove it.
- Immediately afterwards, locate the battery connector on the motherboard and disconnect it with a plastic spudger. This is the most important safety step to de-energise the device.
- Notes on Reassembly:
- Thoroughly clean all old adhesive residue from the frame and the back cover.
- Apply a thin bead of new B-7000 adhesive or pre-cut double-sided tape to the frame before reattaching the back cover.
- Reconnect all flex cables, ensuring they snap into place with an audible "click", and replace all screws in their original locations.
- Press the back cover down firmly and use clamps or rubber bands to maintain pressure for at least 30-60 minutes while the adhesive cures.
4.3 Screen Assembly Replacement Guide
For the Galaxy A21s, the most efficient and recommended screen repair method is to use a "Screen with Frame" assembly. This replacement part includes the LCD, digitiser, and a new chassis frame pre-assembled. Although it is slightly more expensive than a screen without a frame, it drastically simplifies the repair, as it eliminates the need to unglue the old screen from the original frame and glue in the new one—a process that requires significant skill and heat, and often results in damaging the frame.
The procedure consists of a component transplant:
- Follow the general disassembly procedure (Steps 1 and 2).
- Disconnect all flex cables from the motherboard (front camera, interconnect cable, etc.).
- Carefully remove the motherboard, battery (see section 4.4), charging port daughterboard, vibration motor, and other small components from the old frame.
- Transfer all of these components to the new "Screen with Frame" assembly.
- Follow the general reassembly procedure.
4.4 Battery Replacement Guide
- Follow the general disassembly procedure (Steps 1 and 2).
- The battery is firmly glued to the frame. To remove it, carefully apply a small amount of isopropyl alcohol around the edges of the battery to dissolve the adhesive.
- Use a plastic card or a wide, flat pry tool to slowly and carefully pry up from underneath the battery. Do not use sharp or metal tools, as they could puncture the battery.
- Once the old battery is removed, clean the residual adhesive, apply new battery adhesive strips to the frame, and install the new battery.
- Proceed with reassembly.
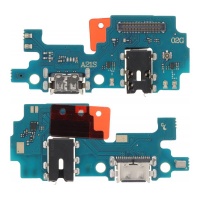
4.5 Charging Port Daughterboard Replacement Guide
This board contains the USB-C port, the main microphone, and the headphone jack.
- Follow the general disassembly procedure (Steps 1 and 2).
- Disconnect the main interconnect cable and the antenna coaxial cable from the daughterboard.
- Remove the single Phillips screw securing the board to the frame.
- Lift and remove the faulty daughterboard.
- Install the new board, reconnect the cables and screw, and proceed with reassembly.
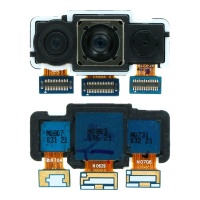
4.6 Rear Camera Module and Lens Glass Replacement Guide
There are two types of camera repairs.
Full Camera Module Replacement:
- Follow the general disassembly procedure (Steps 1 and 2).
- Locate the rear camera module's FPC connector on the motherboard and disconnect it with a spudger.
- The camera module can be easily lifted out and removed.
- Install the new module, reconnect the connector, and reassemble.
Lens Glass Only Replacement:
This is a more delicate repair that does not require a full teardown.
- Gently heat the area of the broken lens glass from the outside of the phone with a heat gun to soften its adhesive.
- Using sharp tweezers, very carefully remove all the broken glass shards. It is crucial not to scratch or touch the camera lenses underneath.
- Thoroughly clean the area with a microfibre cloth and isopropyl alcohol to remove any adhesive residue or dust.
- Peel the protective film from the new lens glass's adhesive and carefully place it into position, pressing down firmly.
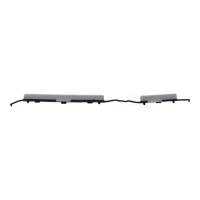
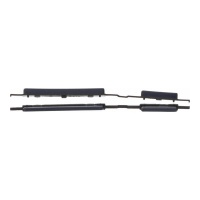
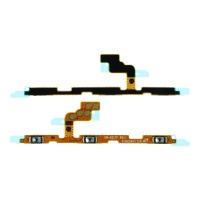
4.7 Power and Volume Button Flex Cable Replacement Guide
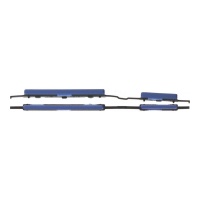
This component is a single flex cable that controls both the power and volume buttons.
- Follow the general disassembly procedure (Steps 1 and 2).
- The flex cable is adhered to the inner side of the chassis frame.
- Carefully use tweezers or a spudger to peel the faulty flex cable away from the frame.
- Clean any adhesive residue and install the new flex cable, ensuring the external physical buttons align correctly with the contacts on the cable.
- Proceed with reassembly.
Navigating the Aftermarket: An In-Depth Component Analysis
The choice of replacement parts is as critical as the repair itself. The smartphone components market is complex and often filled with confusing terminology and varying quality claims. This section provides a critical analysis to help users and technicians make informed purchasing decisions, balancing cost, quality, and performance.
5.1 Decoding Quality Tiers: Genuine, OEM, Service Pack, and Aftermarket
Understanding the quality hierarchy is fundamental to avoid overpaying for inferior parts or risking premature failure.
Genuine / Service Pack:
This is the highest tier of quality. These parts are 100% genuine, manufactured by or for Samsung and distributed through its authorised channels. They often come in Samsung "Service Pack" packaging. They guarantee compatibility, performance, and safety identical to the factory-installed part. They are the most expensive but most reliable option.
OEM (Original Equipment Manufacturer):
This term is the biggest source of confusion and deception in the parts market.
- Technical Definition: An Original Equipment Manufacturer (OEM) is the company that made the original component for the brand (e.g., Samsung Display manufacturing the screen for a Samsung phone). A true OEM part would be identical to the original, possibly without the final brand logo.
- Market Usage: In practice, on platforms like eBay, Amazon, or AliExpress, the term "OEM" rarely adheres to its strict definition. Sellers often use it to describe a high-quality aftermarket part made by a third party, which approximates the performance of the original but is not genuine. A seller claiming a part is "OEM" but "1:1" or a "perfect copy" is implicitly admitting it is not genuine. The key takeaway is that a part labelled "OEM" without Samsung packaging or markings is almost certainly a high-quality aftermarket part, not a genuine one.
Aftermarket / Compatible:
This is a broad category that encompasses all parts made by companies other than the original manufacturer or its contractors. The quality can vary enormously:
- High-Quality Aftermarket (OEM-Equivalent): Manufacturers who specialise in producing high-quality replicas that aim to match the performance of genuine parts.
- Generic / Low-Cost: Parts produced as cheaply as possible, often sacrificing quality, durability, and safety.
The quality hierarchy, in practical terms, is as follows: Service Pack (Genuine) > Pulled (Used Genuine) > High-Quality Aftermarket (often mislabelled as OEM) > Generic.
5.2 In-Depth Screen Replacement Analysis: A Comparison
As established in Section 1, the original Galaxy A21s screen is a PLS TFT LCD. This is crucial, as the market offers several replacement technologies.
5.2.1 LCD Technologies: TFT and INCELL
These are the most common and budget-friendly replacement options, as they are based on the same underlying technology as the original screen.
TFT (Thin-Film Transistor):
This is the most basic type of LCD. A TFT replacement will be functionally similar to the original, but the colour quality, brightness, and contrast can vary significantly depending on the manufacturer. The cheapest options often have duller colours and poorer viewing angles.
INCELL:
This is a more advanced LCD technology. In a traditional LCD, the touch layer (digitiser) is a separate layer on top of the LCD panel. In In-cell technology, the touch sensor is integrated directly into the LCD's pixel layer. This results in a panel that is:
- Thinner and lighter than a standard TFT, allowing for a better fit in the phone's chassis.
- More sensitive to touch with faster response times.
- More power-efficient and with potentially higher brightness than low-end TFTs.
Whilst still an LCD technology and therefore inferior to OLED in contrast, a good quality INCELL screen is generally superior to a generic TFT screen and represents the best LCD-type replacement option.
5.2.2 OLED and AMOLED as Aftermarket Upgrades
Some sellers offer OLED or AMOLED replacement screens for the A21s. Since the phone was not originally designed for this technology, this should be considered an upgrade with its own pros and cons.
Advantages:
- Superior Image Quality: OLED screens offer infinite contrast (true blacks, as pixels turn off individually), much more vibrant and saturated colours, and perfect viewing angles.
- Power Efficiency (Conditional): With dark themes or black backgrounds, OLED screens consume less power than LCDs, as the black pixels are turned off.
Disadvantages:
- Cost: They are significantly more expensive than LCD options.
- Risk of "Burn-in": OLED screens are susceptible to permanent image retention (burn-in) over time if static images are displayed for long periods.
- Thickness and Fit: They may be thicker or have different-sized bezels than the original LCD, which can cause fitment issues in the phone's frame.
- Brightness and Power Consumption: On fully white screens, an OLED display can consume more power than an LCD.
| Technology | Image Quality (Contrast/Colour) | Brightness | Thickness / Fit | Power Consumption | Touch Response | Cost |
|---|---|---|---|---|---|---|
| TFT (Generic) | Low-Medium (Greyish blacks, dull colours) | Variable, often lower | Variable, can be thicker | Medium-High | Acceptable | Low |
| INCELL LCD | Medium-High (Better contrast & colour than TFT) | Good, often superior to TFT | Thinner than TFT, better fit | Medium | Very Good | Low-Medium |
| OLED (Aftermarket) | Excellent (True blacks, vibrant colours) | Excellent | Variable, can be thicker | Low (with dark themes), High (with white) | Excellent | High |
5.3 In-Depth Battery Replacement Analysis: Quality and Safety
Replacing the EB-BA217ABY battery is common, but the choice of part is critical.
Market Analysis:
The market offers batteries ranging from "Genuine Service Pack" to generic "Compatible" and the ambiguous "OEM".
Risks of Low Quality:
Low-quality batteries pose significant risks. They often have a lower actual capacity than advertised, resulting in a short lifespan. They lack proper protection circuits, which can lead to overheating, swelling (a serious fire hazard), and damage to the phone's motherboard.
| Quality Tier | Typical Branding | Expected Performance / Lifespan | Safety Certification | Price Point |
|---|---|---|---|---|
| Service Pack (Genuine) | Samsung | Identical to original, ~500-800 charge cycles | Certified, with full protection circuits | High |
| OEM (High-quality aftermarket) | Reputable third-party brands | Close to original, accurate capacity | Generally certified, good protection | Medium |
| Generic / Compatible | Unbranded or unknown brands | Often lower than advertised capacity, short lifespan | Questionable, minimal or absent protection circuits | Low |
5.4 Sourcing and Vetting Parts: A Buyer's Guide
To minimise risks, buyers should follow a diligent vetting process.
- Supply Sources: Specialised online parts stores (such as iFixit, ReplaceBase, eTech Parts) usually offer a range of qualities and are more transparent in their descriptions. Mass marketplaces like eBay, Amazon, and AliExpress offer the lowest prices but also the highest risk of poor-quality parts and misleading descriptions.
- Vetting Sellers: It is crucial to examine a seller's profile before buying. One should look for high positive feedback ratings (preferably >98%), a substantial sales history, and read reviews from other buyers for the specific product.
- Policies and Warranties: A reputable seller will offer a clear return policy and a warranty for their parts. The absence of a warranty is a major red flag about the product's quality.
Detailed Component Analysis: Understanding Key Internal Connectors
For the advanced technician or enthusiast seeking a deeper diagnosis, understanding the function of certain low-cost internal components is crucial. The failure of these small connectors can mimic symptoms of much more expensive component failures, such as the motherboard or the screen.
6.1 The Role of the Main Interconnect Flex Cable
This component is one of the phone's vital arteries, yet it is often overlooked during diagnosis.
Function:
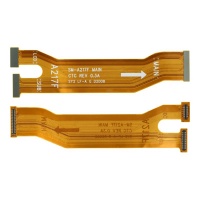
The main interconnect flex cable is a wide, flat ribbon that connects the main motherboard (located at the top of the phone) with the charging port daughterboard (located at the bottom). Critical data and power signals travel through this single cable, including:
- Charging power from the USB port to the motherboard and battery.
- USB data signals for connection to a computer.
- Audio signals for the main loudspeaker.
- Signals from the main microphone.
- Signals for the vibration motor.
Failure Symptoms:
Due to its central role, a damaged interconnect flex cable (often from an accidental tear during a battery or screen repair) can cause a cascade of seemingly unrelated problems. A technician might observe that the phone won't charge, has no sound from the loudspeaker, the microphone doesn't work, and it doesn't vibrate—all at the same time. A less experienced diagnosis might lead to the erroneous conclusion that multiple components or even the motherboard have failed. However, the root cause could simply be this single flex cable, which is inexpensive and easy to replace.
6.2 The LCD FPC Connector: Function and Failure Modes
This is the physical interface point between the screen and the phone's brain.
Function:
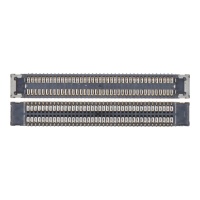
The LCD FPC (Flexible Printed Circuit) connector is a small connector on the motherboard where the screen's flex cable plugs in. For the Galaxy A21s, this is a 78-pin connector. Its purpose is to transmit all video information and power signals from the motherboard to the LCD panel, as well as receive inputs from the touch digitiser.
Failure Modes:
This connector is extremely delicate. During a repair, it is easy to damage it if care is not taken when disconnecting or reconnecting the screen cable.
- Poor Connection: If the connector is not fully seated and locked into place, it can cause intermittent issues like screen flickering, lines, or a lack of touch response.
- Bent or Broken Pins: If too much force or an incorrect angle is applied when connecting the cable, the tiny pins inside the connector can bend or break. This can result in a completely black screen, distorted colours, or dead zones on the touchscreen.
The failure of this connector is often misdiagnosed as a faulty replacement screen. A technician might test several new screens and conclude they are all "bad," when in reality the problem lies with the 78-pin connector on the motherboard. Inspecting this connector with a magnifying glass for damage before condemning a screen is an essential and advanced diagnostic step.
Understanding these two components illustrates a fundamental diagnostic principle: always check the connections and low-cost components that lie in the signal path before assuming the failure of a major, expensive component. A £5 interconnect cable can cause symptoms that look like a £100 motherboard failure, and a damaged FPC connector can mimic a £30 faulty screen. Recognising this is the mark of a competent technician and can save customers a significant amount of money and prevent unnecessary electronic waste.
Synthesis and Strategic Recommendations
This report has provided a comprehensive analysis of the Samsung Galaxy A21s, from its fundamental technical specifications to detailed repair procedures and the complexities of the aftermarket. This final section synthesises the key findings to offer a strategic assessment of the device's overall viability, maintenance, and longevity.
7.1 Summary of Key Findings: The A21s's Most Common Vulnerabilities
The analysis reveals a device profile with a clear dichotomy. On one hand, it has hardware that is attractive for its price, such as a large-capacity battery and a versatile camera system. On the other hand, its most significant vulnerabilities do not stem from catastrophic design flaws, but from the interaction between its entry-level hardware and an increasingly demanding software lifecycle.
The main vulnerabilities are:
- Software-Related Performance Degradation: The most pervasive issue is the sluggishness, freezing, and random reboots that manifest as the device ages. The root cause is the modest hardware, particularly the Exynos 850 chipset and eMMC 5.1 storage, which struggle to handle the growing demands of successive Android updates and modern applications.
- Faults that Mimic Hardware Problems: Software updates often act as catalysts for issues like camera errors and boot loops, leading users to wrongly suspect hardware failures. This complicates diagnosis and can lead to unnecessary repairs.
- Battery Degradation: As with any smartphone, the 5000 mAh battery is a consumable, and its degradation (rapid drain, shutdowns) is an inevitable point of failure after 2-3 years of use.
- Physical Fragility: Being a device built with a plastic frame and back cover, it is susceptible to drop damage, with the screen being the most vulnerable component.
7.2 Cost-Benefit Analysis of Repair vs. Replacement
The decision to repair a Galaxy A21s instead of replacing it is an economic equation that depends on the specific fault and the cost of parts.
- Low-Cost, High-Value Repairs: Replacing components like the battery (part cost ~£10-£30), charging port (~£5-£10), or camera lens glass (~£2-£5) is highly cost-effective. These repairs can restore critical functions for a fraction of the cost of a new or used phone.
- Screen Repair: This is the tipping point. The cost of a replacement screen assembly varies significantly depending on quality:
- A good quality INCELL LCD screen can be acquired for ~£20-£30.
- An aftermarket OLED screen can cost ~£30-£45 or more.
- A Genuine Service Pack screen (if found) would be even more expensive.
Given that a used or refurbished Samsung Galaxy A21s can be found on the market for £80-£120, a screen repair is economically viable, especially if opting for a quality INCELL screen. However, if multiple repairs are required (e.g., screen and motherboard), the total cost can approach or exceed the value of a replacement device.
7.3 Recommendations for Long-Term Maintenance and Durability
For current owners wishing to extend the life of their A21s, the following proactive maintenance practices are recommended:
- Aggressive Software Management: To mitigate performance degradation, users should be diligent in managing software. This includes regularly clearing the application and system cache (via the "Wipe Cache Partition" after each major Android update), uninstalling unnecessary apps, and limiting background processes.
- Healthy Charging Practices: To maximise battery lifespan, avoid fully discharging it to 0% or keeping it at 100% for prolonged periods. Keeping the charge between 20% and 80% is ideal. Always use quality chargers and cables and avoid intensive use of the phone while it is charging to reduce heat.
- Physical Protection: Using a good quality protective case and a tempered glass screen protector is the most effective and inexpensive way to prevent the most common and costly drop damage.
7.4 Final Verdict on the Samsung Galaxy A21s's Repairability and Longevity
The Samsung Galaxy A21s presents an interesting paradox in the smartphone repair landscape.
From a purely hardware perspective, the device is highly repairable. Its construction is not overly complex, the components are modular, and there is a wide and affordable availability of replacement parts of varying qualities. Procedures like replacing the battery, charging port, and screen (especially with a frame assembly) are within the reach of a competent technician or an experienced DIY enthusiast.
However, its longevity is fundamentally compromised by its inherent hardware limitations. The device was built to a 2020 performance standard, and its processor and, above all, its eMMC 5.1 storage, are not well-equipped for the software ecosystem of 2024 and beyond. This manifests as software-induced obsolescence, where the phone becomes increasingly frustrating to use, not because its physical components have failed, but because the software has outgrown its ability to run it efficiently.
Final Verdict: The Samsung Galaxy A21s is a device that is easy to repair but difficult to keep relevant. For the user who needs a specific repair to extend its life for another year, it is an economically sensible choice. However, as a long-term investment, its useful lifecycle is limited by a declining performance that no hardware repair can fix. It is a clear example of how budget-level design decisions directly impact the user experience and the device's sustainability over time.

