 Repair parts iPhone 8

Receive it on tomorrow friday 27 june
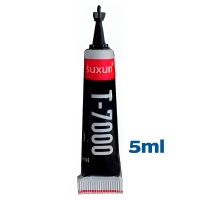

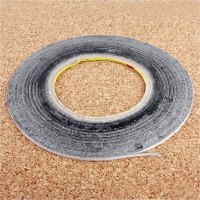
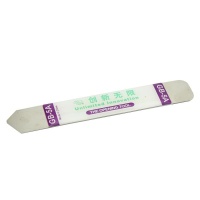


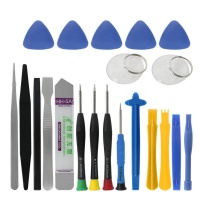



🚀 Give Your iPhone 8 a New Lease of Life with the Best Spares from iLevante.com! 🚀
Is your iPhone 8 not performing like it used to? Smashed screen? A battery that dies in the blink of an eye? Don't worry! At iLevante.com, we're as big fans of the iPhone 8 as you are, and we know this fantastic phone still has plenty to offer. That's why we've put together this super-comprehensive guide so you can get to know all the iPhone 8 replacement parts and spares you need. Get ready to become a repair pro and save a good bit of money! 😉
📱 Getting to Know the Veteran: The iPhone 8 in Detail
Launched in September 2017, the iPhone 8 marked a turning point with its glass and aluminium design, wireless charging, and the powerful A11 Bionic chip. Although Apple has now discontinued it, it's still an incredible machine for day-to-day use! And the best part is, with the right replacement parts, it can stay that way for much longer!
- Design and Dimensions: Glass front and back (considered the toughest on a smartphone at the time by Apple), with an aluminium frame. Its dimensions are 138.4 x 67.3 x 7.3 mm and it weighs 148g. A size that many users still find very comfortable and manageable.
- Retina HD Display: It features a 4.7-inch IPS LCD panel with a resolution of 1334 x 750 pixels (resulting in a density of ~326 ppi), and technologies like True Tone for adaptive white balance and 3D Touch for pressure-sensitive interactions. Typical brightness reaches 625 nits.
- Power Within (A11 Bionic Chip): At its heart beats the A11 Bionic chip with a 64-bit architecture and a neural engine. Its six-core CPU (2 high-performance Monsoon + 4 efficiency Mistral cores) and the Apple-designed three-core GPU provide more than enough power for most current apps and games.
- RAM and Storage: It has 2GB of RAM, accompanied by internal storage options of 64GB, 128GB, and 256GB, using NVMe technology for faster data access.
- Cameras to Capture Memories:
- Rear: A single 12 MP sensor with an f/1.8 aperture, optical image stabilisation (OIS) for sharper photos and videos, and a Quad-LED True Tone flash for more natural colours in low light. It can record video in 4K at up to 60fps and slow-motion in 1080p at up to 240fps.
- Front (FaceTime HD): A 7 MP sensor with an f/2.2 aperture and Retina Flash (the screen lights up to act as a flash). It records video in 1080p HD, ideal for selfies and video calls.
- Battery and Charging: It incorporates a 1821 mAh Li-Ion battery (equivalent to 6.96 Wh). It supports fast charging (up to 50% in 30 minutes using an 18W or higher adapter, sold separately) and also wireless charging under the Qi standard.
- Original Colours: It was launched in Silver, Space Grey, Gold, and a special (PRODUCT)RED edition.
- Resistance: It has an IP67 rating, which means it is resistant to dust and water (it can be submerged up to 1 metre for a maximum of 30 minutes).
- Other Key Details: It keeps the iconic home button with Touch ID fingerprint sensor, offers stereo speakers for more immersive sound, dual-band 802.11ac Wi-Fi, Bluetooth 5.0, and NFC with reader mode for mobile payments and other functions.
An interesting fact: The iPhone SE (2020) and the iPhone SE (2022) are, in essence, blood brothers of the iPhone 8. Apple reused a large part of the iPhone 8's design and internal components for these more recent models. This is excellent news, as it means that many parts, such as some flex cables, cameras, and other internal components, are compatible between these models. This reuse strategy by Apple not only validated the robustness of the original iPhone 8 design but also makes finding replacement parts today much, much easier. For you, the user, this translates into greater availability of parts, potentially more competitive prices, and a lifespan that can be more easily extended. At iLevante.com, we take these compatibilities into account to offer you the best options!
💔 Common iPhone 8 Problems and When to Repair (Hardware to the Rescue!)
Over time, even the best warriors show their scars. Daily use, an accidental drop, or just natural wear and tear can mean your iPhone 8 needs a visit to the home workshop. Here are the most common ailments of the iPhone 8 and why replacing a part can be the perfect, and more economical, solution than buying a new phone:
- Smashed or Faulty Screen: A classic. An unlucky drop, a knock in your pocket... and the screen can end up broken, cracked, or showing strange lines, coloured blotches, or areas where the touch function doesn't respond.
- Degraded Battery: Do you notice your iPhone 8 suddenly switching off even when it still shows battery life? Has the battery life drastically reduced, not lasting you the day? Has the phone's overall performance slowed down? These are clear signs of a battery that's ready for retirement.
- Broken Back Cover: That elegant glass design on the back is very stylish and allows for wireless charging, but it's also prone to breaking when dropped. One knock and... crack!
- Charging Issues: If your iPhone 8 won't charge, the charging is intermittent, you have to wiggle the cable to make a connection, or your computer doesn't recognise it, the charging port (Lightning connector) is most likely damaged or dirty.
- Unresponsive Buttons: The power button, the volume up/down buttons, or the mute switch can stop working correctly due to wear from continuous use or damage to the internal flex cable that connects them to the logic board.
- Camera Problems: If your photos come out blurry, with spots, the camera app won't open, the screen goes black when you try to use it, or the lens glass is scratched or broken, it's a sign that the camera module needs attention.
- Audio Failures: Problems like not hearing well during calls (could be the earpiece speaker), people not hearing you well (faulty main or secondary microphone), or the main loudspeaker (for ringtones and music) sounding quiet, distorted, or not at all.
- Temperamental Touch ID: If the home button doesn't recognise your fingerprint, takes a long time to do so, or has simply stopped working (and you've ruled out a software issue), it could be a fault with the sensor itself or its connecting flex cable. Warning! It's crucial to know that if you replace the home button with a non-original one, you will permanently lose the Touch ID functionality, as this sensor is factory-paired with each iPhone's logic board for security reasons.
It's important to understand that many of these problems can be interconnected. An iPhone is built with multiple modules and flex cables that link them to the logic board. Often, a single flex cable can be responsible for several functions. For example, the charging port assembly frequently integrates not only the Lightning connector but also microphones and antenna contacts. Similarly, the front camera flex cable can include the proximity sensor and the ambient light sensor. Damage to a specific point on one of these flex cables, whether from a drop, liquid contact, or simple wear, can manifest as the failure of one or more of these functions. A user might find their phone isn't charging and, at the same time, people can't hear them well on calls; both problems could originate from a single damaged charging port flex. Therefore, an accurate diagnosis is essential before purchasing spares, and at iLevante.com, we offer assemblies that can solve several problems at once, simplifying the repair.
iPhone 8 Screens: Bring the Sparkle Back to Your Mobile!
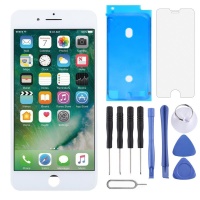
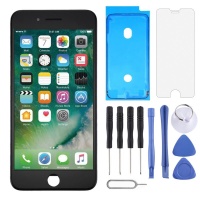
The screen is our main window to the digital world, and a damaged screen can completely ruin the experience with our iPhone 8. Fortunately, if yours is crying out for help, at iLevante.com we have a wide range of options for all tastes and budgets. The iPhone 8 originally came with a 4.7-inch Retina IPS LCD screen, with a resolution of 750 x 1334 pixels and 3D Touch technology, which offered excellent image quality for its time. When looking for a replacement, you'll come across several types of screen technology:
Types of Replacement Screens for iPhone 8:
Understanding the differences will help you choose the best option for you:
- Original or Refurbished OEM LCD Screens: These are the closest you'll get to the screen your iPhone 8 had from the factory. "Original" refers to a new part made by or for Apple, though these are rarer and more expensive to find for older models. "Refurbished OEM" (Original Equipment Manufacturer) means that original components, like the LCD panel and digitiser, have been recovered from other units and fitted with a new glass front. These screens offer the most faithful colour quality, brightness, viewing angles, and touch response to the original. The True Tone functionality (which adjusts the screen's white balance according to ambient light) is usually best preserved with these options, provided the serial number from the original screen is programmed onto the new one, a process that some repair tools allow.
- TFT (Thin-Film Transistor) LCD Screens: These are a more budget-friendly LCD alternative.
- Advantages: Their main appeal is the price, generally being the cheapest option. They offer acceptable image quality for daily use and a decent response time.
- Disadvantages: Viewing angles are usually more limited compared to the original IPS screens; this means colours and brightness can vary if you look at the screen from the side. Colour reproduction and contrast may also be inferior to original IPS or OLED screens. Furthermore, they can consume slightly more power than OLEDs and their visibility in direct sunlight can sometimes be poor if they lack special treatments.
- INCELL LCD Screens: This technology is a step up from standard TFTs. It integrates the touch panel (digitiser) and the LCD into a single layer, which can result in thinner screens and better touch response.
- Advantages: They offer better structural stability and eliminate the annoying raster lines sometimes seen on lower-quality screens. Colours are usually more vivid and vibrant than on standard on-cell LCDs (an older technology where the touch layer is separate from the LCD). They are an excellent option in terms of value for money, sitting above basic TFTs and offering an experience closer to the original. Brightness can be quite good, with some models reaching or exceeding 350cd/mē.
- Disadvantages: They can be slightly more expensive than basic TFTs, but are still more affordable than OLED or high-end Refurbished OEM options. It's important to note that quality can vary between different In-Cell screen manufacturers; brands like RJ, JK, or ZY are known for offering more consistent quality and fewer post-sale issues.
- OLED (Organic Light Emitting Diode) / AMOLED (Active-Matrix OLED) Screens: Although the iPhone 8 did not come with a factory-fitted OLED screen (the iPhone X was the first in the main line-up to do so), the spares market offers screens with OLED technology for this model. These represent a technological upgrade in certain visual aspects.
- Advantages: The main strength of OLEDs is true, deep blacks, as each pixel is individually lit and can be turned off completely. This results in infinitely superior contrast compared to LCDs. Colours also tend to be more vibrant and saturated, and viewing angles are excellent, with almost no colour degradation when viewing the screen from the sides. Additionally, response times are faster, reducing motion blur in moving images. In terms of energy efficiency, they can consume less power with predominantly dark images or if you use iOS's dark mode.
- Disadvantages: They are generally more expensive than LCD options. With very bright or white images, they can actually consume more power than an LCD. There is a theoretical risk of "burn-in," where static images displayed for long periods could leave a permanent mark, although this is less common in modern, good-quality mobile screens than in early OLED generations. Some studies suggest the lifespan of the organic compounds in OLEDs may be shorter than that of the liquid crystals in LCDs.
- Types of Aftermarket OLEDs:
- Hard OLED: These use a rigid glass substrate. They are cheaper to produce than Soft OLEDs, but the trade-off is that they are more fragile and more prone to breaking or damage from impacts or bending. Sometimes, the bezel around the screen can be slightly thicker than on original or Soft OLED screens.
- Soft OLED: These use a flexible plastic substrate, similar to that used in the OLED screens of high-end iPhone models that do come with this technology from the factory. This flexibility makes them more durable and impact-resistant than Hard OLEDs. They offer a better fit in the phone's chassis and an image and colour quality that is much closer to that of an OEM screen. They are considered the best aftermarket option if you're looking for the highest OLED quality, but they are also the most expensive.
Choosing a replacement screen for your iPhone 8 goes beyond a simple comparison between "original" and "copy," or "cheap" versus "expensive." It involves considering a balance between the visual fidelity you're after, the durability you need, and how certain features (like 3D Touch or True Tone) might be affected. The True Tone function, for example, often requires the original screen's serial number to be transferred to the replacement screen using a specific programming tool; otherwise, this feature is unlikely to work correctly. An OLED screen, while technologically superior in contrast and blacks to the iPhone 8's original LCD, might not be the ideal choice for all users due to its cost or the differences in colour representation the user was accustomed to. Therefore, it's vital that you assess what aspects are most important to you: a tight budget? maximum colour fidelity? the best durability? At iLevante.com, we offer a range that covers these diverse needs so you can make the most informed decision.
Comparative Table of Screens for iPhone 8 (So you can choose like a Pro!)
| Feature | Original/Refurb. IPS LCD | TFT LCD | INCELL LCD | Hard OLED | Soft OLED |
|---|---|---|---|---|---|
| Colour/Contrast Quality | Very Good / Original | Average / Low Contrast | Good / Medium Contrast | Excellent / Pure Blacks | Excellent / Pure Blacks |
| Brightness (typical) | Good (e.g., 625 nits) | Average | Good (e.g., 350+ nits) | Good (e.g., ~650 nits) | Very Good / Similar to OEM |
| Viewing Angles | Wide | Limited | Wide | Very Wide | Very Wide |
| Durability | Moderate | Moderate | Moderate | Fragile (rigid glass) | Good (flexible substrate) |
| Power Consumption | Medium | High (constant backlight) | Medium-High | High (bright images), Low (dark images) | Variable / Efficient with darks |
| True Tone Fidelity | High (with reprogramming) | Low / Variable | Medium-High (with reprogramming) | Variable (with reprogramming) | High (with reprogramming) |
| 3D Touch Fidelity | High | Variable / Often absent | High (depending on quality) | Variable | High |
| Relative Price | $$$ | $ | $$ | $$$ | $$$$ |
| Ideal for... | Those seeking maximum fidelity to the original. | Repairs on a very tight budget. | An excellent balance of quality and price. | Those who want OLED quality at a lower cost, accepting greater fragility. | The best quality and durability in aftermarket OLEDs, similar to the OEM experience. |
⚠️ VERY IMPORTANT! The Home Button and Touch ID: A crucial aspect of any screen replacement on the iPhone 8 (and similar models with Touch ID) is the home button. For the fingerprint recognition functionality (Touch ID) to remain operational, YOU MUST transfer the original home button from your damaged screen to the new one. Apple cryptographically pairs the Touch ID sensor with the specific logic board of each iPhone. If you install a new home button (not the original one from your phone), the button may work for returning to the home screen, but the Touch ID function will be permanently lost. So, be very careful and patient during this step!
Basic Guide to Changing the iPhone 8 Screen:
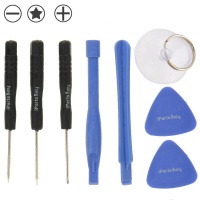
- Preparation: Safety first! Back up your data. Switch the iPhone off completely. Gather your tools: Pentalobe (for the bottom screws) and Phillips PH000 or Tri-Point Y000 (for internal screws) screwdrivers, a suction cup, thin plastic picks, a heat gun or hairdryer to soften the adhesive, and preferably an anti-static wrist strap.
- Opening the iPhone: With the Pentalobe screwdriver, remove the two screws on either side of the Lightning port. Apply moderate, even heat around the edges of the screen for a minute to soften the waterproof adhesive. Place the suction cup near the home button (but not on it) and gently pull upwards to create a small gap. Insert a thin plastic pick into that gap and carefully slide it around the edges to cut the adhesive. Once the edges are free, open the screen to the right (like a book), as the screen's flex cables are on that side. Do not open it more than 90 degrees to avoid damaging the cables!
- Disconnecting Components: This step is VITAL! Before handling any other connector, DISCONNECT THE BATTERY CABLE. To do this, remove the screws from the metal shield covering the battery connector and, using a plastic tool (spudger), disconnect the battery from the logic board. Then, remove the shields from the screen and front sensor assembly connectors, and carefully disconnect them from the logic board.
- Transferring Key Components: This is the most delicate part. You will need to transfer from your original screen to the new one: the home button/Touch ID assembly (with extreme care not to damage its flex cable), the front camera along with the proximity and ambient light sensor, the earpiece speaker, and the screen's back metal plate (LCD shield plate) if your new screen doesn't include them. Remember, Touch ID will only work if you transfer the original button.
- Connecting and Closing: Connect the new screen's cables to the logic board, ensuring they click into place correctly. Reconnect the battery cable (this is the last cable to be connected before closing). Before sealing the phone, switch it on and test all the new screen's functions: touch, brightness, colours, 3D Touch (if applicable), front camera, earpiece, and very importantly, the home button. If everything works correctly, you can apply a new screen adhesive (optional, but recommended to maintain some resistance to dust and splashes), carefully close the iPhone ensuring the top clips engage, and finally, screw in the two bottom Pentalobe screws.
🔋 iPhone 8 Battery: May the Power Be With You!
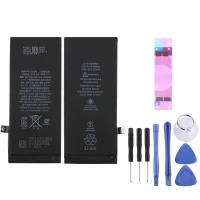
A healthy battery is essential for your iPhone 8 to keep up with you all day. This model, as we've mentioned, uses a 1821 mAh Li-Ion battery (which is equivalent to 6.96 Wh). Common part numbers for this battery include 616-00361, and it operates at a voltage of 3.82V. Like all rechargeable batteries, over time and with successive charge and discharge cycles, its maximum capacity degrades.
How to Know if Your iPhone 8 Battery is Failing?
Your iPhone 8 will give you clear signs when its battery is reaching the end of its life:
- Rapid Draining: The most obvious symptom. The battery runs out much faster than when it was new, forcing you to charge the phone several times a day.
- Unexpected Shutdowns: The phone switches off suddenly, even when the battery indicator shows there is still charge left (e.g., at 20% or 30%). This usually happens when the battery can no longer supply the peak power that the processor demands.
- Slow Performance: Apple implemented a performance management feature in iOS that can throttle the processor's maximum speed if it detects that a degraded battery cannot support peak performance. This means apps may take longer to open, the interface can feel sluggish or "laggy," and the phone generally seems less responsive.
- Excessive Heating: If the iPhone gets abnormally hot during charging or with light use, it could be a sign of battery problems.
- Incorrect Battery Percentage: The battery indicator may get stuck at a certain percentage, or jump abruptly from one value to another.
- "Service" or "Repair" Warning in Settings: The most direct way to check is to go to Settings > Battery > Battery Health & Charging. Here you will see the current "Maximum Capacity" of your battery compared to when it was new. If this percentage is significantly below 80%, or if you see a message indicating that the battery requires service, it's a clear sign that it's time for a replacement.
OEM vs. Aftermarket Batteries: What You Should Know
When looking for a new battery for your iPhone 8, you will mainly find two types of options: "OEM" and "aftermarket".
- OEM (Original Equipment Manufacturer) Batteries: This term refers, in theory, to batteries made by Apple or its direct authorised suppliers. A genuine Apple battery is designed to offer maximum compatibility, performance, and safety with your iPhone. If you take your phone to be repaired at an Apple Store or an Apple Authorised Service Provider, they will use this type of battery.
- Aftermarket Batteries (or third-party, sometimes called "no-logo OEM"): These are batteries made by other companies. But be aware, not all are created equal! Good quality aftermarket batteries, like the ones we carefully select at iLevante.com, use high-quality cells and chipsets (some reputable replacement battery manufacturers use Texas Instruments chipsets, similar to the originals) that meet or even exceed the original battery's specifications in terms of capacity and safety. These batteries can offer excellent value for money, allowing you to restore your iPhone 8's battery life without a huge outlay.
- "No-logo OEM": This is a term sometimes used in the market to describe aftermarket batteries that aim to replicate the quality and specifications of the originals, but which, logically, do not carry the Apple brand. The key here is trust in the supplier; a "no-logo OEM" battery from an unknown seller can be a lottery, but if it comes from a reputable distributor like iLevante.com, which cares about the quality of its components, it is a viable option.
- Importance of the Battery Chipset: A good quality chipset in the battery is crucial. This small integrated circuit is responsible for communication between the battery and the iPhone's logic board, managing charging, discharging, temperature, and reporting charge levels and battery health status. With non-original batteries, especially on newer iPhone models or with newer versions of iOS, it's possible for the system to display an "Unknown Part" message or not show the battery health percentage in settings.
It's essential to address the issue of the "Unknown Part" message or the absence of the "Battery Health" indicator that can appear after installing a non-original battery, even if it is of high quality. This is a measure implemented by Apple in its more recent operating systems and does not necessarily indicate that the replacement battery is faulty or of poor quality. Apple pairs certain components, like batteries in some cases, with the phone's logic board. If the system doesn't recognise the battery as a part "verified" through its own channels, it may display these warnings. However, this does not affect the iPhone's ability to use the battery or the functional performance of the battery itself, as long as the replacement battery is of good quality and meets the proper specifications. At iLevante.com, we are transparent about this: you may see this message, but we assure you that our replacement batteries are selected to provide optimal and safe performance for your iPhone 8. This helps to manage expectations and to understand that the main goal of having a new, long-lasting battery is fulfilled.
Quick Guide to Changing the iPhone 8 Battery:
Changing the battery is one of the most common and rewarding repairs.
- Preparation and Opening: The first steps are identical to the screen replacement. Back up your phone and switch it off! Remove the two Pentalobe screws from the bottom. Gently heat the edges of the screen to soften the adhesive. Use the suction cup and plastic picks to separate the screen from the chassis, opening it to the right.
- Disconnect the Battery FIRST!: Before touching any other internal component, locate the battery connector on the logic board, remove its metal shield (if it has one and it's different from the screen's), and disconnect it with a plastic tool.
- Disconnect the Screen (Optional but Highly Recommended): To have more space and work more safely, it is advisable to disconnect the screen's flex cables and remove it completely.
- Remove the Battery Adhesive Strips: The iPhone 8 uses stretchy adhesive strips under the battery to secure it to the chassis. Locate the black tabs of these strips at the bottom edge of the battery. With tweezers, pull each one slowly and steadily, trying to maintain a low angle (as parallel to the phone as possible) to prevent them from snapping. They are notorious for snapping. If one breaks, don't despair. You can very carefully apply a few drops of isopropyl alcohol around the edges of the battery to help dissolve the remaining adhesive and then, using a sturdy plastic card (like an old credit card) or a wide, flat plastic pry tool, gently pry up the battery. NEVER use metal tools to pry directly on the battery or puncture it, as you could cause a fire!
- Install the New Battery: Clean any old adhesive residue from the chassis. Place the new battery-specific adhesive strips (they usually come with the replacement battery from iLevante.com) on the new battery or directly into the chassis recess. Place the new battery in its place and press down firmly but gently. Connect the new battery's flex cable to the logic board.
- Close and Test: Reconnect the screen cables if you removed them. Close the iPhone, making sure the screen fits well, and replace the two Pentalobe screws. Once assembled, it is recommended to calibrate the new battery so that iOS correctly recognises its capacity: charge the phone to 100% and leave it charging for at least two more hours. Then, use your iPhone until the battery is completely drained and the phone switches off. Finally, charge it back to 100% without interruption.
💎 Back Covers for iPhone 8: Refresh its Look!
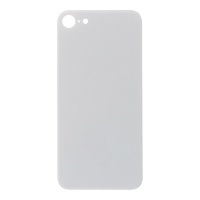
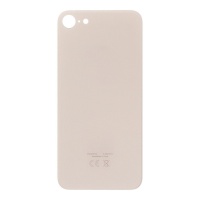
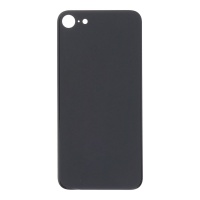
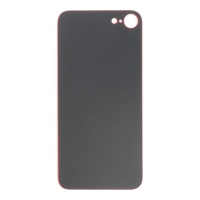
The iPhone 8 was one of the first Apple models to reintroduce a glass back cover, an elegant design that also enabled wireless charging. However, this beauty comes at a price: the glass, both front and back, is susceptible to breaking from drops. If the back of your iPhone 8 has had a mishap, don't worry, at iLevante.com we have the solution to make it look like new again!
Available Colours for the iPhone 8 Back Cover:
You can find replacement back covers that match the original colours the iPhone 8 was launched in:
- Black (which corresponds to the Space Grey finish)
- White (which corresponds to the Silver finish)
- Gold
- Red (corresponding to the (PRODUCT)RED edition)
It's important to note that some replacement back covers may come without the Apple logo printed on them. Be sure to check this detail in the product description on iLevante.com if the presence of the logo is important to you.
How Do You Change the iPhone 8 Back Cover? Warning, Tricky Mission! 🧗♂️
To be perfectly honest, replacing the glass back cover of the iPhone 8 is, by far, one of the most difficult, tedious, and risky repairs you can undertake on this device. Unlike the screen or the battery, the rear glass is strongly bonded to the phone's metal chassis with a very powerful industrial adhesive, and removing it requires dismantling PRACTICALLY ALL of the iPhone's internal components.
VERY general steps (this is only for the brave or technicians with experience and the right tools!):
- Complete Disassembly of the iPhone: This is not an exaggeration. You have to remove the screen, the battery, the logic board, the cameras (front and rear), the loudspeaker, the Taptic Engine, the charging port assembly, all the flex cables, the wireless charging coil, and a long list of small brackets and screws. Basically, you leave the chassis almost empty.
- Removing the Broken Glass: This is the most critical and dangerous step. It involves applying controlled and even heat to the back cover (with a special heat gun, not a simple hairdryer) to soften the powerful adhesive. Then, using specific tools (like thin blades, sturdy metal picks, or even specialised laser machines that vaporise the adhesive under the glass), the glass fragments are removed bit by bit. It's an extremely slow process that requires a lot of patience and precision to avoid damaging the aluminium chassis, the wireless charging coil (which is right under the glass), or other sensitive components. There is a high risk of cuts.
- Thorough Cleaning of the Chassis: Once all the broken glass has been removed, it is crucial to meticulously clean the chassis to remove any residue of old adhesive and glass shards. The surface must be perfectly smooth and clean for the new cover to sit correctly.
- Installing the New Back Cover: A new iPhone-specific back cover adhesive (often pre-cut to the exact shape) is applied to the clean chassis. Then, the new glass cover is carefully placed, aligning it perfectly and applying even pressure to ensure a good bond.
- Complete Reassembly: And now, the marathon of putting back, one by one, all the internal components that were removed in the first step, in reverse order.
Given the extreme difficulty and risks involved, changing just the glass of the iPhone 8 back cover is not a repair we recommend for average users or even for many technicians without specialised equipment. The adhesive used by Apple is so strong that the task becomes titanic. An alternative that some experienced technicians and shops offer is the replacement of the entire chassis assembly (which already comes with the new glass cover installed from the factory). Although this still involves a total transplant of all internal components from your old chassis to the new one, it at least saves you the dangerous and frustrating task of removing the broken glass. If the damage to your back cover is only cosmetic and does not affect wireless charging or expose internal components, sometimes the most sensible option is simply to use a good protective case. If you decide to go ahead, make sure you are very well prepared, have all the necessary tools, and follow very detailed visual guides from reliable sources.
🔧 Most Wanted Spares for iPhone 8!
Besides screens and batteries, which are the components that tend to suffer the most, there are other spares for the iPhone 8 that are frequently requested by our customers at iLevante.com. Knowing them will help you better diagnose your device's problems and find the right solution. Here are 5 of the most popular, with all their details!
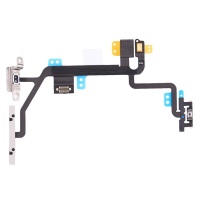
1. Power and Volume Button Flex for iPhone SE 2020 / iPhone 8 / SE 2022
- What is it and what does it include? This spare part is actually an internal flex cable. The external physical power button (also known as the side or lock button) and the volume up and down buttons connect to this cable. Additionally, this same flex cable often integrates other important components like the mute switch, the rear camera's LED flash, and in many cases, one of the device's microphones (often the one used for noise cancellation or for recording video with the rear camera).
- Common Problems it Solves: If the power or volume buttons don't respond when pressed, if they respond intermittently (sometimes they work, sometimes they don't), if they've become stuck, or if the rear camera flash doesn't work or the microphone associated with this flex has stopped picking up sound, this is likely the replacement part you need.
- Colours: The flex cable itself is an internal component and its colour is not visible from the outside. The external physical buttons, which are the parts you touch, do come in colours that match the iPhone's chassis (Silver, Space Grey, Gold, Red). It's important to check if the flex cable spare you purchase from iLevante.com also includes the small internal metal brackets or even the physical buttons themselves, as some references come pre-assembled to make the repair easier. If it doesn't, you'll need to transfer the buttons and brackets from your old flex.
- Cross-Compatibility: Excellent news for owners of multiple models! This flex cable is, in many cases, compatible not only with the iPhone 8 but also with the 2nd generation iPhone SE (2020) and the 3rd generation iPhone SE (2022), as they share much of their internal architecture. Always check the specific compatibility in the product description on iLevante.com!
- Relevant Repair Information: Replacing this flex cable requires opening the phone, disconnecting the battery and screen, and then accessing the side area where these buttons are located. It involves very carefully handling small connectors and screws. The flex cable is usually adhered to the chassis and secured by several brackets.
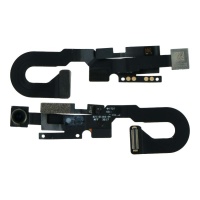
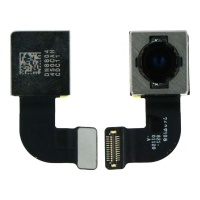
2. Front Camera for iPhone 8, SE 2020, SE 2022 with Proximity Sensor
- What is it and what does it include? This is the module containing the 7-megapixel front camera, essential for your selfies, FaceTime video calls, and other apps. But this flex cable assembly is much more than just a camera. It generally also includes the proximity sensor (responsible for automatically turning off the screen when you bring the phone to your ear during a call, to prevent accidental touches), the ambient light sensor (which automatically adjusts the screen's brightness according to your environment's lighting conditions), and in many of Apple's designs, it can also integrate a secondary microphone (used to improve audio quality in video calls or for Siri) and the connection point for the earpiece speaker, which is how you hear the other person in a call.
- Common Problems it Solves: If your front camera isn't working (black screen in the app, won't switch from rear to front), if photos or videos are blurry or have artefacts, if the screen doesn't turn off when you put the iPhone to your ear during a call, if the screen's auto-brightness isn't working correctly, or if there are issues with the earpiece audio that aren't fixed by just replacing the earpiece, this module could be the culprit.
- Colours: It is an internal component, so it has no visible external colour.
- Cross-Compatibility: Like the volume/power button flex, this front camera and sensor module is often compatible with the iPhone 8, iPhone SE (2020), and iPhone SE (2022). Always check on iLevante.com!
- Relevant Repair Information: This assembly is located on the back of the screen assembly. Therefore, if you are replacing a screen that doesn't come with these components pre-installed, you will need to carefully transfer this module from your old screen to the new one. If the problem is only with this module, you will still need to remove the screen to access and replace it.
3. Rear Camera for iPhone 8
- What is it and what does it include? This refers to the main camera module located on the back of the iPhone 8. This module contains the 12-megapixel sensor, the f/1.8 aperture lens, and the optical image stabilisation (OIS) mechanism, which helps to get sharper photos and videos, especially in low light or when there is movement.
- Common Problems it Solves: If your rear photos are blurry, out of focus, or the camera can't focus correctly; if spots, black dots, or other strange artefacts appear in all images; if the camera app crashes unexpectedly when trying to use the rear camera or simply shows a black screen; or if the external protective lens glass is broken, scratched, or very dirty on the inside, preventing a good shot.
- Colours: The camera module itself is an internal component. The small external protective lens glass, which is part of the chassis or back cover, is transparent.
- Relevant Repair Information: Apple places special emphasis on the fact that camera repairs, to ensure proper function, image quality, and compatibility with all iOS features (like Portrait mode, although the standard iPhone 8 doesn't have it natively on the rear like the Plus, but processed by software), should be performed by trained technicians using genuine parts. This is because the camera is designed and calibrated to work in conjunction with the iPhone's software. Using a non-genuine camera or an incorrect installation could, according to Apple, lead to focus issues, sub-optimal image quality, or failures with third-party apps that use the camera. At iLevante.com, we strive to offer the highest quality replacement camera parts that aim to minimise these risks and restore full functionality to your device. Replacing this module involves opening the iPhone, disconnecting the battery, and then carefully disconnecting the camera's connector from the logic board to remove the old module and install the new one.
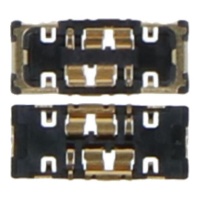
4. Battery FPC Connector for iPhone X / 8 / 8 Plus (Refers to 6 Pin)
- What is it and what does it include? This is a very specific component and its repair is for advanced technicians. It is the small connector that is soldered directly onto the iPhone's logic board. It's the socket where the flex cable from the battery plugs in. The user's query specifically mentions "6 Pin" and associates it with iPhone X / 8 / 8 Plus. While some technical sources for the iPhone 8 and 8 Plus mention a 4-pin battery connector on the board (referenced as J3200), it's possible that variants exist or that the "6 Pin" reference is due to a spare part that covers a wider compatibility with the iPhone X (which might use a different one or have additional pins for other functions if the connector is multi-functional, though this is less common for the direct battery connector). At iLevante.com, if we stock this connector, it will be clearly specified for which models and with what number of pins it is compatible.
- Common Problems it Solves: This connector gets damaged by incorrect handling during a battery change (bent, torn, or broken pins), by corrosion due to liquids, or by a short circuit. If this connector on the logic board is damaged, the iPhone may not turn on, not charge the battery, show incorrect battery percentages, or have intermittent power issues, even if you try a new, functional battery.
- Colours: It's a tiny electronic component soldered to the logic board; its colour is not aesthetically relevant.
- Relevant Repair Information: EXPERT-LEVEL REPAIR! Replacing this FPC (Flexible Printed Circuit) connector on the logic board requires advanced micro-soldering skills, a microscope, precision soldering tools (hot air station, fine-tip soldering iron), and a very steady hand. It is not a repair for beginners under any circumstances. A mistake here can irreparably damage the logic board. If you suspect this connector is damaged, we strongly recommend seeking a technician specialised in micro-soldering.
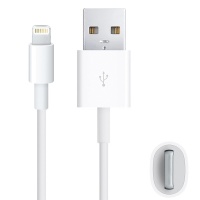
5. Charging Port for iPhone 8 (Lightning Connector Assembly)
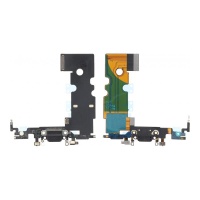
- What is it and what does it include? This is one of the most complex and multifunctional replacement parts. It's a flex cable assembly that includes, as its main component, the Lightning port (the female connector where you plug in the cable to charge the phone and sync it with a computer). But that's not all; this flex often also integrates the lower microphones (the main microphone you use for phone calls and recording voice notes, and sometimes a second microphone for noise cancellation or stereo recording), and it can also have cellular antenna contacts soldered onto it (mainly the lower GSM/LTE antenna) which are crucial for good signal reception.
- Common Problems it Solves: If your iPhone 8 won't charge at all, if you have to hold or wiggle the cable in a very specific position for it to start charging, if charging is intermittent, if the computer doesn't recognise the iPhone when you connect it via USB, if people can't hear you well during calls (or they hear you very quietly or with noise, assuming the main microphone is on this flex), or if you experience mobile network coverage issues that are not due to your carrier or SIM card (provided the antenna contacts are on this flex and have been damaged).
- Colours: The visible external part of the Lightning port (the small metal frame around the connector) usually comes in colours that match your iPhone 8's chassis colour to maintain the original aesthetic:
- Black/Space Grey
- White/Silver (sometimes simply called "White" or "Silver")
- Gold
- Compatibility: This spare part is specific to the iPhone 8. Some product listings may also indicate compatibility with the iPhone SE (2020), given its similar internal design. Always check the product description.
- Relevant Repair Information: This is considered a moderately difficult repair. It does not require soldering, but it does involve opening the phone and dismantling several internal components to access and replace the charging port assembly. You will need to disconnect the battery, the screen, and most likely the Taptic Engine and the main loudspeaker, as the charging port flex usually runs underneath or is connected near these components.
Basic Guide to Changing the iPhone 8 Charging Port:
- Opening and Initial Disconnections: As with most internal repairs: back up your data and switch off the iPhone. Remove the two bottom Pentalobe screws. Apply gentle heat to the screen edges and use a suction cup and plastic picks to separate it from the chassis, opening it to the right. Essential: disconnect the battery first! Then, disconnect the screen cables and remove it to work comfortably.
- Removing Lower Components: To access the charging port assembly, you will generally need to first remove the Taptic Engine (vibration motor) and the main loudspeaker, as they are usually located on top of or around the charging port flex. Make a good note of the order and position of the screws.
- Disconnecting and Removing the Old Flex: Very carefully, disconnect the charging port flex cable's connectors from their respective sockets on the logic board. Remove the screws that secure the Lightning port itself to the chassis. If the microphones are adhered to the chassis, gently peel them off. The flex may also have adhesive holding it to the inside of the chassis; apply a little heat if necessary to make it easier to remove.
- Installing the New Flex: Place the new charging port assembly in position, making sure that the microphones (if it has them) and the Lightning port itself sit correctly in their guides and holes. Screw it to the chassis. Carefully connect its flex cables to the logic board, ensuring the connectors click into place perfectly and without forcing them.
- Reassembling and Testing: Reinstall the loudspeaker and the Taptic Engine. Reconnect the screen and the battery. Before completely closing the phone, switch it on and thoroughly test all the functions of the new port: that it charges correctly, that it syncs with a computer (if you use that function), and that the microphones work well in calls and recordings. If everything is OK, you can apply new screen adhesive (optional but recommended) and close the iPhone, re-inserting the Pentalobe screws.
⚙️ Other Essential Spares for Your iPhone 8 at iLevante.com
But wait, the spare parts party doesn't end here! Your iPhone 8 is a small marvel of engineering, and as such, it has many other components that, while they may not fail as often, might also need replacing to keep it running at peak performance. At iLevante.com, we make sure to have the most comprehensive catalogue possible to cover all your repair needs:
- Main Loudspeaker: This is the speaker located at the bottom of the iPhone, responsible for playing music, ringtones, video sound, and audio in hands-free mode. If you notice the sound is quiet, distorted, crackly, or there's no sound at all, this component could be the culprit.
- Repair Level: Considered moderately difficult. It involves opening the iPhone and usually removing the Taptic Engine and sometimes the charging port assembly to access it at the bottom of the device.
- Earpiece Speaker: This is the small speaker you hold to your ear to listen during phone calls. If you have difficulty hearing the person you're talking to, the sound is very quiet, or you hear interference, you may need to replace it.
- Repair Level: It's usually integrated with or very close to the front camera and sensor assembly, on the back of the screen. It is accessed by removing the screen, and often needs to be transferred from the old screen to the new one if you're replacing the entire screen.
- Vibration Motor (Taptic Engine): The iPhone 8 features Apple's Taptic Engine, which provides precise haptic feedback for notifications, alerts, and actions in the interface. If the vibrations feel strange, are very weak, intermittent, or have disappeared completely, this motor could be failing.
- Repair Level: Moderately difficult. It is located at the bottom of the phone, near the charging port and battery.
- Antennas (Wi-Fi, Cellular, Bluetooth, GPS): The iPhone 8 has multiple antennas for its various wireless connections. If you experience persistent connection issues (poor Wi-Fi signal, Bluetooth not connecting, inaccurate GPS, or mobile coverage problems) that you have already ruled out as being software-related, a problem with your carrier, or your router, there could be an issue with one of the internal antennas or their connection cables.
- Various Internal Flex Cables: In addition to those already mentioned, there are other flex cables that interconnect different parts of the phone, such as the Home button flex (remember that replacing the original Home button affects Touch ID functionality!), interconnecting flex cables between the logic board and secondary boards, etc. Damage to any of these can cause a variety of failures.
- SIM Tray: Although it seems simple, the tray where the SIM card is inserted can be lost, bent, or broken. We have replacements so you can stay connected.
- Screw Sets: During a repair, it's easy for a tiny screw to get lost or for its head to be stripped. At iLevante.com, you can find replacement screw sets specific to the iPhone 8, so you won't be missing a single one.
- Screen and Battery Adhesives: To ensure a good screen seal (and thus maintain some protection against dust and splashes) and to properly secure the battery in its place after a replacement, you will need specific pre-cut adhesives. They are essential for a professional repair.
🛠️ General Repair Guides: You Can Do It!
Repairing your iPhone 8 might seem like a monumental task at first, but we assure you that with the right information, the right tools from iLevante.com, and a good dose of patience, it is more than possible for many common faults! Here are some general tips, and a reminder of where you can find more detailed guides for each specific repair:
Tools You Will Likely Need:
The exact equipment will depend on the specific repair you're undertaking, but a basic tool kit for opening and working on an iPhone 8 usually includes the following items:
- Pentalobe Screwdriver (P2 0.8mm): Essential for removing the two external screws on either side of the iPhone's Lightning port. You can't start without it.
- Phillips Screwdriver (PH00 or PH000): Needed for most of the internal screws that secure shields, connectors, and components.
- Tri-Point Screwdriver (Y000 or Trilateral): Apple uses this type of special screw in some key internal spots (like on the screen and battery connector shields). It's essential to have the right one to avoid stripping the heads.
- Suction Cup: To apply suction to the screen and help lift it slightly to create the first gap.
- Plastic Picks (Opening Picks) or Thin Pry Tools: Inserted into the gap created by the suction cup to cut the adhesive that seals the screen to the chassis.
- Plastic Spudgers: Anti-static tools, usually made of nylon or durable plastic, with flat or pointed ends. They are crucial for disconnecting flex cables, gently prying components, and handling small parts without causing short circuits or damage.
- Precision Tweezers: Very useful for handling tiny screws and small components, as well as for guiding flex cables.
- Heat Gun or Hairdryer: Needed to apply moderate, controlled heat to the edges of the screen or the back cover to soften adhesives and make opening or removing stuck parts easier.
- Magnetic Screw Mat or Organiser Tray: Highly recommended! It allows you to place the screws you remove in an organised way, preventing them from getting lost or mixing up screws of different sizes, which could be fatal during reassembly.
- Anti-Static Wrist Strap (Optional but Recommended): To protect sensitive components from your body's static electricity.
Golden Rules for a Safe and Successful Repair:
Follow these tips to increase your chances of success and avoid mishaps:
- ALWAYS Make a Backup! Before you undo the first screw, make sure you have a recent backup of all your data (photos, contacts, apps...) in iCloud or on your computer. Just in case something doesn't go as planned.
- Switch Off the iPhone: It seems obvious, but it's essential. Make sure the iPhone is completely switched off before you start opening it to avoid short circuits.
- DISCONNECT THE BATTERY FIRST! This is the number one rule of mobile repair. Once you've opened the iPhone and have access to the internal connectors, the very first thing you must do BEFORE touching or disconnecting any other component is to disconnect the battery from the logic board. This minimises the risk of short circuits that could permanently damage your device.
- Organise Your Screws Meticulously: iPhones use screws of many different sizes and lengths, even for the same component. Putting a long screw in a short hole can damage the logic board or other components. Use a magnetic mat with a diagram, or draw a schematic on a piece of paper and tape the screws in their corresponding places as you remove them.
- Be Gentle and Patient with Flex Cables: The flat ribbon cables that connect the different components are extremely delicate and can be torn or damaged easily. Always use plastic tools (spudgers) to lift the connector tabs and to disconnect them. Never pull on the cables directly.
- Use the Right Tools and Don't Force Anything: Every screw and connector has its tool. If something doesn't give way easily, don't force it. Check if you've missed a hidden screw, if there's a security tab, or if there's adhesive that needs to be softened with a bit more heat.
- Work in a Clean, Well-Lit, and Uncluttered Area: Good lighting is key to seeing the small details, and a clean and tidy workspace will prevent you from losing parts or getting dirt inside the iPhone.
- Take Your Time and Be Methodical: Rushing is not advisable in mobile repair. Follow the guides step-by-step, calmly and with concentration. If you feel frustrated, take a break.
- Consult Specific and Detailed Guides: For each specific repair (screen change, battery, charging port, etc.), look for visual step-by-step guides. Websites like iFixit, or numerous YouTube channels specialising in mobile repair, offer excellent tutorials. Often, the product pages themselves on iLevante.com may include links to recommended guides or videos.
💻 Software vs. Hardware Problems: A Tip for Technicians
Sometimes, an iPhone 8 can show symptoms that make us wonder: is it a fault with the operating system or an app (software), or is there really a damaged physical component (hardware)? As a repair technician, or as an advanced user who wants to avoid replacing parts unnecessarily, it's very useful to have some guidelines to try to differentiate the source of the problem.
- Frozen or Unresponsive Screen:
- Software Clues: Before thinking about changing the screen, try a forced restart. On the iPhone 8, this is done by quickly pressing and releasing the Volume Up button, then quickly pressing and releasing the Volume Down button, and finally pressing and holding the side (power) button until the Apple logo appears on the screen. If the problem was a one-off, this usually fixes it. Other software causes can be: lack of storage space, a bug in the current version of iOS or in an app. Consider updating iOS to the latest available version and freeing up space if it's nearly full. If the problem is resolved with these measures, it was software.
- Hardware Clues: If the problem persists even after restoring the iPhone to factory settings with a clean installation of iOS (without restoring a backup at first), and the screen remains unresponsive or behaves erratically in certain areas, it's very likely that the digitiser (the touch layer of the screen) is damaged. In this case, you will need a full screen replacement. In very rare and extreme cases, a fault in the logic board's touch controller could cause these symptoms, but this is a much more complex micro-soldering repair.
- Rapid Battery Drain:
- Software Clues: First, check the Settings > Battery > Battery Health section. If the maximum capacity is good (above 80-85%), the problem could be software. Common causes: an app in the background consuming too many resources, screen brightness constantly at maximum, poor network coverage forcing the phone to search for a signal continuously, location services active for many apps, or a bug in iOS. Try optimising the settings (reduce brightness, disable location for unnecessary apps, manage background app refresh), update all apps and iOS. As a last software resort, you can reset all settings or even restore iOS.
- Hardware Clues: If the "Maximum Capacity" in Battery Health is very low (generally below 80%), or if the phone shuts down unexpectedly, it is a clear indication that the battery is degraded and needs to be replaced. A swollen battery (though less common on the iPhone 8 if it hasn't suffered severe damage) is also an urgent hardware problem. In very rare cases, a fault in the power management chip (PMIC) on the logic board could cause excessive consumption, but this is harder to diagnose and repair.
- Apps Crashing or Misbehaving:
- Software Clues: The vast majority of the time, this is due to software issues. It could be an outdated app, a specific bug in that application, incompatibility with the current version of iOS, or lack of storage space on the device. Try force-closing the app and reopening it, restart the iPhone, make sure both the app and iOS are up to date, and free up storage space if necessary. Reinstalling the app can also solve problems with corrupt app data.
- Hardware Clues: It is very uncommon for a hardware fault to manifest solely as a specific app crashing. It could happen indirectly if the phone overheats due to a hardware fault (like a faulty battery), or if there is a very serious and rare problem with the RAM, but this is usually accompanied by other more generalised symptoms and system reboots.
- Device Overheating:
- Software Clues: Using very demanding applications (games with advanced graphics, video editing), intensive multitasking, or even a bug in an app or iOS causing excessive processor use, can make the iPhone get hot. In these cases, closing the apps, letting the phone cool down, and making sure the software is up to date is usually sufficient.
- Hardware Clues: If the iPhone gets very hot without any apparent intensive use, or gets alarmingly hot during charging (even with an original and certified charger and cable), it could indicate a hardware problem. A faulty battery is a common cause. In more serious cases, it could be a short circuit or a fault in a component on the logic board. If the overheating is persistent and worrying, it's best to have it checked by a technician.
- Connectivity Problems (Wi-Fi, Bluetooth, Mobile Data):
- Software Clues: Often, connectivity problems are solved with simple software steps. Restart your iPhone and also your router (for Wi-Fi problems). Toggle Aeroplane Mode on and off. "Forget" the Wi-Fi network in settings and reconnect by entering the password. Make sure mobile data is enabled and you have a valid plan. As a last software resort, you can go to Settings > General > Transfer or Reset iPhone > Reset > Reset Network Settings (this will erase all your saved Wi-Fi networks and VPN and APN settings, but not your personal data).
- Hardware Clues: If after performing all the software steps (including a clean iOS restore if the problem is severe and persistent) and testing with other networks or devices (to rule out external issues) the connectivity still fails, there could be a hardware problem. This could be a damaged or disconnected internal antenna (perhaps after a drop or a previous botched repair), or, in rarer cases, a fault in the Wi-Fi/Bluetooth chip on the logic board.
A very useful rule of thumb for technicians (and advanced users): Always try to exhaust all possible software solutions first before assuming there is a hardware fault and starting to replace parts, unless there is obvious physical damage (broken screen, wet iPhone, etc.). A full iOS restore via iTunes (or Finder on newer macOS) in DFU (Device Firmware Update) mode, installing the operating system from scratch, is often the "acid test". If the problem persists even with a completely clean iOS (without restoring any backup at first, to rule out the problem being in the backup data), then the probability of it being a hardware fault is very, very high. This differential diagnosis process is key: it saves you time, money on spares that might not have been necessary, and increases satisfaction by solving the problem at its root.
🏁 Your iPhone 8 Deserves a Second Chance with iLevante.com
And that's all for now, brave repair adventurer! As you have seen throughout this extensive guide, your iPhone 8, despite its age, is still a device with a lot of life left in it. And with the high-quality spare parts we offer at iLevante.com, along with the right information and a bit of skill and patience, you can solve the vast majority of problems that may arise.
From a new screen that restores its spectacular brightness and colour, to a fresh battery that lets you get through the day without worry, to cameras that capture your best moments or that charging port that had abandoned you... at iLevante.com we have what you need for your iPhone 8 to remain your faithful companion!
Don't let a small setback, an unfortunate drop, or the simple wear and tear of time force you to say a premature goodbye to a phone that can still offer so much. Repairing your own devices is not only an incredibly rewarding experience and a smart way to save money, but it's also a fantastic gesture for looking after our planet, reducing e-waste and promoting more sustainable consumption. 🌍❤️
So, what are you waiting for? We invite you to explore our complete section of spares for iPhone 8 at iLevante.com. Equip yourself with the right tools, follow our guides and tips (and those of the fantastic online repair community!), and give your iPhone 8 that care and that second (or third!) chance it so richly deserves! If at any point in the process you have doubts or need advice, our team of experts at iLevante.com is here to help you with whatever you need! Let's get to it and happy repairing! 💪

