Samsung A41 screen: what happens when it breaks and how to choose the right replacement
Your phone slips, lands on its edge and a black spot starts spreading from the corner. It’s a common type of damage. Before ordering anything, iLevante suggests a two-minute diagnosis, because the symptoms can tell you a lot:
- Cracked glass, image still fine: for now, the panel has survived. The layers are laminated, with no air gap between them, so replacing just the glass is rarely worthwhile unless you use a specialist repair shop.
- Black spots, coloured lines or flickering: the panel itself is damaged. The full screen assembly needs replacing.
- Ghost touches or dead zones: the digitiser has failed. It is integrated into the same module.
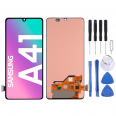
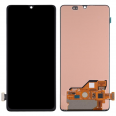
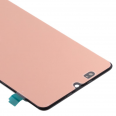
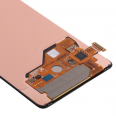
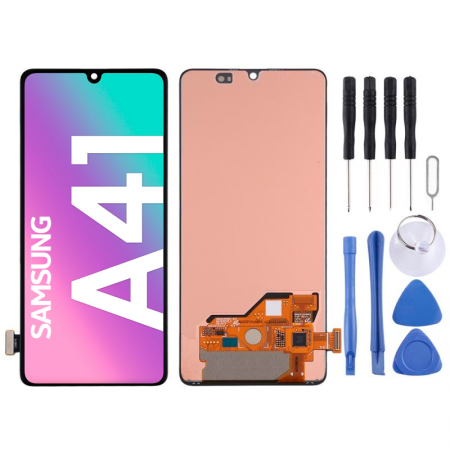
In all three cases, this Samsung Galaxy A41 full screen assembly takes care of the repair with a single part: display, touch glass, connection flex cable and image controller integrated into the flex. It’s a new, premium-quality replacement part, and it comes with two free extras you can use straight away: a screen protector and a tool kit with screwdrivers, opening picks, levers and a suction cup.
Check your Samsung A41 model before buying
Go to Settings > About phone and check the model code. It should be SM-A415F/DSN or SM-A415F/DSM, the 2020 versions this replacement part is designed for. Here’s why checking matters: the Japanese variants SCV48 and SC-41A are also sold as the A41, but their bodies are taller and wider (152.9 × 70.4 mm compared with 149.9 × 69.8 mm). This part won’t fit those models.
What you need to know about this Samsung A41 screen
First, the display. It matches the phone’s format: 6.1 inches, 20:9 aspect ratio and Full HD+ resolution of 1080 × 2400 pixels. Its brightness specifications are:
- Maximum manual brightness: 375 nits.
- Outdoor peak brightness with automatic brightness enabled: around 560 nits.
What does that mean in practice? One nit is equal to one candela per square metre. For comparison, in a well-lit office the A41 usually operates at around 130–160 nits with automatic brightness. At 375 nits, you’ll have plenty of brightness for everyday use, while the peak figure comes into play in direct sunlight.
Fingerprint reader and sensors: read this section carefully
Your A41 came from the factory with a Super AMOLED panel and an optical fingerprint reader underneath it. This reader works using light: the panel illuminates your finger, and the reflected light passes through the screen to the sensor. This replacement has an LCD panel, whose layers and backlight do not let that signal through. That’s why the in-screen fingerprint reader does not work with this part.
Bear this in mind before opening your phone. Make sure you remember your PIN or pattern and, when you’re finished, set up face unlock. It may seem like a small detail until your phone asks for a fingerprint it can no longer read.
One more thing. The A41 doesn’t have a physical proximity sensor: it simulates one using software and the top of the screen. Its ambient light sensor, however, is hidden beneath the panel, and this module does not have sensor holes in that area. Automatic brightness may respond differently, so our team recommends keeping the manual brightness control handy and carrying out the call test described below.
iLevante’s guide to replacing the Samsung A41 screen
It’s worth knowing from the start: this phone opens from the back, even though the damage is on the front. This is a repair of medium difficulty. If it’s your first time, allow up to two hours and clear a space to work. As well as the kit, you’ll need a hairdryer and screen adhesive, neither of which is included. Please note that opening the phone voids the manufacturer’s warranty.
- Switch off the phone and remove the SIM tray.
- Remove the back cover. Heat it until it is still comfortable to touch, place the suction cup on the lower half and insert an opening pick between the cover and the frame. Move slowly and don’t insert it too far: the camera area and battery are very close.
- Remove the 16 PH00 screws from the mid-frame (7 at the top, 9 at the bottom), then release it with opening picks starting at the top-right corner. The plastic near the SIM tray is thin, so take extra care there.
- Disconnect the battery before doing anything else.
- Disconnect the screen connector. One end of the interconnection cable, attached to the board, is visible underneath it: lift the screen connector first and leave the other one in place. Never force a connector.
- Remove the broken panel. Apply moderate heat from the front in short passes, taking care not to focus on the battery area. Lift it with the suction cup and opening picks, guiding the flex cable as you go.
- Clean the frame thoroughly. Even a small amount of old adhesive can cause a corner of the new panel to lift.
- Connect the new panel and the battery, then test the screen as described in the next section, before sticking anything down.
- Reassemble: apply the adhesive, secure the screen, screw the frame back in place and attach the back cover using a little heat. Leave it under a light weight for around 30 minutes.
- Apply the free screen protector to the clean, dust-free glass.
Test your Samsung A41 screen before fitting it
This is the most important step in the entire repair. Keep the protective films on and test the screen before sticking it down:
- Image: display a white background, then a dark one, and check for lines, spots or dim areas.
- Touchscreen: press and hold an icon, then slowly drag it across the entire screen. If it stops responding at any point, there may be a problem.
- Call: bring the phone to your ear and check that the screen responds as it should.
- Brightness: move the slider from minimum to maximum and check that the brightness increases smoothly.
Common problems after replacing the A41 screen
Most have a simple explanation. These are the first things our team would check:
- Green or coloured lines appear immediately after fitting: switch off the phone, disconnect the battery and reseat the screen connector. A loose connection can cause this symptom.
- The screen stays on during calls or turns off when it shouldn’t: remove the screen protector to rule it out, as Samsung warns that screen protectors and cases can interfere. Clean the top of the glass and run the proximity sensor test in the Samsung Members app. It’s normal for the screen not to turn off when using speakerphone or Bluetooth headphones.
- A corner lifts after a few days: this is almost always caused by unevenly applied adhesive or residue left on the frame.
- The phone no longer withstands splashes as well as before: the IP65 rating announced by Samsung relies on the factory seal. Once the phone has been opened, treat it as a device with no liquid protection.
Questions about the Samsung A41 screen replacement
How much does it cost?
The price shown at the top of the page, including VAT. Only delivery costs, which depend on your location, are added.
Can I do it at home, or should I go to a repair shop?
You can do it yourself with patience and by following the steps in order. The trickiest parts are removing the back cover and lifting the panel without damaging the flex cable or battery. However, if the battery is swollen or the frame is bent from the impact, we recommend leaving the repair to a technician.
• Product Weight: 0.18 kg.The technical specs of Samsung Galaxy A41
can help you to choose the correct repair part for your device. Make sure your model reference is the same as this element. Here are some tech specs to help you:
- Brand: Samsung
- Samsung Galaxy A41 Size: 149.9 x 69.8 x 7.9 mm.
- Release date: 2020, March 18. Released 2020, May 22.
- Weight: 152 g.
- Screen specs: Super AMOLED.
- Screen size: 6.1 inches, 89.8 cm2.
PVP:
SNK.SPA0505B21.75€ AvailableInStockNewCondition