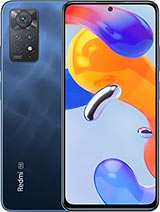
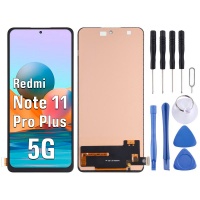
 Repair parts Xiaomi Redmi Note 11 Pro 5G

Receive it on tomorrow tuesday 17 february
Receive it on tomorrow tuesday 17 february

Ultimate Guide to Xiaomi Redmi Note 11 Pro Spare Parts: Repair and Revitalise Your Device with iLevante.com
The Xiaomi Redmi Note 11 Pro is more than just a phone; it's an essential tool in the daily lives of millions of users. The frustration that arises when this device malfunctions is understandable, given its central role in communication, work, and entertainment. At iLevante.com, we understand this need and have put together this comprehensive guide, designed for the average user looking to understand, diagnose, and in many cases, repair their own Xiaomi Redmi Note 11 Pro. Our aim is to provide the necessary technical information and practical tips to extend your mobile's lifespan, ensuring that every part and spare you acquire is the ideal solution. The ability to maintain and repair a device not only extends its functionality but also promotes more conscious and sustainable consumption.
1. Getting to Know Your Xiaomi Redmi Note 11 Pro Inside Out: Essential Features
To perform repairs effectively, it's crucial to thoroughly understand the device's architecture and capabilities. The Xiaomi Redmi Note 11 Pro, launched in February 2022, has established itself as a robust and efficient device within the competitive mid-range segment.
This model features an impressive 6.67-inch Super AMOLED display, offering a resolution of 1080 x 2400 pixels and a 120Hz refresh rate. This combination ensures an exceptionally fluid and vibrant visual experience, with intense colours and deep blacks, setting a very high quality standard for any replacement component. The screen and camera lens cover are protected by Corning Gorilla Glass 5, a feature that provides considerable resistance to drops and scratches. This level of protection, while robust, doesn't completely eliminate the possibility of damage from severe impacts, which explains the frequent need for screen and back cover replacements.
In terms of performance, the device is equipped with the Mediatek MT6781 Helio G96 chipset, an Octa-core 12 nm processor that delivers solid processing power for daily tasks, multitasking, and smooth game execution. Battery life is managed by a powerful 5000 mAh Li-Po battery, complemented by an impressive 67W fast charging capability, allowing it to reach 51% charge in just 15 minutes. This ultra-fast charging feature is a key point for users, and any replacement component related to power must be able to support this wattage to maintain the original user experience.
The Redmi Note 11 Pro's photographic setup includes a versatile quad-camera configuration on the rear, highlighted by a 108 MP main sensor, an 8 MP ultrawide, a 2 MP macro lens, and a 2 MP depth sensor. For selfies and video calls, it has a 16 MP front camera. The phone's construction features an elegant design with a glass front and back (both with Gorilla Glass 5) and a plastic frame, earning it an IP53 rating for dust and splash resistance. Finally, in terms of connectivity, the device includes USB Type-C 2.0 with OTG support, Bluetooth 5.1, Wi-Fi 802.11 a/b/g/n/ac, NFC for payments, and an infrared port for remote control of devices.
Table: Key Technical Specifications of the Xiaomi Redmi Note 11 Pro
This table provides a concise summary of the most relevant technical characteristics of the Xiaomi Redmi Note 11 Pro. It offers a quick reference for users to confirm the model and understand the capabilities they should expect from replacement parts, ensuring that any purchased component is compatible and maintains the device's original performance.
| Feature | Specification |
|---|---|
| Display | Super AMOLED, 6.67", 1080x2400 px, 120Hz, Gorilla Glass 5 |
| Processor | Mediatek Helio G96 (12 nm) Octa-core |
| GPU | Mali-G57 MC2 |
| Battery | Li-Po 5000 mAh, 67W Fast Charging (51% in 15 min) |
| Main Camera | 108 MP (wide), 8 MP (ultrawide), 2 MP (macro), 2 MP (depth) |
| Front Camera | 16 MP |
| Dimensions | 164.2 x 76.1 x 8.1 mm |
| Weight | 202 g |
| Construction | Glass front/back (Gorilla Glass 5), plastic frame, IP53 |
| Connectivity | USB-C 2.0, Bluetooth 5.1, Wi-Fi 802.11 a/b/g/n/ac, NFC, IR |
| Operating System | Android 11, MIUI 13 |
2. Screens: The Window to Your Digital World and Its Replacement Options
The screen is the primary interaction point with your smartphone and, unfortunately, also the component most susceptible to damage. A faulty screen doesn't just affect the device's aesthetics, but severely compromises its functionality and user experience.
Symptoms of a Faulty Screen
Early identification of screen problems is crucial for timely repair. Common signs indicating the need for a replacement include:
- Constant Flickering: The screen displays intermittent flickering, often accompanied by dots or lines extending across it. This can be an indication of a fault in the internal screen connection or in the panel itself.
- Decreased Touch Sensitivity: You notice a lack of response or inconsistent response to touch, requiring multiple presses or more pressure for the screen to react. Some areas may become completely unresponsive.
- Visible Cracks: Beyond the aesthetic impact, cracks in the glass can affect touch functionality, cause the screen to freeze, or, in severe cases, render it completely inoperable.
- Localised Overheating: The screen becomes excessively hot during normal use or charging. While this can have software causes, persistent and localised overheating of the screen can signal an underlying hardware issue with the display.
- Poor Colour Quality or Visual Anomalies: A degradation in image quality is perceived, such as faded colours, blurry images, permanent spots (that don't disappear with cleaning), or the appearance of incorrect tones.
- "Ghost Touch" (Rogue Touch): The screen registers touches by itself, opening apps or dialling numbers randomly without user interaction. This behaviour usually indicates a problem with the digitiser.
- Frozen or Dead Screen: The device stops responding to touch or the screen doesn't turn on at all, even though the phone is powered on and functioning internally.
Exploring the Types of Replacement Screens
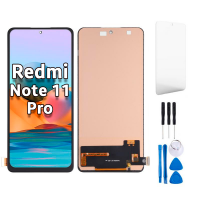
The Xiaomi Redmi Note 11 Pro was launched with a **Super AMOLED** display, a technology renowned for offering vibrant colours, deep blacks, and exceptional contrast. When looking for a replacement, the market offers various options, each with its own characteristics in terms of visual performance, durability, and cost:
- **Originals (Super AMOLED):** These screens replicate the exact quality and technology of the factory-installed component. They provide the most accurate colours, perfect blacks (due to each pixel being able to turn off individually), and the best viewing angles. They represent the most expensive option but guarantee the user experience identical to the original. It's important to understand that, in the spare parts market, "original" often refers to components manufactured to Original Equipment Manufacturer (OEM) specifications, meaning they are high quality and designed for the specific model, even if they don't always come directly from Xiaomi's assembly line.
- **OLED/AMOLED (Aftermarket):** These replacement screens aim to emulate the quality of original AMOLED displays.
- **Soft OLED:** They use flexible plastic substrates, which gives them significantly greater durability compared to Hard OLEDs and a lower incidence of post-sales issues. They offer an immersive viewing experience and excellent image quality with vibrant colours and deep blacks. However, their manufacturing process is more complex and, therefore, they are more expensive, potentially being 25% to 30% pricier than Hard OLEDs. The flexibility of their substrate makes them more resistant to impacts and flexing, which translates into a longer lifespan after repair.
- **Hard OLED:** They offer extremely high contrast and true blacks, resulting in a very attractive visual quality. However, they have higher power consumption compared to LCDs, are susceptible to "screen burn-in" with prolonged use of static images, and are notably more fragile to drops due to the rigidity of their original material. For newer models, aftermarket Hard OLEDs may offer slightly lower resolution or less accurate colours (pastel tones). The stability of raw material supply for these screens can also be a challenge. While they are more economical than Soft OLEDs, their inherent fragility is a considerable disadvantage to consider.
- **INCELL:** These screens integrate the touch digitiser technology directly into the LCD panel, allowing for a thinner profile. In the spare parts market, they are positioned as an intermediate quality option. They offer visual performance that sits between TFT and traditional LCD screens, with slightly lower colour reproduction and contrast than TFTs, but superior to LCDs. Additionally, they provide wider viewing angles than LCDs. They are an excellent option for economical repairs that aim to maintain acceptable image quality without the cost of OLEDs. Some manufacturers such as RJ, JK, and ZY are known for producing INCELL screens with stable processes and consistent quality.
- **TFT (Thin-Film Transistor):** These are an improved variant of LCD screens. They offer superior colour reproduction and contrast compared to traditional LCDs, along with better viewing angles and faster response times, which helps reduce motion blur in dynamic content. They are more affordable than OLED/AMOLED options and are not prone to crosstalk. While they represent an improvement over basic LCDs, their visual quality doesn't match the depth of blacks or contrast of OLED screens.
- **LCD (Liquid Crystal Display):** The oldest technology and generally the most economical in the replacement market. They offer average colour performance with lower contrast, which can make blacks appear greyish. Their viewing angles are narrower, which can cause colour distortion when viewing the screen from the sides, and their longer response times can result in motion blur. Although they have lower power consumption, they don't match the visual quality or immersive experience of more modern options.
Table: Comparison of Screen Types for Xiaomi Redmi Note 11 Pro (Replacement)
This comparison table is an essential tool for the user, as it details the key features, advantages, and disadvantages of each type of replacement screen available. It allows for an informed decision based on individual priorities, whether it's cost, visual fidelity, or post-repair durability.
| Screen Type | Pros | Cons | Visual Quality | Durability | Relative Price |
|---|---|---|---|---|---|
| Original (Super AMOLED) | Vibrant colours, pure blacks, 120Hz, high brightness, identical experience to original | More expensive, limited availability in spare parts market | Excellent | Good (Gorilla Glass 5) | High |
| Soft OLED | Vibrant colours, pure blacks, excellent contrast, greater durability than Hard OLED, fewer post-sales issues | Higher cost than Hard OLED, complex manufacturing | Excellent | Very good | Medium-High |
| Hard OLED | Vibrant colours, pure blacks, good contrast, more economical than Soft OLED | Higher consumption, "burn-in", very fragile, possible lower resolution/pastel colours in aftermarket | Very good | Low | Medium |
| INCELL | Balance of quality/price, better than LCD, decent viewing angles, thin bezels on recent models | Slightly inferior to OLED in contrast and blacks, not AMOLED | Good | Medium | Medium-Low |
| TFT | More affordable, better colour/contrast than LCD, good angles, fast response, not prone to crosstalk | Doesn't reach OLED quality (blacks, contrast), thicker | Acceptable | Medium | Low |
| LCD | Low power consumption, most economical option | Average colours, low contrast, greyish blacks, narrow viewing angles, motion blur | Basic | Medium | Very Low |
Basic Screen Replacement Guide (General Outline)
Screen replacement is one of the most common, but also one of the most delicate, repairs, requiring technical skill and patience. If you decide to perform this repair yourself, it's essential to follow these general steps with utmost care:
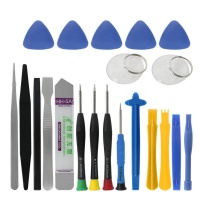
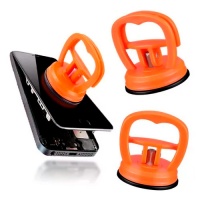
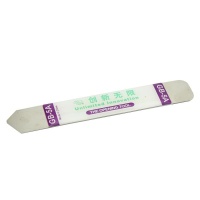
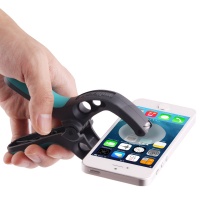
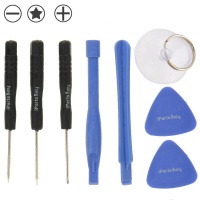
- **Preparation and Safety:** Completely switch off the device to prevent any short circuits or electrical damage. Prepare a clean, tidy, and dust-free workspace. Gather all necessary tools, which typically include a mobile repair kit with specific screwdrivers, a suction cup, opening picks, tweezers, plastic spudgers, and a heat gun or hairdryer. It's crucial to use an anti-static wrist strap to protect electronic components from electrostatic discharge.
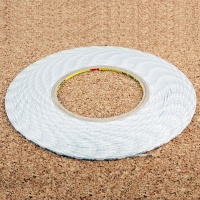
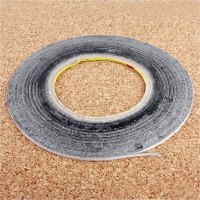
- **Heating the Adhesive:** Apply gentle and even heat to the edges of the screen with a heat gun or hairdryer. This will soften the adhesive holding the screen to the phone's frame, making it easier to separate.
- **Careful Opening:** Using the suction cup, create a small gap between the screen and the frame. Then, insert a thin plastic pick or opening tool and carefully slide it around the edges to cut the adhesive. It's of utmost importance to be extremely careful not to damage the internal flex cables connecting the screen to the motherboard.
- **Component Disconnection:** Once the screen is sufficiently separated, gently lift it (without forcing) and disconnect the flex cables of the screen and digitiser from the motherboard. These connectors are very sensitive and can be easily damaged if not handled with extreme delicacy.
- **Functional Test (Critical Step):** Before applying any adhesive or permanently attaching the new screen, it is absolutely crucial to connect it to the motherboard and turn on the phone. Perform thorough tests to verify that the screen works correctly: check touch response across the entire surface, image quality, and ensure there are no lines, spots, or dead pixels. If the screen doesn't work as expected, check the flex cable connections. Only if the test is successful should you proceed with the final installation. This step is vital to prevent irreversible damage or the need for another repair.
- **Installation and Reassembly:** If the test is satisfactory, remove the faulty screen and thoroughly clean any adhesive residue from the phone's frame. Apply new double-sided adhesive to the frame. Connect the new screen to the motherboard and firmly press it into place to ensure a good seal. Finally, reassemble the rest of the phone, ensuring all screws and components are in their correct positions.
It should be noted that there are many screws of different sizes and lengths within the device; it is fundamental to mark them correctly to avoid confusion and possible damage when reassembling the phone. If the phone's chassis is deformed due to an impact, it's advisable to correct it before installing the new screen, as a deformation can prevent the screen from fitting correctly or even cause it damage.
3. The Power Driving Your Day: Batteries for Xiaomi Redmi Note 11 Pro
The battery is the heart of any smartphone, and its health is fundamental for optimal performance and a satisfactory user experience. Over time and with use, all lithium-ion batteries undergo natural degradation, which directly affects the device's battery life and charging speed.
Specifications of the Xiaomi Redmi Note 11 Pro Battery
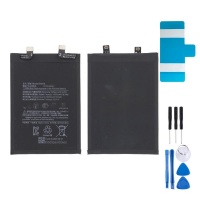
The Xiaomi Redmi Note 11 Pro is equipped with a Li-Po (Lithium Polymer) battery that boasts a robust 5000 mAh capacity. One of the most outstanding features of this model is its compatibility with impressive 67W fast charging, allowing it to recharge 51% of the battery in just 15 minutes. The specific battery model for this device is the **BN5E**. It's important to recognise that phone batteries are designed for a limited number of full charge cycles, approximately 500 recharges before their performance begins to noticeably decline. This degradation is a natural process and a common reason for battery replacement.
How to Tell if the Battery is Faulty
Battery degradation or failure manifests through several clear symptoms that affect the phone's overall performance:
- **Slow Phone Response:** The device feels slower than usual, apps take longer to open, and general navigation becomes less fluid, even when the phone is fully charged.
- **Rapid Charge Loss:** The battery doesn't hold a 100% charge for a reasonable time, drains quickly even with minimal use, or the phone unexpectedly shuts down with a high charge percentage (e.g., at 20% or 30%).
- **Need for Frequent Charges:** You notice the need to charge the mobile several times a day to keep it operational, or the device only works when connected to power.
- **Overheating During Charging:** The phone becomes excessively hot while charging. This is an important warning sign and may indicate an internal battery problem.
- **Swollen Battery:** If you notice that the screen or phone casing deforms or bulges, it's a clear indication that the battery is swollen. This condition is dangerous and requires immediate replacement by a professional, as a swollen battery poses a risk of fire or explosion.
OEM Batteries Without Logos: What are they and why are they like originals?
In the spare parts market, it's common to find batteries described as "OEM quality battery without logo." For many users, the absence of a brand logo can raise doubts about the product's authenticity or quality.
- **Explanation:** OEM stands for "Original Equipment Manufacturer." An "OEM without logo" battery is a component manufactured to the same quality standards, specifications, and materials as the original battery that Xiaomi installed in the phone. The only difference is that it doesn't carry the Xiaomi brand logo. This is because these batteries are sold through third-party channels or directly from the factory that produces for Xiaomi, but without the brand license to include the logo on the replacement part.
- **Advantage:** These batteries offer the same compatibility and performance as an original, including support for 67W fast charging, often at a more affordable price than an "official" part with a logo. For the user, this represents a reliable and high-quality option that allows restoring the device's functionality without incurring unnecessary brand-associated costs.
Basic Battery Replacement Guide
Battery replacement is a common repair that can significantly extend the device's lifespan, but it requires care to avoid damage. It's recommended to consult detailed guides like those available on iFixit for the Xiaomi Redmi Note 11 Pro.
- **Safety First:** Ensure the phone is completely switched off and disconnected from any power source. Whenever possible, the battery should be removed before starting disassembly to prevent short circuits. It's crucial to remember that lithium-ion batteries are sensitive components; never puncture, excessively bend, or expose them to high temperatures. If the battery is swollen, immediately stop the repair and seek professional help, as a swollen battery poses a risk of fire or explosion.
- **Opening the Device:** Generally, you'll need to apply gentle and even heat to the phone's back cover to soften the adhesive holding it. Use opening tools, such as plastic picks and a suction cup, to carefully lift the back cover, sliding them around the edges to cut the adhesive.
- **Component Disconnection:** Once the back cover is open, locate the screws holding the shield over the battery and motherboard connectors. Unscrew them and remove the shield. Then, carefully disconnect the battery flex cables from the motherboard. Some models may have two cables (identified as S and M); when installing the new battery, the seller often recommends connecting the S cable first, then the M.
- **Removing the Old Battery:** Batteries are usually adhered with strong adhesive. Use a plastic prying tool and, if necessary, a little isopropyl alcohol or adhesive remover to carefully loosen the glue. It's vital to avoid bending or puncturing the battery during this process.
- **Installing the New Battery:** Place the new battery in its compartment, ensuring the connectors align correctly with those on the motherboard. Connect the battery flex cables to the motherboard, ensuring they are firmly seated.
- **Reassembly:** Replace the shield and screws. Secure the back cover, applying new adhesive if necessary to maintain structural integrity and resistance to external elements.
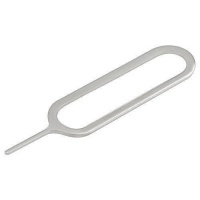
Essential tools for this repair include an iOpener, a suction cup, a heat gun (or hairdryer), adhesive remover, microfibre cloths, isopropyl alcohol, a SIM eject tool, tweezers, and an assortment of prying tools.
4. Style and Protection: Your Redmi Note 11 Pro's Back Covers
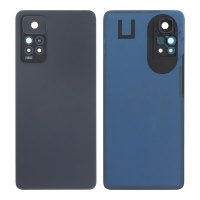
A smartphone's back cover not only contributes to its aesthetics and design but also plays a crucial role in protecting delicate internal components from dust, splashes, and impacts. Since the Xiaomi Redmi Note 11 Pro features a glass back, it's susceptible to damage from drops, making its replacement a common repair.
Available Colours
The Xiaomi Redmi Note 11 Pro was launched in a range of attractive colours, allowing users to maintain its original look or even give it a different, personalised touch. The official colours available for this model include:
- **Graphite Grey (Stealth Black):** A crystallised hue and glass finish that give it a mineral look.
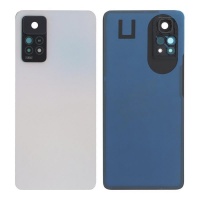
- **Polar White (Phantom White):** A pristine and soft white tone, which adds elegance and lightness to the device.
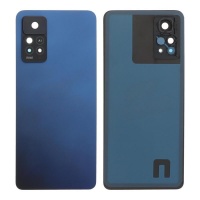
- **Star Blue:** A unique combination of bluish and purplish tones that creates a distinctive and striking colour.
- **Atlantic Blue:** A colour inspired by sunlight on the water's surface, evoking a sense of calm and nature.
Choosing the colour of the back cover can be both a functional necessity (replacing a damaged one) and an opportunity to refresh the device's style.
Basic Guide to Changing the Back Cover
Replacing the back cover is a process that requires patience and the use of the right tools. Although it's often perceived as a purely aesthetic repair, it's fundamental to maintain the device's IP53 dust and splash resistance rating.
- **Power Off and Preparation:** Ensure the phone is completely switched off before starting any manipulation. Prepare your workspace, making sure it's clean and well-lit. Necessary tools include a heat gun or hairdryer, plastic opening picks, a suction cup, and optionally, adhesive remover.
- **Applying Heat:** Apply gentle and even heat to the edges of the back cover. The heat will soften the adhesive holding it to the phone's frame, making it easier to remove.
- **Careful Separation:** With a suction cup, create a small opening in the back cover. Then, insert a thin plastic pick and carefully slide it around the edges to cut the adhesive. It's crucial to proceed with extreme caution to avoid damaging sensitive internal components, such as flex cables or the battery, located just beneath the back cover. The most challenging and time-consuming part of this repair is removing the old glass, while installing the new cover is usually much simpler.
- **Cleaning:** Once the damaged cover is removed, thoroughly clean any adhesive residue from the phone's frame. A clean surface is essential for proper adhesion of the new cover.
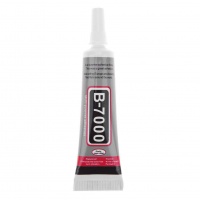
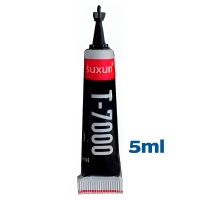
- **Installing the New Cover:** Apply new high-quality double-sided adhesive to the phone's frame. Carefully align the new back cover with the device's chassis and press it firmly to ensure correct adhesion and a tight seal. A perfect fit is vital to maintain the phone's dust and splash resistance (IP53).
The relative ease of installing the new back cover, once the old one is removed, makes this an accessible repair for users with little DIY experience, making it an excellent starting point for those wanting to begin maintaining their devices.
5. Essential Spares: A Detailed Look at Key Components
Beyond the screen, battery, and back cover, there are other specific components crucial for the optimal functioning of the Xiaomi Redmi Note 11 Pro that frequently require replacement. Below, we detail some of the most sought-after spare parts and their relevance:
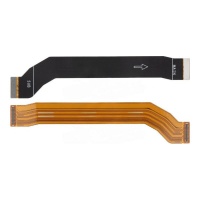
- **LCD Flex Cable for Xiaomi Redmi Note 11 Pro 5G:**
- **Function:** This flex cable is a vital bridge connecting the display (Super AMOLED in the case of the Note 11 Pro) to the phone's motherboard. Its primary function is to transmit image and touch signals, allowing the screen to display visual content and respond to user interactions.
- **Reasons for Replacement:** It's commonly replaced when the original cable is damaged, worn, or has malfunctioned. This can manifest as a screen that shows nothing at all, blurry images, the appearance of vertical or horizontal lines on the screen, or touch response issues. A fault in this component can simulate a screen problem, highlighting the importance of accurate diagnosis.
- **Compatibility:** It's important to note that this flex cable is compatible with several variants of the model, including the Xiaomi Redmi Note 11 Pro 4G, Note 11 Pro+ 5G India, and Note 11E Pro.
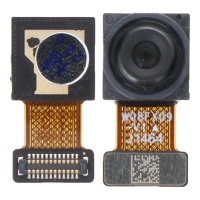
- **2MP Macro Camera for Redmi Note 11 Pro:**
- **Function:** This small lens is specifically designed to capture extremely close-up details, allowing for macro photography at distances of 1 or 2 cm from the object.
- **Context and Utility:** Although its low 2MP resolution has been subject to debate and some users consider it of inferior quality compared to the main camera, others find it surprisingly useful for specific tasks. For example, it's ideal for reading tiny labels on electronic components or capturing fine details that the main camera cannot focus on at such a close distance.
- **Common Issues:** It may exhibit video stabilisation problems or, in some cases, its functionality may "disappear" or become inaccessible after operating system updates (like HyperOS). This shows that some hardware issues can originate from software faults or incompatibilities, requiring a dual diagnostic approach.
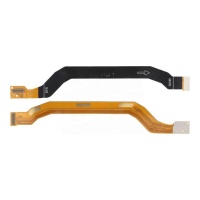
- **Flex to Motherboard for Redmi Note 11 Pro:**
- **Function:** This main flex cable is a fundamental component, acting as the backbone of the phone's internal communication. It connects the motherboard (the device's "brain") to all other vital components, ensuring the flow of data and power throughout the entire system.
- **Reasons for Replacement:** A damaged or faulty motherboard flex can cause a wide range of problems often confused with faults in other components. For example, it can cause the screen to not display, be blurry, or have vertical lines, as it disrupts essential communication between the motherboard and the screen. It can also affect the functioning of charging, buttons, speakers, or any other component that relies on this main connection.
- **Importance:** Its replacement is a more complex and critical repair, as its malfunction can simulate faults in multiple components, making accurate diagnosis crucial to avoid unnecessary replacements of other parts.
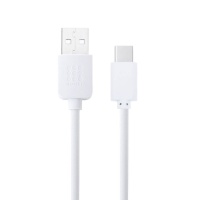
- **USB C / Type C to USB Cable for Huawei, Samsung, LG, and Xiaomi:**
- **Function:** USB-C cables are versatile, reversible connectors designed for data transfer and power delivery. They are essential for charging the device and transferring files between the phone and other devices.
- **Types and Quality:** Not all USB-C cables are equal in terms of their capabilities. There are different speed and power standards:
- **USB-C 2.0:** Supports data transfer rates of up to 480 Mbps and power output up to 60W. It's suitable for routine charging and syncing tasks.
- **USB 3.0 (also known as USB 3.1 Gen 1):** Provides data transfer rates of up to 5 Gbps, offering significantly higher performance for large file transfers.
- **USB 4 / Thunderbolt 3:** Offer the highest speeds, up to 40 Gbps of data and power up to 100W, ideal for users who demand maximum performance in data transfer and ultra-fast charging.
- **Performance Factors:** Cable quality (materials, shielding), cable thickness (a lower gauge, i.e., a thicker cable, is better for charging), and length (shorter cables tend to be more efficient due to lower resistance) directly influence the speed and efficiency of charging and data transfer.
- **Recommendation:** Given that the Xiaomi Redmi Note 11 Pro supports 67W fast charging, it's crucial to use a high-quality USB-C cable, preferably with certifications like USB-IF, to ensure that charging is efficient, safe, and fully leverages the charger's capacity. A low-quality cable can limit charging speed, causing user frustration.
- **Other Related Spare Parts for Xiaomi Redmi Note 11 Pro:**
The ecosystem of spare parts for the Xiaomi Redmi Note 11 Pro is extensive and covers almost any component that might fail, allowing for comprehensive device repair:
- **Charging Port (USB-C):** Essential for charging and connectivity with other devices. Common issues include dirt accumulation preventing connection, physical damage from incorrect insertions or drops, or failures due to water exposure.
- **Loudspeaker:** Responsible for multimedia sound (music, videos) and hands-free calls. Faults can manifest as low volume, distorted or crackling sound, or a complete absence of audio.
- **Power and Volume Buttons:** The internal flex cables of these buttons can wear out or become damaged with use, causing the buttons to become unresponsive, stuck, or work intermittently.
- **Cameras (Front/Rear):** Beyond the macro lens, the main rear camera sensors (108 MP, ultrawide) and the front camera may require replacement due to physical damage (e.g., broken lens) or internal faults affecting image quality or camera app functionality.
- **Camera Lens / Glass:** The glass cover protecting the camera lenses can crack or scratch, significantly affecting photo and video quality. Its replacement is a common and relatively simple repair.
- **Microphone:** Microphone problems can manifest as difficulty being heard during calls, inaudible or distorted voice recordings.
- **SIM Tray:** Can be damaged or lost, preventing the use of the SIM card and access to the mobile network.
- **Midframe:** This is the internal structure that supports and aligns the phone's components. A damaged midframe can affect the device's assembly and integrity.
- **Adhesives and Screws:** Although small, these components are essential for proper device reassembly, ensuring that parts stay in place and the phone maintains its resistance to external elements.
6. Common Problems: Diagnosis and Solutions from a Technician's Perspective
From a repair technician's perspective, it's fundamental to distinguish between hardware (physical) and software (operating system) problems for accurate diagnosis and effective repair. Many issues that initially seem to be hardware faults can originate in the software, and vice versa.
Common Hardware Problems
These are the physical faults that most frequently require component replacement:
- **Damaged Screen:** Manifestations include visible cracks, lack of touch response, spots, lines, or a complete absence of image. These damages are usually the result of drops or impacts.
- **Degraded or Swollen Battery:** Rapid battery drain is observed, unexpected device shutdowns, general system slowdown, overheating during charging, or physical deformation of the phone (bulging screen or casing). A swollen battery is a safety risk and must be replaced immediately.
- **Faulty Charging Port:** The phone doesn't charge, the connection is intermittent, or the USB-C cable doesn't fit correctly. Common causes include dirt accumulation in the port, physical damage from incorrect insertions or drops, or corrosion from water exposure.
- **Camera Faults:** Blurry images, difficulty focusing, the camera app not opening, or video stabilisation issues, especially with the macro lens.
- **Faulty Loudspeaker or Microphone:** Sound is distorted, volume is low, or there's a complete absence of audio during calls or recordings.
- **Physical Buttons (Power/Volume) Unresponsive:** This is usually due to wear or damage to the button's internal flex cable, preventing proper interaction.
- **General Device Overheating:** While software can contribute, persistent and severe overheating can be a sign of hardware failure (such as the processor, memory, or battery) and, if not addressed, can lead to severe damage and even data loss.
Common Software Problems (from a repair perspective)
From a technician's perspective, software problems are the first line of diagnosis, as they can often simulate hardware faults and be resolved without the need for part replacement.
- **Slow Performance or Freezing:** This problem can be caused by software bugs, apps consuming excessive resources (memory leaks), insufficient internal storage (it's recommended to keep at least 20% free space), or corrupted system files. An operating system update or regular cache clearing can resolve many of these issues.
- **Boot Loops (Constant Restarts) or Frozen Screen:** The phone gets stuck on the boot logo (Mi logo) or the screen freezes and becomes unresponsive. Often, this can be resolved with a forced restart (hold down the power button or the power + volume down combination for 15-30 seconds). In more persistent cases, a factory reset may be necessary, although this implies data loss (it's recommended to back up beforehand). Curiously, even a poorly placed screen protector or a faulty app can cause a boot loop.
- **Connectivity Issues (Wi-Fi, Bluetooth):** Difficulty connecting to Wi-Fi networks, unstable connections, or Bluetooth problems. Common solutions include updating the operating system, restarting the router, forgetting and reconnecting to the Wi-Fi network, or resetting network settings. Xiaomi offers a hardware detection mode (CIT mode, accessible by dialling *#*#6484#*#* or *#*#64663#*#*) that allows checking if the touch sensor or connectivity hardware are working correctly, which helps differentiate whether the problem is software or hardware.
- **Specific Features Disappearing or Failing:** A clear example is the macro camera that may stop working or disappear from the camera app options after an operating system update (like HyperOS). Another case is the double tap to wake screen feature becoming unresponsive. These cases illustrate how software can directly affect hardware functionality, and are often resolved with updates or configuration adjustments.
- **Post-Update Failures:** A phone that doesn't charge or turn on after a software update is a common scenario. From a technician's perspective, this often indicates a software problem that can be resolved with a "software update" (firmware reflash) at a service centre, without the need to replace components.
A technician's ability to identify whether a problem is hardware or software is crucial for providing the most efficient and economical solution to the user. It is always recommended to exhaust software options before proceeding with component replacement.
7. DIY Repair Tips: Do It Yourself with Caution
Performing repairs on your Xiaomi Redmi Note 11 Pro can be a rewarding experience and often an effective way to save money. However, it's crucial to approach the process seriously, with preparation, and, above all, caution. Safety should always be the top priority to prevent damage to the device or, more importantly, personal injury.
Essential Tools for DIY
A mobile phone repair tool kit is indispensable for any smartphone repair. Ensuring you have the right tools is the first step towards a successful and safe repair:
- **Precision Screwdrivers:** With tips suitable for small smartphone screws (often Torx, Phillips, or Pentalobe).
- **Opening Tools (Spudgers):** Plastic or metal picks (spatulas) designed to separate components, pry, and cut adhesives without scratching delicate phone surfaces.
- **Suction Cup:** Essential for lifting screens or back covers, creating suction that facilitates the separation of adhered parts.
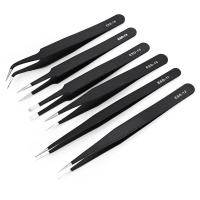
- **Tweezers:** Essential for manipulating flex cables, small connectors, and other tiny components with precision.
- **Heat Gun or Hairdryer:** A fundamental tool for softening the adhesive holding the screen, back cover, and battery, making their removal easier without applying excessive force.
- **Adhesive Remover or Isopropyl Alcohol:** Useful for cleaning old glue residue and preparing surfaces for new adhesive application.
- **Microfibre Cloths:** Ideal for cleaning delicate surfaces like the screen and camera lenses without leaving lint or scratches.
- **Anti-static Wrist Strap (ESD):** A crucial safety item to protect sensitive electronic components from electrostatic discharge, which can cause invisible but irreversible damage.
Having the right tools is not a luxury, but a necessity to perform repairs efficiently and minimise the risk of causing additional damage to the device.
Indispensable Safety Precautions
Safety comes first in any electronic repair. A mistake can result in permanent damage to the phone or, more seriously, personal injury.
- **Completely Power Off the Device:** Before any manipulation, ensure the phone is completely switched off and disconnected from any power source. Never work on a device that is plugged in.
- **Disconnect the Battery:** Whenever possible, remove the battery at the beginning of the disassembly process. This prevents accidental short circuits and protects sensitive components.
- **Personal Protection:** Use safety glasses to protect your eyes from glass fragments or small particles that may detach during repair. Consider wearing protective gloves to prevent cuts from broken glass and to protect your skin.
- **Battery Handling:** Lithium-ion batteries are delicate and store a considerable amount of energy. Never puncture, excessively bend, or expose them to high temperatures. If a battery is swollen or starts to smoke, immediately stop the repair and move away, as it poses a risk of fire or explosion. In these cases, seeking professional help is imperative.
- **Delicate Flex Cables:** Be extremely careful when handling flex cables. They are very susceptible to damage from pulling or excessive bending, which can lead to failures in the component they are connected to.
- **Workspace Organisation:** Maintain a clean, tidy, and well-lit workspace. Label screws and parts as you remove them, as they can vary in size and length. This is crucial for correct reassembly and to prevent damage from misplaced screws.
- **Do Not Work Alone:** In case of an emergency or an unexpected problem, it's important to have someone nearby who can offer help or call emergency services.
- **Prior Documentation:** Before starting any repair, consult detailed repair guides (such as those available on iFixit) and watch model-specific video tutorials. Understanding each step and potential difficulties is key to success.
Adopting these precautions is fundamental for a safe and successful DIY repair process. If at any point the repair seems too complex or you feel unsure, the best decision is to stop and seek professional help.
Extend the Life of Your Xiaomi Redmi Note 11 Pro
This detailed guide has provided a clear and empowering insight into the maintenance and repair of the Xiaomi Redmi Note 11 Pro. We've explored everything from understanding its key components and the different types of replacement screens, to diagnosing common hardware and software issues, and performing frequent repairs. Knowledge of the device's specifications, available spare parts options (including OEM batteries without logos that offer original quality at an accessible cost), and basic steps for the most common repairs, equips the user to make informed decisions.
It's important to remember that, while DIY can be rewarding and economical, safety is paramount. We've emphasised the need to use appropriate tools and follow strict safety precautions to prevent damage to the device or personal injury. A technician's ability to differentiate between hardware and software problems is a fundamental pillar in diagnosis, as many apparent hardware failures can be resolved with software solutions, saving time and money.
At iLevante.com, our commitment is to offer the highest quality spare parts, ensuring that every component contributes to restoring the original functionality and performance of the Xiaomi Redmi Note 11 Pro. By investing in quality spares and your own knowledge, you not only repair the device but also extend its lifespan, contributing to more sustainable consumption and keeping your Xiaomi Redmi Note 11 Pro operating at its maximum potential. When the complexity of the repair exceeds the user's capabilities, the option of seeking professional help is always available and recommended. The durability of a device depends not only on its manufacturing but also on the care and willingness to repair it when necessary.

