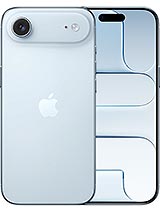
 Repair parts iPhone Air





Receive it on monday 9 de february

iPhone Air: The Ultimate Guide to Parts and Repairs
Are you the proud owner of an iPhone Air? Congratulations! It's an incredible device, known for its ultra-slim design and perfect balance of performance and portability. But (because there's always a but), its slimness also makes it particularly... delicate. 💔
A small knock, an unfortunate drop, or simply the wear and tear of time, and suddenly your precious companion is showing signs of weakness. Don't panic! At iLevante.com, we believe in repair. It's more economical for you and much better for the planet.
This guide is your starting point to identify your iPhone Air's problem and find the exact replacement part you need. Cracked screen? Tired battery? We're going to cover it all.
The iPhone Air Under the Bonnet: Key Features
Before diving into repairs, let's understand what we're dealing with. The iPhone Air stood out for its attempt to merge the lightness of the iPad Air with the power of a standard iPhone. This involves very compact internal components and precise engineering.
- Design: Brushed aluminium chassis, thinner than the standard models of its generation.
- Display: It often used a screen (which we'll detail below) seeking the best compromise, frequently a "Soft" OLED to absorb shocks despite the chassis's thinness.
- Uniqueness: Its "Air" design means many components, like the Taptic Engine module or the speakers, are specific and designed to save space. Disassembly, therefore, requires special care.
The iPhone Air Screen: Everything to Know for a Replacement 🌟
This is THE most replaced component. The infamous "spider web" after a drop, mysterious vertical lines, or a screen that stays black... the symptoms are many. But not all replacement screens are created equal. Here's what you need to know to make the right choice at iLevante.com.
The Different Types of Screens for iPhone Air
When the original screen (usually a Super Retina XDR, i.e., an OLED) is broken, several options are available to you:
- TFT Screens: This is the most basic and economical option. They use classic LCD technology. Advantage: the price. Disadvantage: the colours are less vibrant, the blacks less deep, and they consume a bit more battery.
- INCELL Screens: An improved version of LCD. The touch layer is integrated into the LCD panel, making them thinner than TFTs. It's an excellent balance of quality and price, with touch responsiveness very close to the original.
- OLED Screens (Hard or Soft): Now we're getting into the big leagues. OLED (Organic Light Emitting Diode) is the technology used by Apple.
- Hard OLED: More rigid, offering superb colours and contrast, but potentially more fragile in case of another drop.
- Soft OLED: More flexible (as it's built on a plastic substrate), it absorbs shocks better and is more durable. This is the closest you can get to the screen originally fitted on the iPhone Air.
- AMOLED Screens: This is a variation of OLED (Active-Matrix Organic Light Emitting Diode). In the replacement parts ecosystem, the terms OLED and AMOLED are often used interchangeably to refer to the infinite contrast technology.
- Original (or Refurbished) Screens: These are often original Apple screens where the glass has been refurbished. This guarantees 100% of the original's visual performance, responsiveness, and colours. The premium choice.
How to Change the iPhone Air Screen (The Basics)
Replacing the screen is an intermediate-level repair. If you're meticulous, it's doable!
- Discharge the battery: Always work with a device below 25% battery to avoid risks.
- Open the device: Remove the 2 pentalobe screws near the charging port.
- Heat: Gently heat the edge of the screen (with a hairdryer or thermal pad) to soften the waterproof seal.
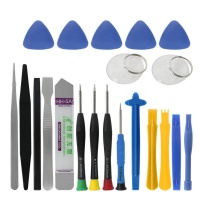
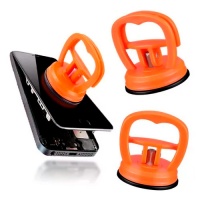
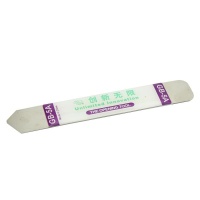
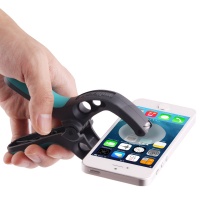
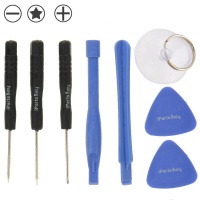
- Open: Use a suction cup and a plectrum (or thin plastic spudger) to gently separate the screen from the chassis. Warning: The iPhone Air opens like a book (usually to the left).
- Disconnect: IMPORTANT: ALWAYS disconnect the battery first before disconnecting the screen's flat cables (ribbon cables).
- Transfer components: You will need to retrieve the earpiece speaker / proximity sensor module from your old screen and transfer it to the new one. Without this, you could lose Face ID!
- Reassembly: Follow the steps in reverse. Remember to replace the waterproof seal if you want to maintain splash protection.
The Battery: The Heart of Your iPhone Air 🔋
The second most common problem. After two years, it's normal to feel a drop in battery life. Does the iPhone suddenly switch off at 20%? Is the "Battery Health" in your settings below 80%? It's time to change it.
Which Battery for the iPhone Air?
The iPhone Air uses a specific Lithium-ion battery, designed for its slimness. It might be (for example) a model like the A2650 (fictional model number for this example) with a capacity around 3150 mAh. When choosing, make sure you get a model specifically compatible with the "iPhone Air".
OEM Batteries: Original Quality Without the Logo
You'll often see the term "OEM". It stands for Original Equipment Manufacturer. These are batteries made by the same factories that supply Apple, but they don't carry the brand's logo. They use the same cells and control chips as the original. In our opinion at iLevante, this is the best choice: you get the quality and safety of the original, without the brand price.
How to Change the iPhone Air Battery
This repair is trickier than the screen because of the battery's adhesives.
- Open the device: Follow the same steps as for the screen replacement (heat, open, disconnect battery).
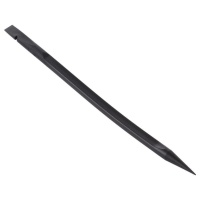
- Remove the adhesives: This is the crucial part. The battery is held by stretch-release adhesive strips. You must pull them slowly and steadily. If they break, you'll have to (very carefully!) pry with a plastic spudger, possibly using a little isopropyl alcohol to dissolve the glue. Never bend or puncture the battery.
- Install the new one: Place the new adhesive strips, connect the new battery, and close the device.
Technical Note: On recent models, Apple "pairs" the battery to the motherboard. Changing the battery yourself may make the "Battery Health" menu disappear from the settings (the battery will work perfectly, but the phone will display a "Service" message).
The Back Covers: Colours and Complexity 🎨
The back of the iPhone Air is glass, to allow for MagSafe wireless charging. It's beautiful, but it breaks! The original colours (like Sky Blue, Mint Green, Starlight Silver...) are superb, and you can find these same shades as replacement parts.
Changing the Back Glass: A Mission for Experts
Let's be clear: this is one of the most difficult repairs on a modern iPhone. The glass is bonded with an extremely strong adhesive. Professionals use a laser machine to burn away the glue before removing the shattered glass piece by piece. Trying to do it by hand is long, tedious, and risky for other components.
Our advice at iLevante: opt for a complete pre-assembled chassis. This is a part that includes the back glass, the metal frame, and often the small buttons. You'll just have to transfer the internal components (motherboard, battery, etc.) from your old chassis to the new one. It's more expensive, but infinitely simpler and safer.
Top 4 Other iPhone Air Replacement Parts
Beyond the "screen, battery, back glass" trio, here are the most frequent hardware failures we see:
1. The Charging Connector (Dock Connector)
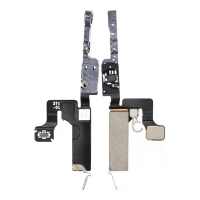
Symptoms: The iPhone Air no longer charges, you have to "wiggle" the cable, the microphone doesn't work during calls (the main mic is on this part), or the computer doesn't recognise it. The part: It's a ribbon cable (flat cable) that includes the Lightning port, the main microphone, and antennas. Replacing it requires dismantling a good portion of the phone, including the loudspeaker and the Taptic Engine.
2. The Rear Camera
Symptoms: Blurry photos (the focus is stuck), black spots on the image (dust inside the sensor), the "Camera" app stays black, or the optical image stabilisation (OIS) vibrates non-stop. The part: The camera module is (relatively) simple to change once the device is open. Just disconnect it and replace it. Pay attention to the versions (Standard, Ultra Wide-Angle) if the iPhone Air has more than one.
3. The Earpiece Speaker
Symptoms: You can no longer hear your callers during a call (except on speakerphone). The part: This is the small speaker located at the top of the screen. It's often sold pre-assembled with the sensor ribbon cable (proximity, ambient light). Warning: the sensor required for Face ID is on this part. It often needs to be transferred from the old ribbon to the new one, which requires micro-soldering.
4. The Taptic Engine
Symptoms: Your iPhone no longer vibrates, or the haptic feedback (the "click sensation") is weak or noisy. The part: This is the vibration motor. On the iPhone Air, it's very compact. The replacement is simple: unscrew, disconnect the old one, put the new one in.
What If It's Not the Hardware? Software Issues 💻
Sometimes, a hardware problem is actually a software bug. From a technician's perspective, here's what to check before ordering a part:
- Battery draining abnormally fast: Before changing the battery, check in the settings if an app is consuming all the power. Sometimes, a simple reset of network settings or an update solves the problem.
- The "Boot Loop" (the Apple logo appears and disappears): This is the nightmare scenario. The iPhone tries to start but can't. It's often due to a failed update or full storage. Before blaming the motherboard, try a DFU Restore (Device Firmware Update) via a computer. This reinstalls the entire system. Warning, this erases all data!
Your iPhone Air Deserves a Second Life ♻️
Repairing your iPhone Air is both an economical and ecological action. A new screen or a fresh battery can give your device years of faithful service. At iLevante.com, we are committed to providing you with the highest quality replacement parts, whether you're looking for the most reliable OEM option or an economical alternative like INCELL.
Browse our catalogue below to find the screen, battery, or that small connector you need for your iPhone Air. And don't forget: take your time, be organised, and follow the guides! Happy repairing!

