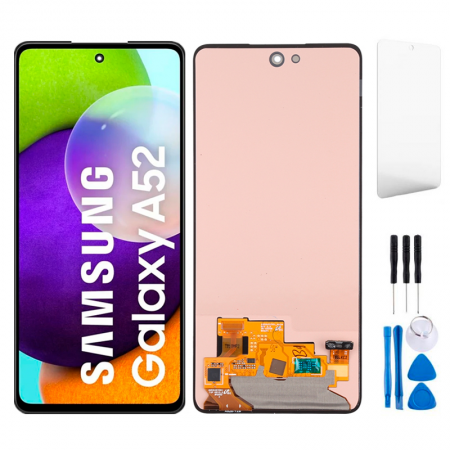
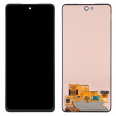
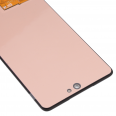
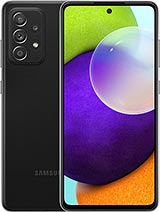
High-quality incell for the 4G model of the Samsung Galaxy A52
The screen we offer has all the features we will mention now:
- The IC that controls what is displayed.
- The LCD screen, where we see the moving images.
- The flex cable that connects to the Samsung motherboard.
- The touchscreen, which transmits the signal from the touches we make on the phone.
To make it easier to remove the screen, we include a set of tools, including levers, a pick, and screwdrivers. You will use each element to achieve a successful module replacement.
The Samsung A52 screen and the tools will arrive in optimal condition thanks to the packaging we use. The fingerprint reader is not included in the list of features.
Screen Replacement for Samsung Galaxy A52
An alternative we suggest is to look for videos on Samsung Galaxy A52 screen replacement and the tools you need for the repair, such as a screwdriver. For our part, we offer you the shipment of the complete screen
for your original Samsung mobile. It will arrive in excellent condition, as we send it protected and excellently packaged, avoiding damage to any part.
Once we have made the diagnostic analysis, it is time to proceed with the screen replacement very carefully. The instructions to follow are:
- Before starting, it is essential and also important that you remove the battery.
- Make sure you have no static electricity. For this, it is good to have an antistatic wrist strap and wear shoes that dissipate static electricity.
- To remove the Samsung A52 screen from the phone, it is essential that you have something that emits heat, such as a hairdryer or heat gun at 120°, never use one that exceeds 120° because otherwise, internal components will be damaged and it will not work properly.
- You have to focus the heat on each corner so that the adhesive softens. To completely remove the module, help yourself with a pick, which is part of the necessary set of tools for the replacement.
- Then continue applying heat, but in the middle of the phone, do it carefully and quickly so as not to affect the battery (it is best to remove it).
- After removing the screen, be very careful, as the old one (which we understand is broken) will be glued in some parts to the body of the Samsung. Observe very calmly how the module is attached, there should be at least one flex cable connected. You must disconnect it. We use tweezers for this, because otherwise, the connector can be damaged.
- Now, thoroughly remove all the adhesive residue with a cloth and alcohol. You should not clean the remnants with water, as water would oxidize the connectors if not properly dried.
- Now that we have correctly removed the old screen, we are about to finish. Connect the new screen to the main module and make sure that the flex cable is well connected.
- At this point, you just have to place the Samsung A52 screen that you have purchased from us. These screens come with an included adhesive, you just need to heat the screen a little so the adhesive will melt.
- When it is slightly melted, stick it to the surface of your Samsung A52.
You have finished, you have the new screen on your mobile. Now you can turn it on and check that the installation has been a success. If it does not work well or you have any problems with the touch, check that you have followed all the steps correctly.
What is the price of the Samsung Galaxy A52 screen?
The total is specified at the beginning: (17.90€), only the shipping cost will be added. VAT is already included in the final purchase price. You will only have to add the shipping costs. Depending on your province, country, or locality they may vary. As well as if you choose express or standard shipping.
What color or colors are available?
For now, we only have the color black for all Samsung Galaxy A52. There are no more options for this model.
It will work for all phone colors, because
you are only changing the main screen.
Should I go to the original service?
No, it is not necessary, because we will guide you so that you can change it yourself with all the care that is needed and you will see what tools are essential to have.
In this way, you will be able to exchange the display (model SM-A525F, SM-A525F/DS) quickly and thus save a significant amount of money.
Will I be able to change this screen for Samsung A52 screen?
Yes! We have already mentioned the steps to follow quickly and effectively so that your smartphone works again. From now on, we will show you how to tell if your Samsung's screen is damaged.
If you follow the steps you will not have problems. You will have managed to fix the problem with your own hands and in record time.
Original alternatives and recommendations for Samsung Galaxy A52
Undoubtedly, we would like the phone to be indestructible, but the truth is that, in an act of negligence, a blow, can end with our screen shattered.
That's why, a wise suggestion is: cover it with a case. The cases fulfill their purpose very well.
There are not a few who are used to lending their phone and the truth is that no one will protect your mobile like you. If you don't want someone else to break it, save yourself that trouble and don't lend it unless it's an emergency.
Every time you connect your Smartphone to electricity, look for a reliable space where no one can touch it while it is charging. This way you will avoid breaks that you will later regret.
And finally, if you want to protect the useful life of your mobile phone, we recommend that children do not play with the phone. If they want to play, on sales websites it is possible to buy very cheaply, technological devices designed for our children.
How to know if I need to change the screen
Before concluding that it is completely broken, we must know if it is the film protector or the Samsung A52 screen that is cracked.
If the touch fails we will notice when the top part is broken but the LCD continues to display normally. But the Samsung A52 screen will be damaged if the phone stops working, that is, if only half is visible, horizontal lines appear or everything is dark. To finish confirming that we must replace it, go to settings. Then, to "About phone" and click 7 times on "build number". This will give you access to the "developer options".
Within this section, select "pointer location", and outline the entire area of the module. If these do not draw, it means that there are problems and you have to replace it.


