
How long does it last and how to change the battery of the Vivo Y36 5G
Publicado por Maria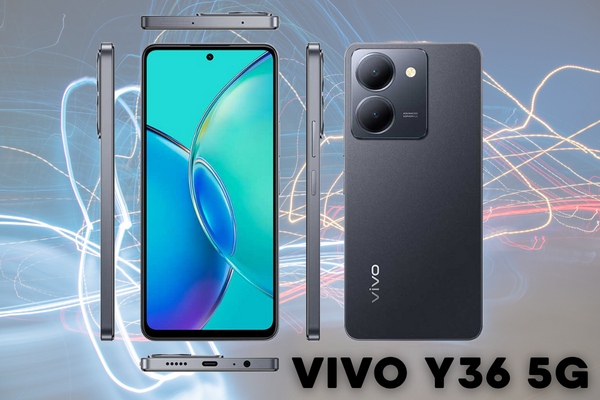
How long does the battery of the Vivo Y36 5G last and how to replace it
The 5000 mAh sounds impressive, but what does it mean for your daily life? When it was new, your phone was a true marathon runner. Performance tests like PCMark have recorded battery durations of between 21 and 23 hours of continuous screen-on time. Truly amazing!
- With light to moderate use (social media, WhatsApp, calls, a few photos, and internet browsing), your Vivo Y36 5G should easily last a day and a half, or even up to two days without any issues.
- With intensive use (gaming, streaming series, using GPS for a long time), the battery will last without problems for the entire day, reaching the night with charge to spare.
It's important to be honest: the Vivo Y36 5G achieves this incredible autonomy thanks to a very efficient processor (the MediaTek Dimensity 6020), which is optimized for energy saving, not for maximum performance in demanding games. It's a phone designed to last, not to break speed records in gaming. Therefore, recovering that original autonomy means restoring its main superpower.
Chronicle of a foretold death: Signs that your battery urgently needs replacement
All batteries degrade over time and charge cycles. It's an inevitable chemical process. If you recognize several of these symptoms, it's time to replace it:
- Rapid discharge: This is the clearest symptom. If you used to reach the end of the day but now need to charge it mid-afternoon with the same usage, your battery's capacity has diminished.
- Sudden shutdowns: The phone shuts off suddenly, even if it shows 20% or 30% battery. This usually happens when you demand a bit more from it, like opening the camera or a game.
- "Ghost" charge percentages: The charge drops illogically (from 50% to 15% in five minutes) or stays "frozen" at a number for hours.
- Abnormal overheating: You notice the phone gets hotter than usual, even with simple tasks or while charging. This could be a sign that the battery is struggling to function.
- ?? Physical swelling! DANGER!: This is the most serious symptom and requires immediate action. If you notice the back cover of your phone bulging or the screen lifting at the edges, it means the battery is swollen. This is a safety risk, as it could damage other internal components or, in extreme cases, leak. You must replace it as soon as possible.
The Solution Within Your Reach: Replacement Battery for Vivo Y36 5G at iLevante.com
Now that you've diagnosed the problem, here comes the best part: the solution. At iLevante.com, we offer a battery and the Vivo Y36 Screen replacement that will not only solve your problems but restore your Vivo Y36 5G to its glory days.

Quality and compatibility: Our replacement battery for the Vivo Y36 5G
Our replacement battery for the Vivo Y36 5G is a piece of OEM (Original Equipment Manufacturer) quality. What does this mean? That it is manufactured to the same quality, performance, and safety standards as the original battery. It retains the reference B-Z5 and the capacity of 5000 mAh, guaranteeing compatibility and performance identical to the factory part. The only difference is that it doesn't have the brand logo, which allows us to offer you exceptional quality at a much more competitive price.
Additionally, to make your life easier, our batteries usually include the mounting adhesive and often come with a complimentary basic tool kit. We want you to have everything you need for a successful repair from the start.
| Benefit | Description |
|---|---|
| ?? Guaranteed Compatibility | Being the B-Z5 model, it fits perfectly with your Vivo Y36 5G, Y27, or Y78 5G. Zero connection or size issues. |
| ?? Real 5000 mAh Capacity | You'll regain the original autonomy. Enjoy your phone all day (or more!) without worries. |
| ?? OEM Quality and Safety | Manufactured under strict quality controls to ensure stable performance and protect your device. |
| ?? Installation Kit Included | We provide you with everything you need to perform the replacement yourself, saving time and money on a technical service. |
| ?? iLevante.com Warranty | By buying from us, you have the peace of mind and support of a specialist spare parts company. |
Let?s Get to Work! Complete Guide to Replacing the Battery of Your Vivo Y36 5G
Ready to become a repair hero? With the right tools and a bit of patience, this process is entirely within your reach. Let?s do it!
The technician's arsenal: Tools you'll need for the repair ??
To perform the battery replacement like a pro, you'll need to gather this small kit. Many of these items are already included as a gift with your battery from iLevante.com!
- Heat source: A low-power hairdryer or a heat gun for repairs are ideal for softening the adhesive on the back cover.
- Suction cup: To lift the back cover and create the initial gap.
- Plastic picks (plectrums): The star tool for separating the case without leaving a single mark.
- Plastic spudgers: To disconnect the delicate flex connectors without the risk of a short circuit.
- Precision screwdriver kit: You'll need a Phillips (cross) bit of the appropriate size (usually PH00).
- Anti-static tweezers: Very useful for handling small screws and connectors.
- Isopropyl alcohol (IPA 99%): Your best ally for safely and effortlessly dissolving the glue on the old battery.
- Replacement adhesive: B-7000 glue or specific double-sided adhesive strips for phones to reseal the back cover.
Step by Step to Revive Your Vivo: The Replacement Process (Technical Guide)
Follow these steps calmly and carefully. A great advantage of your Vivo Y36 is that its back cover is plastic, making it more flexible and much less prone to breaking than glass ones. This makes your job much easier!
- Preparation: Completely power off your Vivo Y36. Not in sleep mode, fully off! And very importantly, remove the SIM card tray.
- Heat the Back Cover: Use the hairdryer to apply gentle and even heat along all edges of the back cover for a couple of minutes. This will soften the adhesive keeping it sealed.
- Careful Opening: Place the suction cup on the bottom of the cover and gently pull until a small gap is created. Insert a plastic pick there.
- Cut the Adhesive: Carefully slide the pick around the phone's perimeter between the cover and the chassis to cut through the glue. If you encounter resistance, apply a bit more heat. Be very careful with the fingerprint reader cable on the side! Open the cover slowly, like a book.
- Internal Disassembly: Once open, you'll see a black plastic plate covering the motherboard. Remove all screws holding it in place with your precision screwdriver.
- SAFETY FIRST! DISCONNECT THE BATTERY: This is the most crucial step. Locate the battery connector (a small rectangular connector) and, using a plastic spudger, gently pry it off to disconnect it. From this point on, the circuit has no current.
- Safe Removal of the Old Battery: The old battery is strongly glued. DO NOT attempt to pry it with metal tools or bend it. The professional trick is to use isopropyl alcohol. Pour a few drops along the battery's edges and wait a minute. The alcohol will dissolve the adhesive. Now, with a plastic card or wide spudger, gently pry it, and you'll see it comes out almost effortlessly.
- Installing the New Battery: Remove the protective plastics from your new iLevante.com battery adhesive and place it in position. Connect its flex to the motherboard. It should fit with a gentle "click."
- Reassembly: Reconnect any other flex cables you may have disconnected. Reattach the protective plastic plate and all its screws.
- Preliminary Test: Before sealing the phone, turn it on. Check that the screen works, the touch responds, and the battery icon indicates charging if connected.
- Final Sealing: If everything is correct, turn it off. Clean off old adhesive residue from the frame and cover. Apply a thin line of B-7000 glue or new adhesive strips and close the phone. Use light clamps or books to keep it closed for a few hours while the glue cures.
Danger Zones: Common Repair Problems and How to Avoid Them
Even the best technicians can make mistakes. Here?s a list of the most common ones so you can avoid them:
-
Problem: Breaking the fingerprint reader flex cable when opening the cover.
Prevention: Open the back cover extremely slowly, without pulling, as if opening a book cover. Identify the cable before fully separating it. -
Problem: Puncturing the old battery while trying to remove it.
Prevention: NEVER use metal or pointed tools to pry! Isopropyl alcohol is your best friend here. Be patient. -
Problem: Damaging the small connectors on the motherboard.
Prevention: Always use plastic tools (spudgers) and apply minimal, perpendicular force to disconnect and reconnect the flex cables. -
Problem: Losing or mixing up screws.
Prevention: Use a magnetic mat or simply draw a phone diagram on paper and stick each screw in its corresponding spot as you remove them. -
Problem: The new battery doesn't seem properly calibrated.
Solution: After the repair, perform a calibration cycle. Use the phone until it shuts off on its own. Then charge it uninterruptedly to 100% and leave it connected for one more hour.
Advanced Diagnosis: When the Battery Might Be Innocent
Sometimes, charging problems aren't the battery's fault. Before buying a replacement, it's smart to do a little diagnosis to make sure you're not addressing the wrong problem. This can save you time and money.
My phone doesn't charge well: Is it the battery or the charging port? ?
Follow this simple troubleshooting process:
- Try another cable and charger: This is the first and most obvious step. Grab a USB-C cable and a power adapter you know work perfectly with another device and try charging your Vivo Y36. If it charges fine now, the issue was your cable or charger, not the phone.
- Clean the port: Often, the charging port accumulates lint and dirt from your pocket. Turn off the phone and use a flashlight to look inside the USB-C port. If you see dirt, you can carefully remove it with a wooden or plastic toothpick (NEVER metal) or a soft, dry toothbrush. You'd be surprised how often this solves the problem.
- Check for looseness: Connect the cable. Does it "wiggle" inside the port? Do you have to move it around to find a specific angle for it to start charging? If yes, this is a clear sign that the internal charging connector is damaged or worn out.
Solution in Sight: Replacing the Charging Port of the Vivo Y36 5G
If you've concluded that the charging port is the culprit, don't worry! It's not the end of the world. In the Vivo Y36 5G, the USB-C charging port comes on a small modular board, often called a "charging board" or "charging flex". This part is relatively easy to replace, and of course, it's available at iLevante.com. The replacement process is very similar to that of the battery, as it requires the same initial steps to open the device.
Your Vivo Y36 5G, Stronger Than Ever
Congratulations! You've reached the end of this comprehensive guide. Now you know that the battery issues of your Vivo Y36 5G not only have a solution but are within your reach. By opting for a repair, you're not only saving a considerable amount of money compared to buying a new phone, but you're also reducing electronic waste and giving a new life to a device you love.
Restoring your phone's legendary autonomy is one of the most rewarding repairs you can do. We hope this guide has given you the confidence to take the step. Remember, at iLevante.com, we're here to support you, offering the best spare parts and expert knowledge to make every repair a success. Your Vivo Y36 5G is ready to get back into action!


