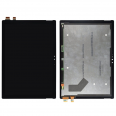
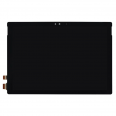
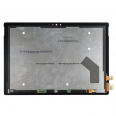
Surface Pro 4 V1.0 screen: the original 12.3-inch complete display, ready to fit
Imagine your Surface Pro 4 falling off the table with its case open. Or imagine months of an image that shakes and shifts as soon as the device heats up. In both cases, the solution is the same: a complete Microsoft Surface Pro 4 screen, with the glass, touchscreen digitiser and LCD panel bonded together at the factory. This is exactly that part, in original quality and compatible with V1.0 of model 1724.
Before we go any further, here’s a warning we give customers every day at iLevante: the Surface Pro 4 was made with two different screens, and choosing the wrong one is the most common mistake. So we’ll start by explaining how to identify yours.
Which Surface Pro 4 screen version do you have? V1.0 vs V2.0
Microsoft used panels from two manufacturers during the device’s production run. The tablet looks identical on the outside, but the panel and connector are different:
- Version 1.0 (this screen): Samsung panel, part number LTL123YL01, with a 25-pin connector.
- Version 2.0: LG panel with a 32-pin connector.
The two versions are not interchangeable. A V2.0 screen won’t fit a V1.0 tablet, and a V1.0 screen won’t fit a V2.0 tablet. The casing has no label to identify the version, so the only reliable way to check is to open the device and look at the old panel. Here’s what to do:
- Look for a part number starting with LTL123YL01 on the label on the back of the panel. If you find it, the panel is Samsung and therefore V1.0.
- Count the contacts on the video cable connector: 25 means it’s compatible with this part.
- If the part number starts with LP123 or the connector is wider and has 32 pins, your tablet is V2.0 and you’ll need the other version.
A real-life example: one customer ordered the screen based only on the purchase date, convinced their device was from the first production run. When they opened it, they found an LG panel. Those five minutes spent checking would have saved them a return.
What the original Microsoft Surface Pro 4 screen offers
As this is an original part, you’ll get the same image quality your Surface had when it left the factory. The 12.3-inch PixelSense display has a resolution of 2736 x 1824 pixels, giving it 267 pixels per inch. At a normal viewing distance, individual pixels are indistinguishable.
Here’s an idea of what to expect:
- Brightness: the original panel reaches between 400 and 436 nits at maximum brightness, with a minimum setting of around 7 nits for reading in the dark. As this is the same panel, it offers the same factory brightness.
- Contrast: around 1300:1, according to the official specification, with black levels of around 0.3 nits.
- Colour: covers virtually 100% of the sRGB colour space, so photos look as they would on a calibrated monitor.
- 3:2 aspect ratio: taller than a widescreen laptop. You can view almost an entire A4 page without scrolling.
- 10-point touch and Surface Pen compatibility, with 1024 pressure levels to distinguish a light stroke from a firm one.
- Front glass made from just 0.4 mm Gorilla Glass 4, bonded with almost no air gap. That’s why writing with the pen feels like writing directly on the image.
The thin glass is one reason these screens can break relatively easily. That’s why we’ve included something at iLevante that you’ll appreciate from day one.
What’s included with your Surface Pro 4 screen
- The complete screen: glass, digitiser and LCD assembled together.
- The 25-pin V1.0 flex cable for the Samsung version. It’s useful to have a spare, as this is one of the components most likely to be damaged during disassembly.
- A free screwdriver kit, so you don’t have to go looking for specialist bits.
- A free screen protector, so your new glass doesn’t have to face its first scratch unprotected.
Everything is dispatched from our warehouse in protective packaging. Before shipping, our team checks the condition of each screen to make sure it arrives in perfect condition.
How to tell if your Surface Pro 4 screen is damaged (and when the fault lies elsewhere)
A cracked screen is easy to spot. Other symptoms can be more confusing, so here’s a quick guide to help you tell them apart:
- Spots, white, grey or black lines, or areas with no image: this is almost always LCD damage.
- Areas that don’t respond to touch, or ghost touches that open apps by themselves: the digitiser is likely at fault. A simple test is to open Paint in full-screen mode and leave the tablet untouched. If lines appear without you touching it, the touchscreen is malfunctioning.
- An image that shakes, shifts or doubles: this is the well-known Surface Pro 4 issue, and it deserves its own section.
Surface Pro 4 screen flickering: what to do if it happens to you
Before ordering a replacement, try this check used by our technical team to rule out a software problem:
- Shut down the tablet from the Windows menu.
- Press and hold the volume up button, then press the power button once.
- Release the volume button when the Surface logo appears. You’ll enter UEFI, the settings menu that runs before Windows.
- If the screen still shakes there, the fault is hardware-related and no driver will fix it.
If the image looks perfect in UEFI, update Windows and the Surface drivers first. If you do need a replacement, you’ll find the Surface Pro 4 V1.0 screen right here, with fast delivery from iLevante.
How to replace your Surface Pro 4 screen step by step
Let’s be honest: this repair is not one of the easiest. The screen is bonded to the magnesium chassis with adhesive around the edges, and the glass is thin. Allow 35 to 50 minutes. With patience and care, you can do it at home. You’ll need a gentle heat source (a heat gun on a low setting, a heating pad or a hairdryer), a suction cup, plastic opening picks, isopropyl alcohol and 2 mm double-sided tape to reattach the frame.
Preparation
- Discharge the battery to below 25%. A charged lithium battery can catch fire if accidentally punctured.
- Shut the tablet down completely; putting it to sleep isn’t enough.
- If the glass is broken, cover it with packing tape. This helps stop shards from flying off and gives the suction cup a better grip.
Removing the old screen
- Heat the edge of the screen evenly until it feels warm to the touch, then keep it warm for a few minutes. Too much heat can damage the LCD, so take your time.
- Place the suction cup on one side, never in the centre, and create a small gap. Insert a plastic pick at an upper corner.
- Work along the sides and bottom edge first. The adhesive is thinner at the bottom and the cables are close by, so don’t insert the pick too far.
- Leave the top edge until last. The Wi-Fi and Bluetooth antennas are attached to the adhesive there and can break easily if you rush.
- Carefully lift the screen without forcing it. There are cables at the bottom left connecting it to the body.
- Disconnect the cable on the right by gently levering under the connector. For the cable on the left, first remove the small metal plate covering it.
Fitting the new Surface Pro 4 screen
- Check the small touchscreen controller board in the corner. If it isn’t already fitted to your new screen, you’ll need to transfer it from the old one using gentle heat and careful leverage.
- Clean off any adhesive residue with isopropyl alcohol, wiping in one direction to avoid spreading dirt.
- Check that the chassis isn’t bent. Even a slight bend, such as one caused by a drop, can prevent the new screen from sitting properly and cause it to crack.
- Connect the cables carefully. The flex cable is delicate and must not be bent by more than 90 degrees along its flat sections.
- Switch on the tablet before sticking anything down. Check the image, touch response in all four corners and the pen.
- If everything works, fit the new 2 mm tape, position the screen and press around the edges for a few minutes.
If something doesn’t work after installation
The issues we see most often at iLevante are easy to fix:
- The image is fine, but touch doesn’t work and the pen does: check the touchscreen board and its cable connection. It’s almost always a connector that isn’t seated properly.
- Touch input is offset by a few millimetres: type Calibrate in the Windows search box, open the option to calibrate the screen for pen or touch input, then select Reset.
- Black screen while the device is on: reconnect the 25-pin video cable. This is where the spare V1.0 flex cable included in the package comes in handy.
How to help your new Microsoft Surface Pro 4 screen last for years
Fit the free screen protector as soon as you’ve finished, making sure the screen is clean and dust-free. If you carry the tablet in a backpack, a hard case that covers the edges makes a real difference, as most of the screen breaks we repair start at a corner. And if you use the pen every day, replace the tip when it starts to feel rough: a worn tip can scratch the protector before it scratches the glass.
• Product Weight: 0.50 kg.The technical specs of Microsoft Surface Pro 4 v1.0
can help you to choose the correct repair part for your device. Make sure your model reference is the same as this element. Here are some tech specs to help you:
PVP:
SNK.SP0284BL52.90€ AvailableInStockNewCondition