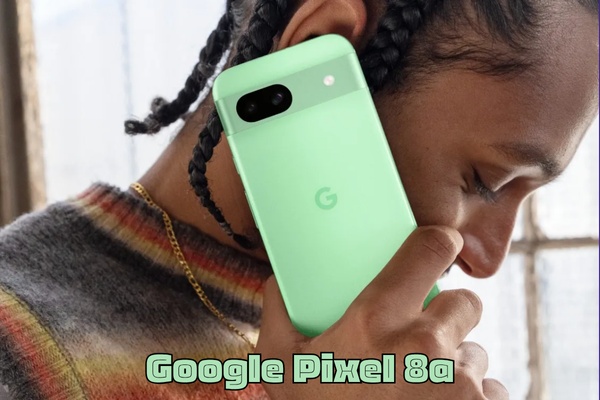
My Google Pixel 8a is not charging, how do I fix it?
Publicado por Maria
My Google Pixel 8a won?t charge, how do I fix it?
Don?t panic! If you've made it here, it's because your brand-new Google Pixel 8a is giving you trouble and refusing to charge. We completely understand: that moment when you plug it in and don't see the charging lightning bolt is pure agony. But don't worry, at iLevante.com, we are experts in giving your devices a second life, and we've prepared the ultimate guide to help you figure out what's going on with your phone and how to fix it.
Throughout this article, we will break down all the possible reasons, from the simplest ones you can fix at home in five minutes to the more complex issues that require technical intervention. We'll guide you step by step, using clear language while not skimping on technical details when necessary. Our goal? To make you an expert in charging your Pixel and to ensure that, if you need a replacement, you know exactly which one to choose from our store.
First Aid for Your Pixel 8a: The Basics You Should Try
Before thinking about opening the phone or buying parts, let's start with the simplest solutions. Often, the fix is easier than it seems. Let?s rule out the usual suspects!
-
The Magic Restart ?: It may sound cliché, but it?s the first obligatory step. A forced restart can resolve temporary software glitches affecting the battery management. Hold down the power button for about 30 seconds until the phone restarts.
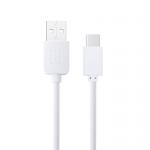
- The Cable and Charger Dance ?: Not all chargers and cables are created equal. Your Pixel 8a is a modern device that requires a charger compatible with the Power Delivery (PD) standard to charge at its maximum speed. Test another charger and another cable USB-C / Type-C to USB Cable that you know work correctly. Sometimes, the cable gets damaged internally even if it looks fine on the outside.
- The Mysterious Outlet: What if the issue isn?t the phone but the power outlet? Try plugging it into another socket. It might sound silly, but you?d be surprised how often this is the solution.
- Safe Mode to the Rescue: If the issue started after installing a new app, that app might be the culprit. Restart your Pixel in Safe Mode (hold the power button on the screen and then hold the ?Restart? option). In this mode, only system apps load. If it charges fine here, you know a third-party app is causing the conflict.
Why Won?t My Pixel 8a Charge? The List of Suspects
If the first-aid steps didn?t work, it?s time to dig a bit deeper. Here?s a list of potential culprits that we?ll analyze throughout this article:
- Issues with the cable or power adapter.
- Dirt, dust, or lint obstructing the charging port.
- A temporary glitch or error in Android software.
- The battery has reached the end of its life and is degraded.
- Physical damage to the USB-C charging port (bent pins, corrosion).
- Overheating of the device that limits charging for safety.
- In the worst case, a fault in the motherboard.
The USB-C Charging Port of the Pixel 8a: The Guardian of Power
The tiny port at the bottom of your phone is a marvel of engineering but also one of the components most prone to daily wear and tear. Understanding its features helps us figure out what it needs to work properly.
| Feature | Google Pixel 8a Specification |
|---|---|
| Connector Type | USB Type-C |
| USB Standard Version | USB 3.2 Gen 1 |
| Max Charging Power via Cable | 18W |
| Fast Charging Protocol | USB Power Delivery 3.0 (PD3.0) |
| Wireless Charging | Yes, Qi standard |
| Max Wireless Charging Power | 7.5W |
Detective Guide: How to Tell if Your Charging Port is Damaged
If you?ve ruled out issues with the cable, charger, and software, it?s time to inspect the port. Become a detective and look for these clues:
- Visual Inspection with Light: Grab a flashlight and look inside the port. The most common cause of a ?false? broken port is simply dirt. Over time, pocket lint, dust, and other debris compact at the bottom, preventing the cable from making good contact.
- The Wobble Test: Plug in the cable. Does it feel firm or loose? Move it gently side to side. If the charging connects and disconnects, or if you have to leave the cable at an odd angle to make it work, it?s a clear sign that the internal contacts are worn or damaged.
- Search for Physical Damage: Look closely at the tiny golden pins inside. Do you see any bent, broken, or missing ones? Also, look for signs of corrosion, which usually has a greenish or whitish color and appears due to moisture exposure.
- The ?Click? Test: A healthy port usually produces a satisfying tactile and sometimes audible ?click? when the cable fits perfectly. If you don?t feel that click, it?s likely that dirt is preventing a complete connection.
Safe Cleaning Protocol: Say Goodbye to Lint! ?
If you?ve detected dirt, cleaning it is easy, but it must be done carefully to avoid causing further damage. Follow these steps:
- Turn off the phone! This is the most important step. Never attempt to clean the port with the phone on.
- Compressed Air: This is the safest option to start with. Use a can of compressed air (always held upright) and apply short, controlled bursts to blow out loose dust and lint.
- Non-Metal Tools: If the dirt is very compacted, you?ll need something to gently scrape it out. Use a wooden or plastic toothpick, or even a very fine interdental brush. Gently scrape the inner sides of the port, never the central part where the pins are. WARNING! ? Never, under any circumstances, use metal objects like needles, clips, or pins. You could touch the contacts, cause a short circuit, and irreversibly damage the motherboard.
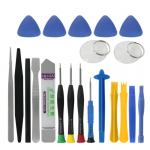
Don?t have the right tools? For safe and effective cleaning, it?s best to use anti-static plastic tools. At iLevante.com, you?ll find precision repair kits that include everything you need to take care of your Pixel safely.
The Verdict: Is It the Battery or the Charging Port?
Examining Your Battery?s Health ?
Sometimes, the symptoms of a defective port (slow charging, the phone not lasting all day) are actually those of a battery that has reached the end of its life. Lithium batteries, like the one in your Pixel 8a, degrade with each charge and discharge cycle. Luckily, Google makes it easy to check its condition.
Go to Settings > About Phone > Battery Information. Here, you?ll find two crucial data points:
- Charge Cycle Count: The Pixel 8a is designed to retain at least 80% of its original capacity for approximately 1000 charge cycles. If you?re approaching or exceeding that number, it?s normal to notice a drop in performance.
- Capacity Status: The phone itself will give you its diagnosis. If the status is ?Reduced?, it means the battery?s maximum capacity is already below 80% of the original. At this point, Google officially recommends its replacement.
SAFETY ALERT! ?? SWOLLEN BATTERY: If you notice the back of your phone bulging or the screen peeling away at the edges, the battery is likely swollen. This is a serious safety hazard that could lead to a fire. If this is your case: DO NOT try to charge the phone, DO NOT press it, and DO NOT attempt to repair it yourself. Turn it off and take it to a professional repair service immediately.
The Puzzle Pieces: What Can Actually Be Replaced?
This is where we separate the hobbyists from the experts and where many charging problems find their true solution. It?s crucial to understand which component is failing to know if the repair is within your reach.
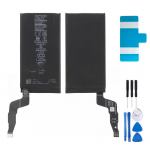
- The Battery: It?s a modular part. Although replacing it requires opening the phone, it?s one of the most feasible repairs for a user with patience and the right tools. It?s a very common solution for autonomy and charging issues. At iLevante.com, we have high-quality replacement batteries for your Pixel 8a (model G07DF) to restore its original performance.
- The Charging Port (The Inconvenient Truth): And here comes the key information many don?t know. Unlike most Android phones, where the charging port comes on a small independent board (charging flex) that?s easy to replace, in the Google Pixel 8a, the USB-C port is soldered directly to the main motherboard. This completely changes the game. It?s not a part you can simply disconnect and swap out.
This difference is crucial. While replacing the battery is a manageable challenge, replacing the charging port becomes a highly complex operation requiring specialized knowledge and tools.
Mission (Almost) Impossible: The Charging Port Repair Guide
Expert Warning: What You Need to Know Before Starting
Let?s be completely transparent: this is not a repair for beginners. Repair experts like those at iFixit or Repairability Score have given the Google Pixel 8a a very low repairability score, around 4.5 out of 10. The main reason? The use of extremely strong adhesives and, above all, the fact that key components like the charging port are soldered to the motherboard.
To replace this port, a screwdriver isn?t enough. You need skills and microsoldering equipment. This section is intended for very advanced users or to help you understand the complexity of the work a professional technician would perform. If you have no experience with soldering electronic components, we strongly advise against attempting this.
Risk Checklist: Read This to Avoid a Disaster!
Attempting this repair without the necessary experience can turn a charging issue into an unusable phone. These are the most common risks:
- Damage to the Screen: It?s the first thing that needs to be removed. It?s glued with very strong adhesive and is extremely fragile. It?s very easy to break or damage its delicate flex cable in the process.
- Loss of Water Resistance: Your Pixel 8a has an IP67 certification against dust and water. Opening it breaks this seal. Restoring it perfectly at home is practically impossible.
- Damage to the Motherboard: The heat from the soldering gun, if not applied with extreme precision, can melt nearby components or damage the internal traces of the board. A mistake here is fatal and irreversible.
- Damage to the Battery: Piercing or bending the battery during disassembly can cause a short circuit or even a fire.
- Fingerprint Sensor KO: The fingerprint sensor is under the screen. After any repair involving disconnecting the screen, it?s mandatory to recalibrate it using an online software tool provided by Google. If you skip this step, the sensor won?t work again.
- Total Data Loss: Before even thinking about opening the phone, back up all your data completely.
Charging Port Replacement Process (Expert Level)
This is a summary of the professional procedure. It?s not a step-by-step tutorial for beginners but a demonstration of the technical complexity.
- Preparation and Tools: In addition to the basic kit (heat gun, suction cup, picks, screwdrivers), you?ll need specialized equipment: a hot air soldering station, a microscope, flux, desoldering wick, and heat-resistant Kapton tape.
- Device Opening: Start by removing the screen. Heat the edges to soften the adhesive, use a suction cup to create a small gap, and cut the seals by sliding plastic picks around the contour with extreme care.
- Component Disconnection: Once open, remove the protective metal plates and disconnect the screen, battery, and other peripheral connectors with a plastic spudger to free and extract the main motherboard.
-
Microsoldering Work: Here begins the real surgery.
- Fix the motherboard under the microscope.
- Protect the area around the port with Kapton tape.
- With the hot air station, precisely heat the old port until the solder melts, allowing it to be removed with tweezers.
- Clean the old solder from the contact pads on the board.
- Position the new charging port from iLevante.com, apply flux, and resolder it to the board with the hot air gun. This is the most critical step.
- Reassembly and Testing: Perform the entire process in reverse. Reconnect all components, reattach the motherboard, apply specific new adhesive for the screen, and seal the phone. Finally, turn it on, test that charging and data transfer work, and perform the aforementioned fingerprint sensor calibration.
Your Pixel 8a Deserves a Second Chance
You?ve come a long way, from a simple restart to the complexity of microsoldering. Now you have all the information to make the best decision for your Google Pixel 8a. Diagnosis is key, and now you know how to distinguish between a software issue, a dirty port, a drained battery, or a physically damaged port.
At iLevante.com, we believe in the right to repair and giving your devices a second life. That?s why we offer two clear paths:
- For the Brave and Experienced DIYer: If, after reading our guide, you feel confident and, most importantly, have the experience and tools to tackle the repair, you?ll find everything you need on our website. We offer the replacement USB-C charging port for the Pixel 8a, the original G07DF battery, and all the precision tool kits to make your mission a success.
- For the Cautious and Smart User: If the repair seems too complex or risky (which is totally understandable!), the most sensible option is to go to a professional repair service. But that doesn?t mean you can?t save money. You can buy the high-quality replacement from iLevante.com and bring it to your trusted technician. This way, you ensure the installed part is the best, and you only pay for the labor.
Whichever choice you make, repairing your Pixel 8a not only saves you the cost of a new phone but is also a step towards sustainability. Thank you for trusting iLevante.com to bring energy back to your mobile!


